crwdns2915892:0crwdne2915892:0
The shutter is a very important part of the camera because without it you can't take pictures. This guide will give you the steps to access this button and replace this button.
crwdns2942213:0crwdne2942213:0
-
-
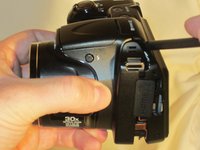
Use a Phillips #0 screwdriver to remove the screws on the front casing. There are 10 screws around the casing. 3 are located on the left side of the camera, 6 are located on the bottom near the product label, and 1 is located on the right side of the camera.
-
-
-
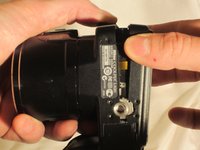
Next, remove the screw held on top of the camera above the Nikon logo.
-
Moving to the bottom of the camera, open the empty battery slot, and locate the 4 screws in the compartment. Begin removing the 4 screws located within.
-
-
-
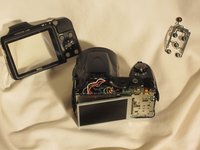
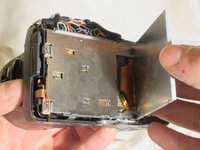
Using the spudger, begin prying the case from the device, carefully separating the rear housing from the camera assembly. Once the rear housing is separated, the camera's physical buttons will be accessible for replacement.
-
-
-
Remove the front casing around the LCD screen from the camera.
-
-
-
crwdns2935267:0crwdne2935267:0Tweezers$4.99
-
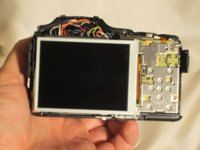
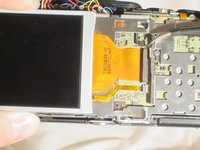
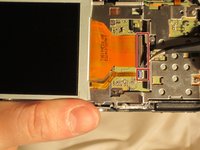
Using the tweezers shown in the materials list, lift the hinges connecting the two ribbon wires to the camera. The wires will unlatch from the device.
-
-
-
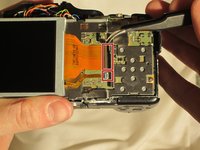
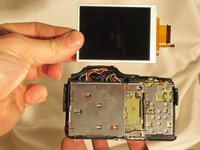
Once the ribbon wires are disconnected, remove the LCD screen from the camera.
-
Safely store the LCD for reinstallation.
-
-
-
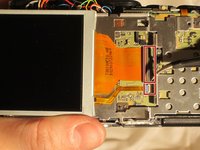
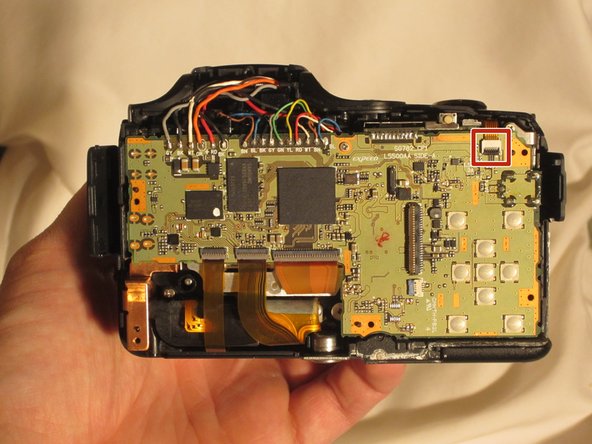
Remove the five screws from the back of the camera using a Phillips #0 screwdriver.
-
-
-
Using the pointed edge of the spudger, remove the hinge that secure's the camera's flex circuit. This will unfasten the camera's ribbon wire.
Also, remove screw inside battery compartment holding down the shutter/zoom assembly.
-
-
-
Remove the shutter's plastic cover from the camera by lifting the piece up. It will disconnect from the device.
As Greg started in the previous step in the comments, there is a singular small screw in the very bottom of the battery compartment holding the shutter button assembly in place, do not try to force the shutter button assembly up, make to remove that screw first (shouldn't be hard to take off).
-
-
crwdns2935267:0crwdne2935267:0Tweezers$4.99
-
Remove the metal cover using tweezers to allow access to the shutter button. Take the new shutter button and place it where the original piece was located.
-


To reassemble your device, follow these instructions in reverse order.
To reassemble your device, follow these instructions in reverse order.
crwdns2935221:0crwdne2935221:0
crwdns2935229:02crwdne2935229:0
crwdns2915084:0crwdne2915084:0

UMass Dartmouth, Team 1-4, Miles Spring 2015 crwdns2935289:0UMass Dartmouth, Team 1-4, Miles Spring 2015crwdne2935289:0
UMASSD-MILES-S15S1G4
crwdns2931471:03crwdne2931471:0
crwdns2935297:010crwdne2935297:0
crwdns2947412:03crwdne2947412:0
Muy bueno pero falta documentar 3 tornillos.
1. En el paso 1, en la tercera foto debajo del sticker del código de barras.
2. En el paso 2, justo en el fondo del compartimento de una de las baterías (la del extremo). Incluso se alcanza a apreciar en la foto.
3. En el paso 8, en esa misma pieza de metal a un lado está el otro tornillo.
My shutter button still works but doesn’t give feedback. It’s hard to tell when I’ve taken a picture because it doesn’t “click.” I’m wondering if that’s something that can be fixed, but I can’t tell if the mechanism for that feedback is in the mechanical portion above (and maybe a piece of metal broke) or built into the switch soldered on the circuit board.
Dove si può acquistare il bottone a buon prezzo? grazie
Where can you buy the button at a good price? Thank you