crwdns2933423:0crwdne2933423:0

Nikon Coolpix L16 LCD screen replacement

crwdns2942213:0crwdne2942213:0

  1. Nikon Coolpix L16 LCD screen replacement, LCD: crwdns2935265:01crwdnd2935265:01crwdnd2935265:03crwdne2935265:0 Nikon Coolpix L16 LCD screen replacement, LCD: crwdns2935265:01crwdnd2935265:02crwdnd2935265:03crwdne2935265:0 Nikon Coolpix L16 LCD screen replacement, LCD: crwdns2935265:01crwdnd2935265:03crwdnd2935265:03crwdne2935265:0
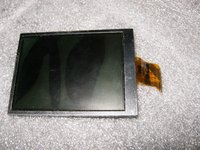
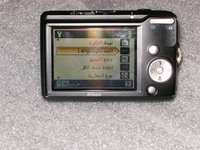
    • Clearly visible damage to the LCD. It did not even light up.

    • Remove the screw from the right side.

    • Remove the visible screw from the left side.

  2. Nikon Coolpix L16 LCD screen replacement: crwdns2935265:02crwdnd2935265:01crwdnd2935265:03crwdne2935265:0 Nikon Coolpix L16 LCD screen replacement: crwdns2935265:02crwdnd2935265:02crwdnd2935265:03crwdne2935265:0 Nikon Coolpix L16 LCD screen replacement: crwdns2935265:02crwdnd2935265:03crwdnd2935265:03crwdne2935265:0
    • Open the USB A/C cover, there is one more screw that needs to be removed. That is why it is important to always remove all covers...

    • Remove the three screws from the bottom.

    • Start splitting the case from the battery compartment. I used an opening tool, but fingernails will be sufficient as well.

  3. Nikon Coolpix L16 LCD screen replacement: crwdns2935265:03crwdnd2935265:01crwdnd2935265:03crwdne2935265:0 Nikon Coolpix L16 LCD screen replacement: crwdns2935265:03crwdnd2935265:02crwdnd2935265:03crwdne2935265:0 Nikon Coolpix L16 LCD screen replacement: crwdns2935265:03crwdnd2935265:03crwdnd2935265:03crwdne2935265:0
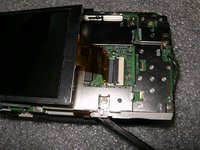
    • After the splitting of the case, the LCD is imediately visible.

    • Lift the LCD out of the frame by using your fingernail or an opening tool. Do not remove it yet, it is still connected.

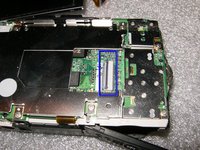
    • Flip the black clasp up by using fingernails or the opening tool. No big force is required. Remove the old LCD.

  4. Nikon Coolpix L16 LCD screen replacement: crwdns2935265:04crwdnd2935265:01crwdnd2935265:02crwdne2935265:0 Nikon Coolpix L16 LCD screen replacement: crwdns2935265:04crwdnd2935265:02crwdnd2935265:02crwdne2935265:0
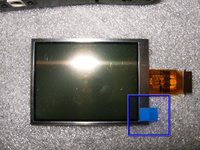
    • Here is the new screen, note the blue tab. This is the screen protector, remove it after installation.

    • Reassemble in reverse order. Hopefully your results will be the same as for me.

crwdns2915888:0crwdne2915888:0

To reassemble your device, follow these instructions in reverse order.

crwdns2935227:0crwdne2935227:0

oldturkey03

crwdns2935283:009/29/10crwdne2935283:0

781,574 crwdns2915208:0crwdne2915208:0

crwdns2935297:0119crwdne2935297:0

crwdns2915084:0crwdne2915084:0

Global Fixers crwdns2935289:0Global Fixerscrwdne2935289:0

Community

crwdns2931471:032crwdne2931471:0

crwdns2935297:0531crwdne2935297:0

crwdns2944067:00crwdne2944067:0

crwdns2917038:0crwdne2917038:0

crwdns2936625:0crwdne2936625:0:

crwdns2936751:024crwdne2936751:0 0

crwdns2936753:07crwdne2936753:0 0

crwdns2936753:030crwdne2936753:0 8

crwdns2942667:0crwdne2942667:0 2,940