crwdns2915892:0crwdne2915892:0
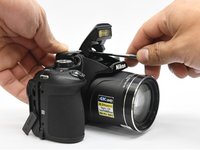
This guide shows how to replace the full lens assembly and housing on the Nikon Coolpix B700 camera. This can be done if the lens glass is cracked or the sensor is damaged.
crwdns2942213:0crwdne2942213:0
-
-
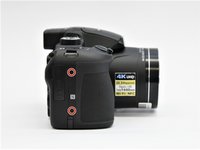
Use the Phillips screwdriver to remove the two 5.5 mm screws on the left side of the camera.
-
-
-
Use the Phillips screwdriver to remove seven 5.5 mm screws from the bottom of the camera.
-
-
-
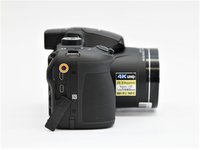
Use the Phillips screwdriver to remove the two 5.5mm screws on the right side of the camera.
-
Open the HDMI flap to remove a 5.5mm screw.
-
-
-
Use the Phillips screwdriver to remove the two 5.5mm screws under the LCD panel.
-
-
-
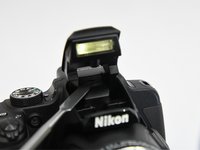
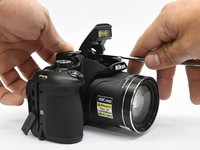
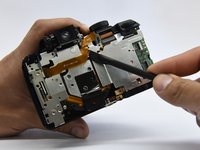
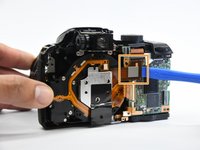
Open the flash assembly and insert the spudger into the slot under the flash unit and twist.
-
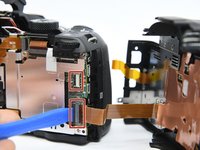
While twisting, pry apart the shell to split the camera in half.
-
-
-
-
Place the pry tool under the black latch. Lift gently until the latch flips up.
-
Gently pull the ribbon away from the latch.
How to check the rear part my b700 will turn ON when i disconected the 2 ribbons
-
-
-
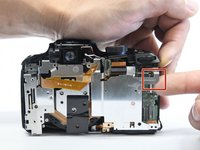
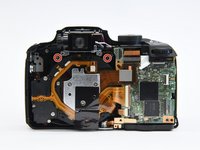
Use the Phillips screwdriver to remove the remaining five 5.55mm screws.
-
Remove the single 6mm screw.
The screw to unscrew on the bottom left seems to not exist or is covered by a foam which is as large as the grey area around in the picture.
Also from this step to the next the golden cover got removed it seems.
I removed the left screw on the golden cover as well.
-
-
-
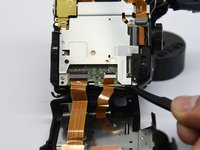
Insert the pry tool under the latch and gently lift up to remove the ribbon.
-
-
-
Move the ribbon out of the way to reveal the hidden screw.
-
-
-
Lift the button assembly gently to give access to remove the 4mm screw.
-
-
-
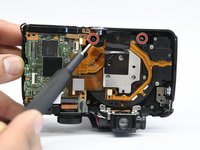
On the top of the camera, remove the 6mm screw.
-
-
-
With the spudger tool gently pry off the white tap holding in the bracket.
-
Use the same tool to remove the glued-on ribbon.
-
-
-
Gently lift up the button assembly to slide the bracket out.
-
-
-
With the pry tool gently lift up the latch and pull the cable toward the lens assembly.
-
Use the pry tool again and place it under the ribbon and lift straight up to disconnect the ribbon.
-
-
-
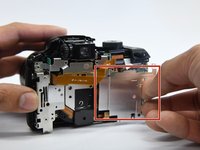
Use the Phillips screwdriver to remove the four 6 mm screw that hold on the bracket housing.
the screw driver I got drom the starter toolkit is 0.5mm too short to remove the last two screws nicely. But it works.
-
-
-
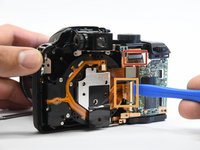
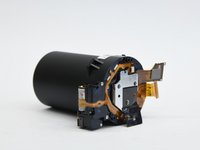
Remove the tripod mount from it's slot.
-
-
-
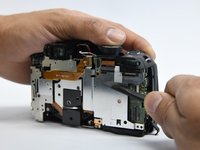
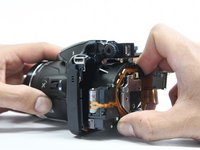
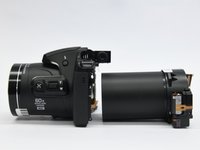
Now you just have to slide the lens assembly out of the housing.
my nikon b700 camera lense is deffective and I want remove and inspect the lense, I want find what is wrong inside of the lense, I would lije fix it your guidance help me a lot opening and checking wrong contacts in my camera, but I found deffective my lense you are good teacher
-


To reassemble your device, follow these instructions in reverse order.
To reassemble your device, follow these instructions in reverse order.
crwdns2935221:0crwdne2935221:0
crwdns2935229:09crwdne2935229:0
crwdns2915084:0crwdne2915084:0

Purdue University Northwest, Team S4-G5, Hingst Spring 2019 crwdns2935289:0Purdue University Northwest, Team S4-G5, Hingst Spring 2019crwdne2935289:0
PNW-HINGST-S19S4G5
crwdns2931471:04crwdne2931471:0
crwdns2935297:014crwdne2935297:0
crwdns2947412:02crwdne2947412:0
how to reset an objective error on B700 ? the lens is stopped in the middle of a hike
how to reset an objective error? the lens is stopped in the middle of a hike