crwdns2915892:0crwdne2915892:0
Additional Information
crwdns2942213:0crwdne2942213:0
-
-
Position the back of the camera facing you and open the LCD screen to the left.
-
-
-
Use a Phillips screwdriver to unscrew the two 5.556 mm screws under the LCD screen.
-
-
-
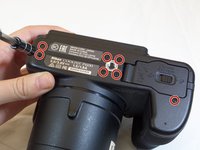
Use a Phillips screwdriver and remove the eleven 5.556 mm screws around the outside frame of the camera.
-
-
-
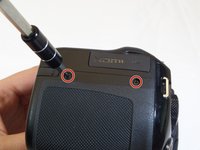
Open the "HDMI" rubber flap.
-
Use a Phillips screwdriver and remove the 5.556 mm screw underneath the flap.
-
-
-
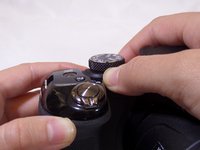
Press the flash button (as shown) to access flash.
-
-
-
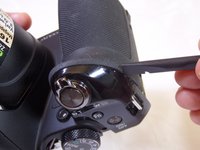
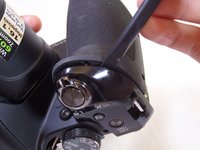
Use a spudger to wedge underneath the flash
-
Pry (up and down) to separate.
-
-
-
Use your hands to gently pull the front and back of the camera apart.
-
-
crwdns2935267:0crwdne2935267:0Tweezers$4.99
-
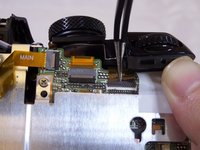
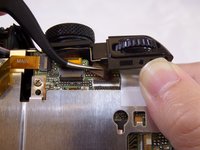
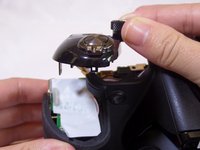
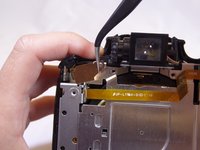
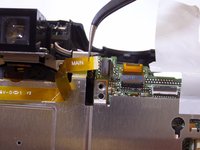
Use needle-nose tweezers to gently lift the black/grey latch towards the ribbon-wire (the latch rotates upward to release and snaps down to lock).
-
Use tweezers to gently remove ribbon-wires.
-
Pull the ribbon-wires towards the back-end of the camera.
-
-
-
-
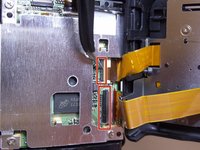
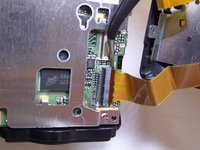
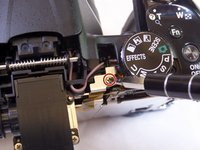
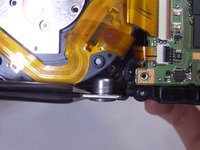
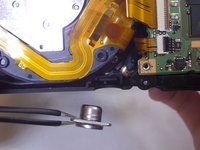
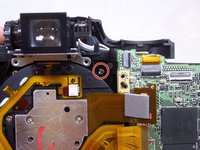
Use a Phillips screwdriver and remove the single 6.350 mm screw, left of the mode-adjustment dial.
-
-
-
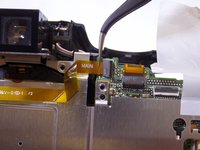
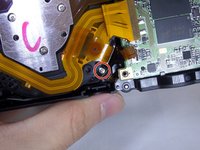
Use needle-nose tweezers to remove the large ribbon-wire located under the screw.
-
Gently wiggle the ribbon out in an upward motion.
-
-
-
Insert a plastic opening tool under the shutter button.
-
Gently pry (back and forth) between the rubber grip and camera casing.
-
-
-
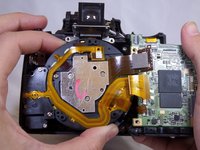
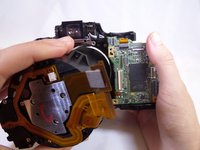
Place hands around the camera. Hold onto the mode dial and grip under the shutter button.
-
Gently push right thumb away and pull in left index finger to separate the camera halves.
-
-
-
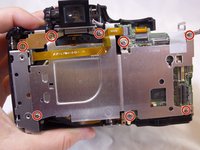
Use a Phillips screwdriver to remove the nine 3.175 mm screws on the inside of the camera.
-
Use tweezers to remove the golden bracket.
-
-
-
Use tweezers to remove the white film under the shutter-release button.
-
-
-
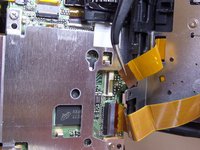
Use tweezers to remove the yellow ribbon-wire.
-
Gently wiggle it to the left and then out of its port.
-
-
-
Use hands to remove the metal cover.
-
Pull the cover up.
-
-
-
Use tweezers to remove the golden bracket.
-
-
-
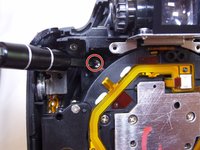
Use tweezers to remove the tripod connector.
-
-
-
Unscrew the three 3.175mm screws.
-
-
-
Continue removing screws, keeping an awareness of the cavity right below the screw. It would be difficult to extract screw if lost in this cavity.
-
-
-
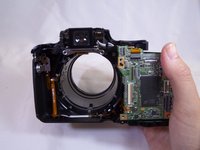
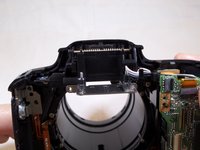
Remove lens by pulling up vertically.
-
Be careful not to damage any of the electrical ribbon on top of the lens.
-
-
-
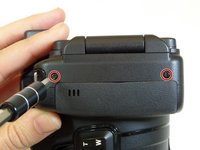
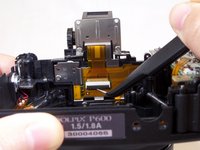
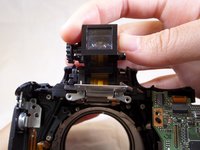
Unscrew the 2 screws located at the top of the viewfinder.
-
-
-
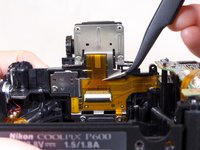
Unclip and pull out the yellow wire ribbon.
-
-
-
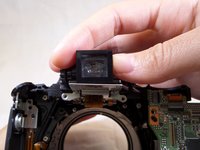
Vertically lift the viewfinder piece for removal.
-


To reassemble your device, follow these instructions in reverse order.
To reassemble your device, follow these instructions in reverse order.
crwdns2935221:0crwdne2935221:0
crwdns2935229:06crwdne2935229:0
crwdns2935103:0crwdne2935103:0
crwdns2915084:0crwdne2915084:0

CSU Fullerton, Team 1-5, Bruce Fall 2015 crwdns2935289:0CSU Fullerton, Team 1-5, Bruce Fall 2015crwdne2935289:0
CSUF-BRUCE-F15S1G5
crwdns2931471:03crwdne2931471:0
crwdns2935297:09crwdne2935297:0