crwdns2915892:0crwdne2915892:0
Warning: Lithium-ion batteries like that found in the NK CoxBoxes can be hazardous. Please be aware of the hazards and take appropriate precautions.
These are instructions for replacing the battery on recent CoxBox Core and GPSes. You will need a compatible battery. Instructions for buying a commodity battery and building an adapter for it are here.
crwdns2942213:0crwdne2942213:0
-
-
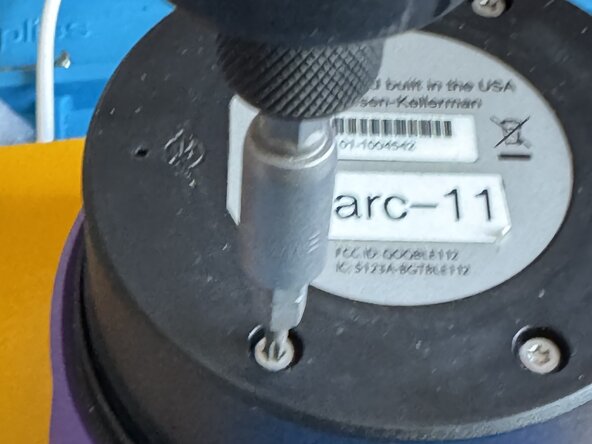
Remove the can bumper from the back of the cox box, then remove the four screws.
-
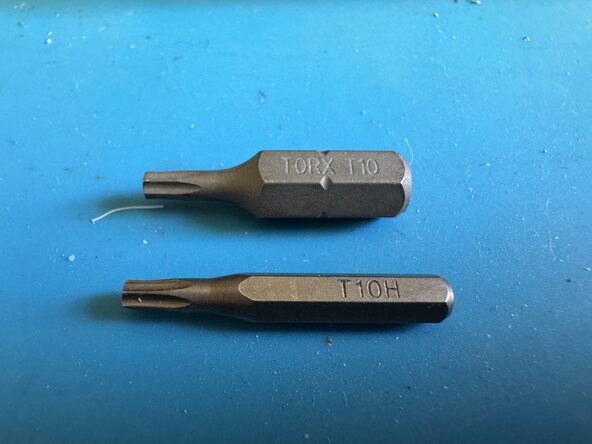
Use a Torx T10 bit to remove the screws
-
-
-
The outside screws have little orange O-rings on them - do not lose these.
-
Do not overtighten the screws when putting it back together, you do not want to damage the O-rings.
-
-
-
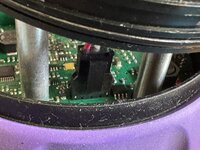
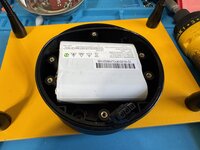
Carefully lift up the back of the cox box.
-
The battery is in the part of the cox box you are lifting, connected to the other part of the cox box by a wire at the side of the cox box away from where the boat and charger wires plug in.
-
When you feel resistance, tilt the back half of the cox box away from the connectors.
-
-
-
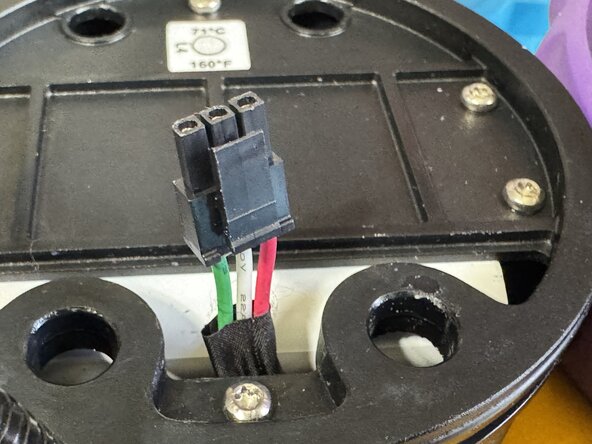
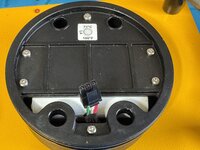
Carefully disconnect the battery from the cox box electronics. Do not use excessive force.
-
Note that there is a latch on the back of this connector (the side closest to the edge of the cox box. You MUST press down on the top of the latch before removing the connector.
-
-
-
-
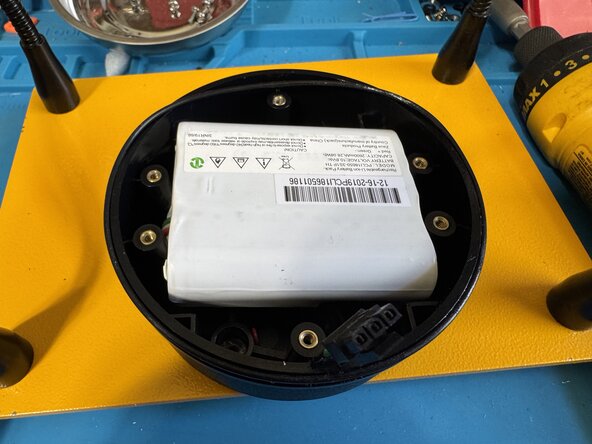
Remove the six screws securing the battery in the rear compartment. They use the same T10 Torx bit as the outside screws.
-
Remove the cover of the battery compartment.
-
Lift the old battery out.
-
-
-
Put new battery in battery compartment
-
This exact battery is out of stock, and I was unable to find a replacement. Theoretically any 11.1V 3S battery pack with a Molex Microfit 3.0 connector with the correct wiring (positive, ground, and 10K NTC thermistor connected between the middle wire and ground wire) will work.
-
Can't find a replacement battery? Don't worry, there is a guide on making an adapter.
-
-
-
Use a multimeter or build a polarity checker to ensure the polarity of the connector on the replacement battery matches that of the original battery.
-
If the connectors on the new battery do not match, you may destroy your CoxBox electronics, so compare the new battery connections to the old battery connections carefully.
-
Do not trust the wire colors - use a multimeter or purpose-built polarity tester.
-
There should be a positive wire, a ground wire, and a thermistor wire.
-
In addition to checking the positive and negative lines, verify that the thermistor is wired correctly. On the CoxBoxes I've opened the thermistor is connected to the middle pin and the ground pin.
-
Your CoxBox may be different. Compare your new battery to the old battery you are replacing.
-
-
-
Put battery back in battery compartment.
-
Put cover on and feed battery connector through hole.
-
Align screws but do not secure cover until testing the battery
-
Connect the battery to the cox box electronics.
-
The cox box should start at this point.
-
Connect a cox box charger. The charging symbol should being flashing.
-
If the cox box says something about it being too cold to charge, the thermistor is incorrect or not wired.
-
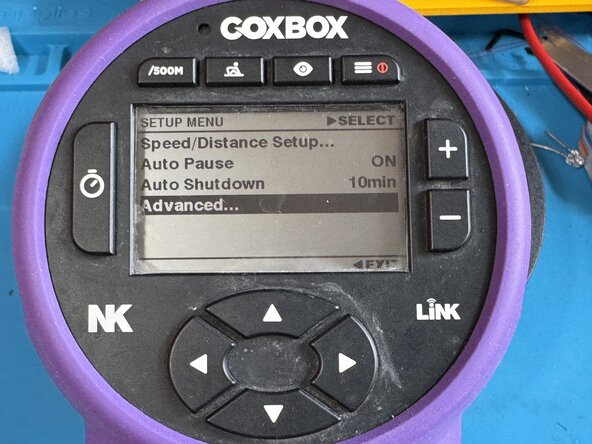
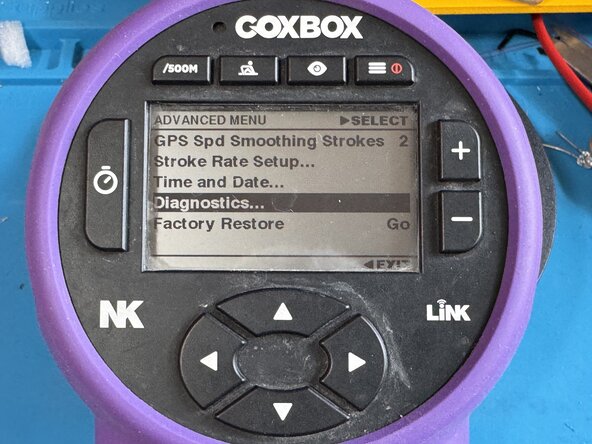
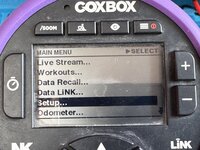
You can walk through the diagnostics to see battery voltage and charging information: Main Menu->Setup->Advanced->Diagnostics
-
-
-
Check that the battery is charging correctly.
-
-
-
Reverse disassembly steps to put the cox box back together.
-
Ensure the O-ring on the back of the cox box is properly positioned before closing the back cover.
-
Use silicone grease on the O-ring if needed (can't hurt).
-
Make sure the O-ring is positioned properly - 99% of the time it doesn't matter, but if the boat flips and the cox box is under water you'll really wish you had been careful with the O-ring.
-


To reassemble your device, follow these instructions in reverse order.
To reassemble your device, follow these instructions in reverse order.