crwdns2915892:0crwdne2915892:0
If you have a cracked glass or a poor sensing touchscreen, they need to be replaced. This guide will take you through the steps to replace the display assembly which consists of the screen and glass as one component. You will begin by removing the battery, then the motherboard, and finish with the display assembly. The most difficult part will be removing the back cover, so please follow the steps carefully. The entire process is moderately difficult and will take you approximately 31 minutes to complete.
crwdns2942213:0crwdne2942213:0
-
-
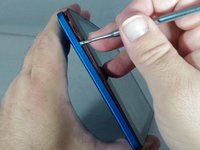
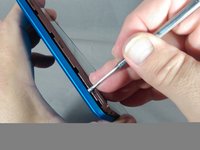
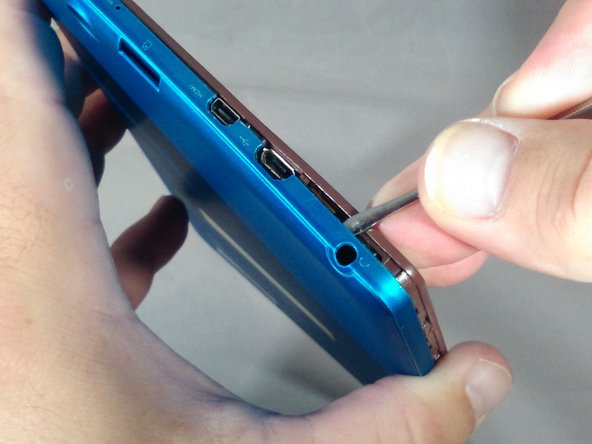
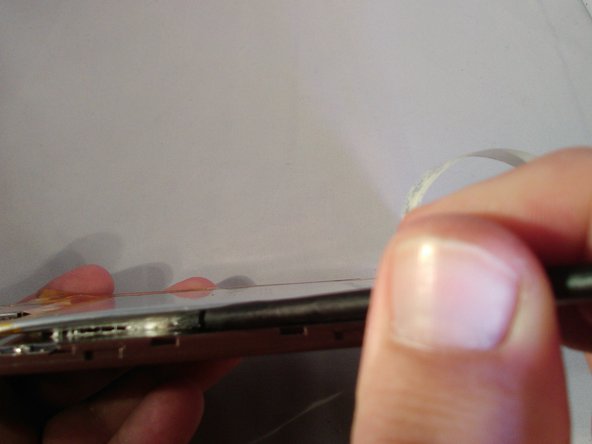
With the tip of the thin metal spudger in place, use a prying motion to work the spudger down the side to the corner of the device.
-
-
-
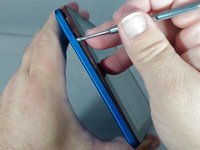
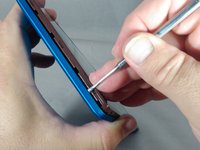
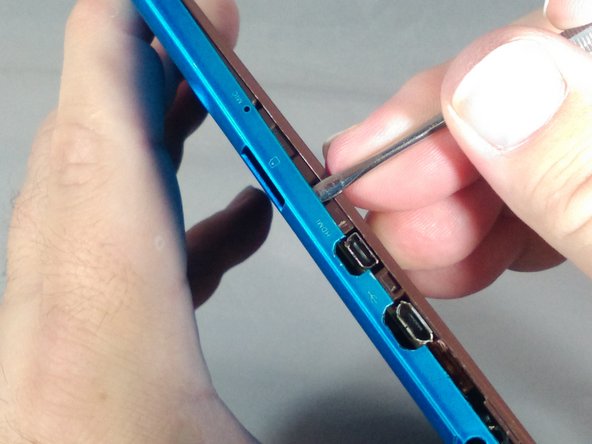
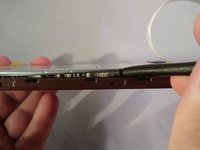
Continue working the spudger downward and pry with the spudger until the bottom left-hand corner of the tablet is reached.
-
-
-
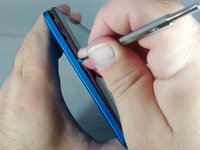
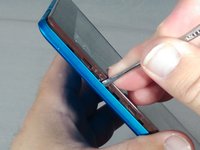
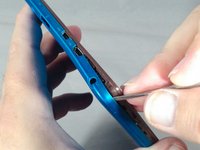
Along the bottom of the tablet, keep using a working and prying motion with the spudger to loosen the cover.
-
-
-
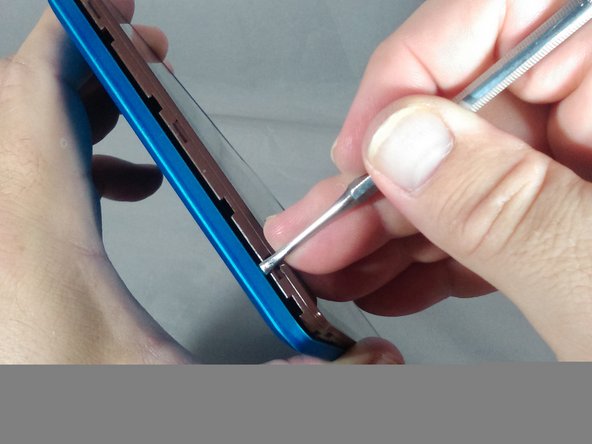
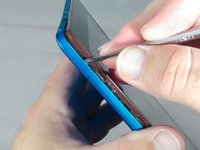
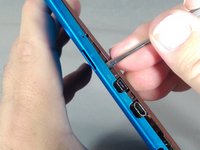
Continue prying motion until the bottom right-hand corner of the tablet is reached.
-
-
-
Work the spudger to the upper left-hand corner of the tablet.
-
-
-
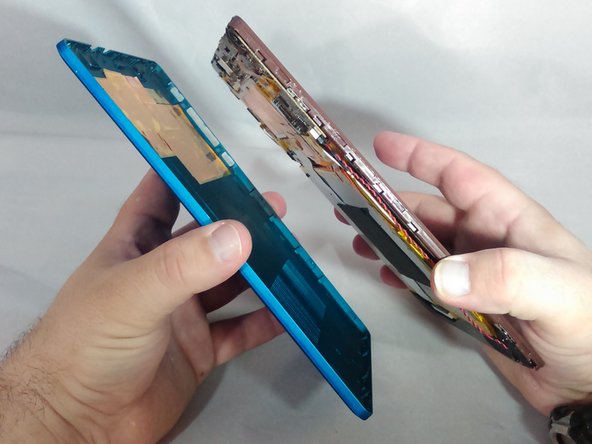
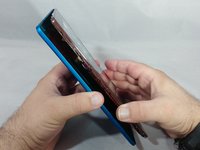
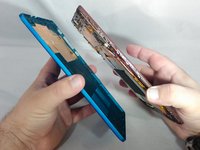
Continue working the spudger around the tablet until the cover of the device comes off
-
-
-
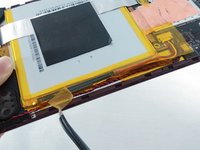
Separate from the cover from the tablet.
-
-
-
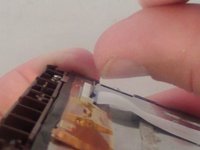
Locate and carefully remove the yellow cellophane tape from the red and black speaker wires that connect the speaker to the edge of the motherboard.
-
-
crwdns2935267:0crwdne2935267:0Tweezers$4.99
-
Locate and carefully remove the yellow cellophane tape with tweezers from the battery connector and black and red speaker wires on the edge of the motherboard.
-
-
-
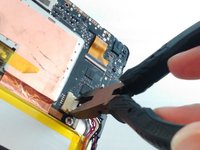
Using small pliers, carefully disconnect the male battery connector from the motherboard.
-
-
-
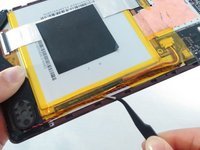
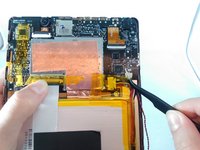
Carefully remove the gray square pad glued to both the white ribbon cable and the battery by pulling slowly.
-
-
-
-
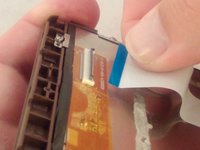
Locate the white ribbon cable Zero Insertion Force (ZIF) connector between the battery and the motherboard, and peel the yellow cellophane tape off the connector.
-
-
-
Flip up the gray retainer clip on the white ribbon cable ZIF connector on the motherboard with your fingernail. If you do not have fingernails long enough, carefully use a black plastic spudger.
-
-
-
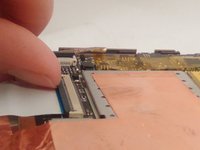
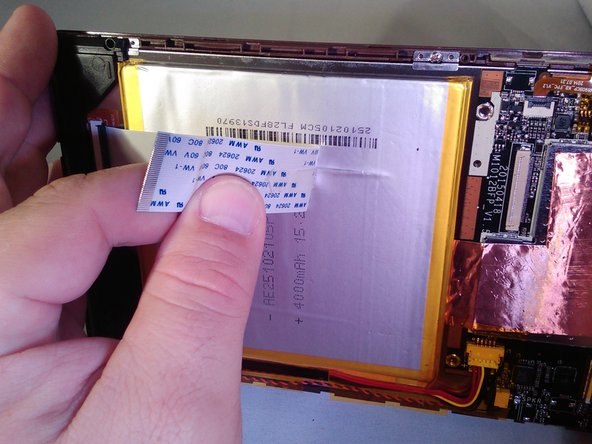
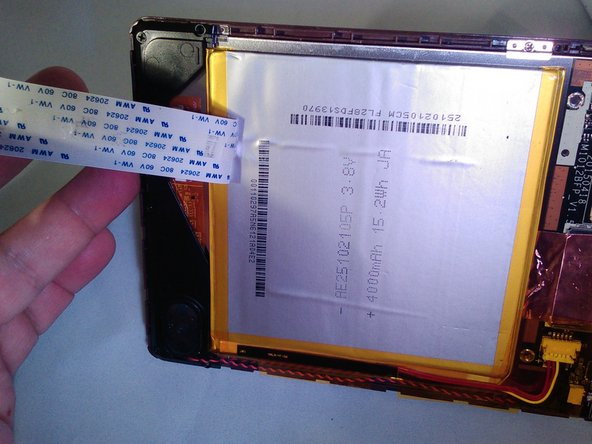
Remove the white ribbon cable and carefully peel it off the battery.
-
-
-
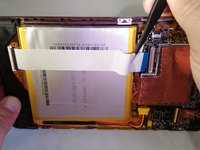
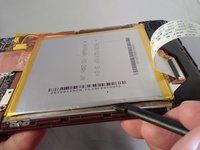
Move the spudger in a left-to-right scraping motion to loosen the glue until the battery is separated from the tablet.
-
-
-
Remove the battery.
-
-
-
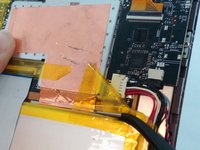
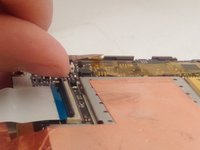
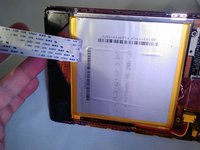
Locate and remove the yellow cellophane tape from the display assembly ribbon cable ZIF connector.
-
-
-
Locate the volume, power, home button ribbon cable ZIF connector.
-
-
-
Flip the ZIF connector retainer up with your fingernail. If you do not have fingernails long enough, carefully use the black plastic spudger.
-
-
-
Remove the ribbon cable by gently pulling on it.
-
-
crwdns2935267:0crwdne2935267:0Tweezers$4.99
-
Locate the Display Assembly ribbon cable ZIF connector, and using tweezers, remove the yellow cellophane tape.
-
-
-
Put your fingernail under the gray ZIF connector retainer and flip the retainer up. If you do not have fingernails long enough, carefully use a black plastic spudger.
-
-
-
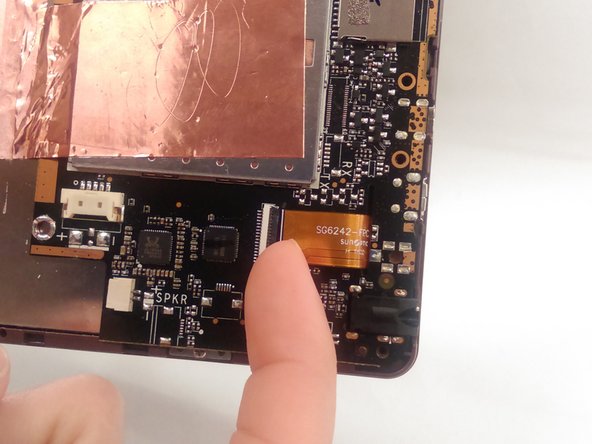
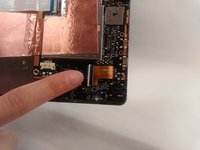
Remove the Display Assembly ribbon cable by gently pulling on it.
-
-
-
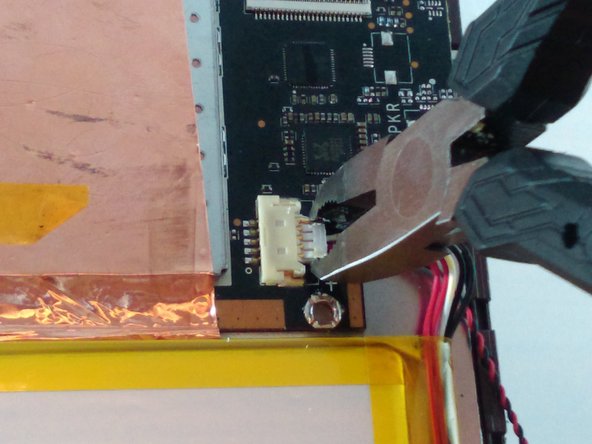
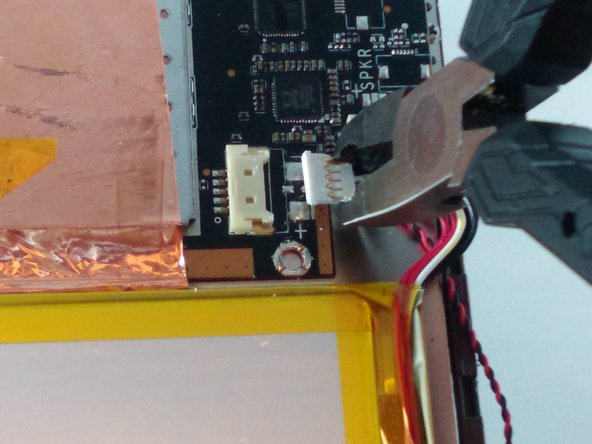
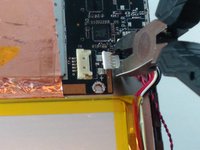
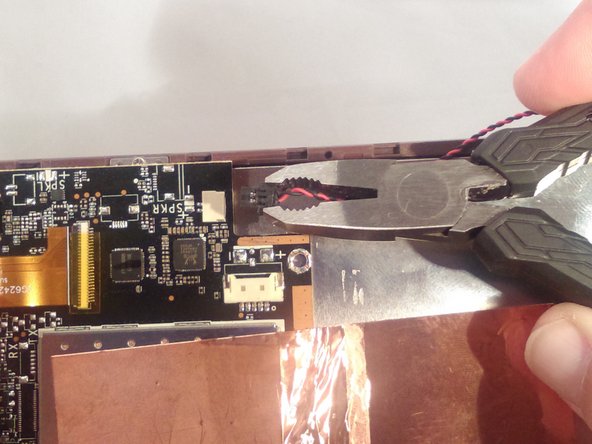
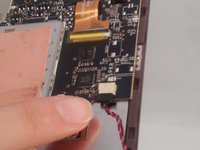
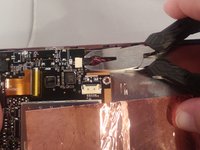
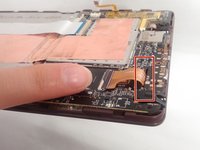
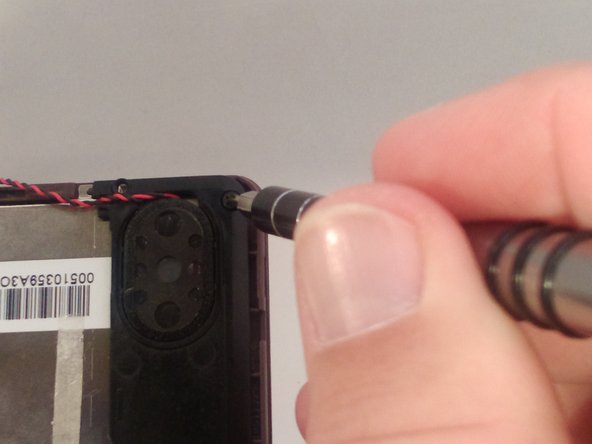
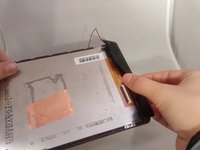
Use small pliers to pull the connector, wiggling it a little as you pull it from its connection.
-
-
-
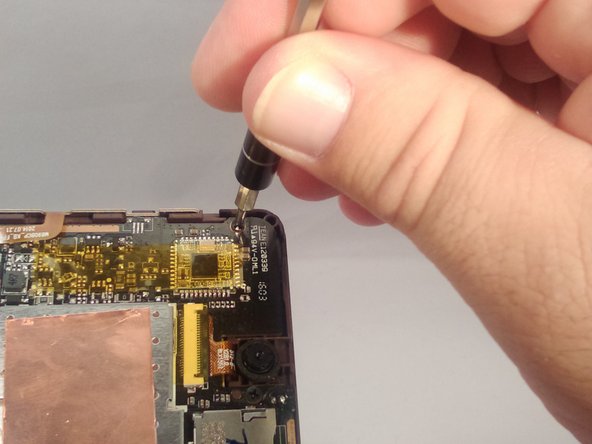
Using a J00 screwdriver, remove the 4 black 4.0 mm screws.
-
There is no screw at this location.
-
-
-
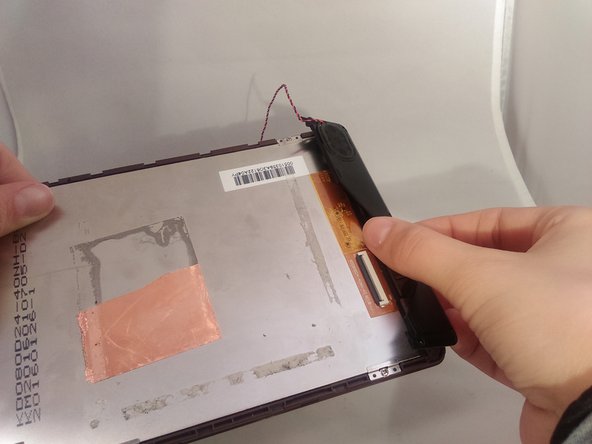
Locate the ZIF connector to remove the white ribbon cable
-
-
-
To remove the white ribbon cable, put your fingernail under the gray ZIF connector retainer and flip the retainer up.
-
-
-
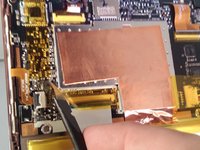
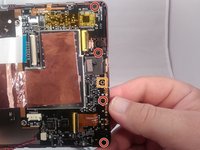
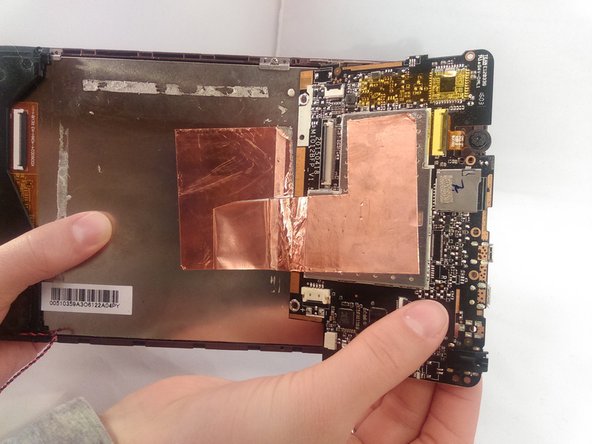
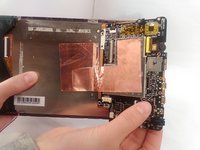
Pull the motherboard back over the copper tape to tear the tape and remove the motherboard.
-
-
-
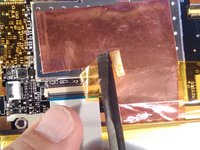
Remove the remaining copper tape from the back of the display assembly and the motherboard.
-
-
-
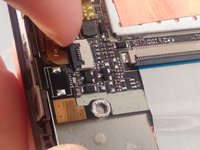
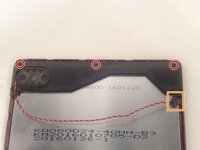
Locate and remove the 3 black 4.0 mm screws on the speaker panel using a J00 screwdriver.
-
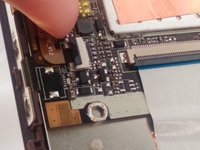
Disconnect the speaker from the motherboard.
-
Remove the panel.
-


To reassemble your device, follow these instructions in reverse order.
To reassemble your device, follow these instructions in reverse order.
crwdns2935221:0crwdne2935221:0
crwdns2935229:03crwdne2935229:0

crwdns2915084:0crwdne2915084:0

Eastern Washington University, Team S1-G7, Carnegie Fall 2017 crwdns2935289:0Eastern Washington University, Team S1-G7, Carnegie Fall 2017crwdne2935289:0
EWU-CARNEGIE-F17S1G7
crwdns2931471:04crwdne2931471:0
crwdns2935297:05crwdne2935297:0
crwdns2947412:02crwdne2947412:0
Would these instructions be the same for a Nextbook ares11a?
I would think so, it's basically the same adaptation for all laptops.