crwdns2933423:0crwdne2933423:0

Nextbook Flexx 10 Camera Replacement

crwdns2942213:0crwdne2942213:0

  1. Nextbook Flexx 10  Camera Replacement, Front and Rear Camera: crwdns2935265:01crwdnd2935265:01crwdnd2935265:03crwdne2935265:0 Nextbook Flexx 10  Camera Replacement, Front and Rear Camera: crwdns2935265:01crwdnd2935265:02crwdnd2935265:03crwdne2935265:0 Nextbook Flexx 10  Camera Replacement, Front and Rear Camera: crwdns2935265:01crwdnd2935265:03crwdnd2935265:03crwdne2935265:0
    • Remove the top section by pushing the middle button in the center of the base and lift on the screen.

  2. Nextbook Flexx 10  Camera Replacement: crwdns2935265:02crwdnd2935265:01crwdnd2935265:03crwdne2935265:0 Nextbook Flexx 10  Camera Replacement: crwdns2935265:02crwdnd2935265:02crwdnd2935265:03crwdne2935265:0 Nextbook Flexx 10  Camera Replacement: crwdns2935265:02crwdnd2935265:03crwdnd2935265:03crwdne2935265:0
    • Remove the black back panel of the screen.

  3. Nextbook Flexx 10  Camera Replacement: crwdns2935265:03crwdnd2935265:01crwdnd2935265:02crwdne2935265:0 Nextbook Flexx 10  Camera Replacement: crwdns2935265:03crwdnd2935265:02crwdnd2935265:02crwdne2935265:0
    • Place the panel screen down.

    • Identify the cameras at the top center.

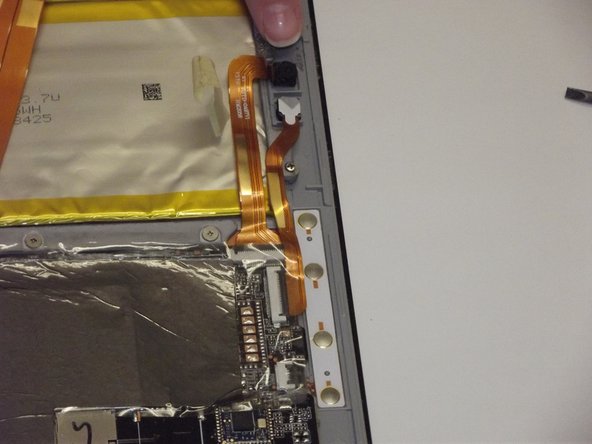
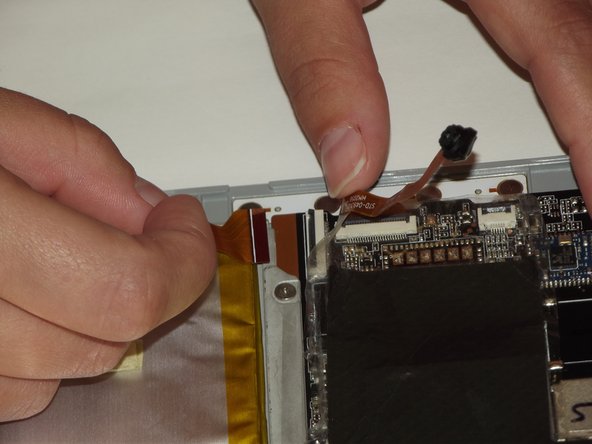
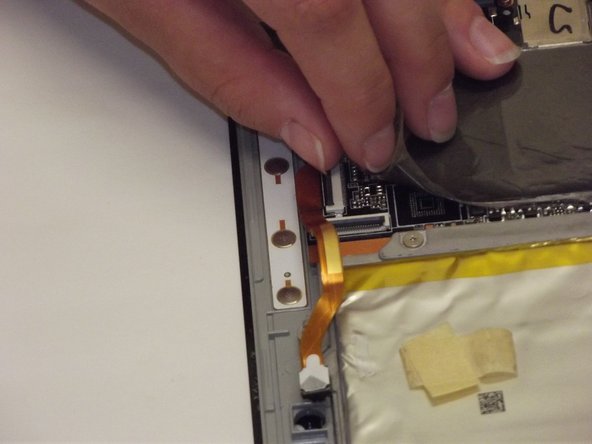
  4. Nextbook Flexx 10  Camera Replacement: crwdns2935265:04crwdnd2935265:01crwdnd2935265:03crwdne2935265:0 Nextbook Flexx 10  Camera Replacement: crwdns2935265:04crwdnd2935265:02crwdnd2935265:03crwdne2935265:0 Nextbook Flexx 10  Camera Replacement: crwdns2935265:04crwdnd2935265:03crwdnd2935265:03crwdne2935265:0
    • Find the front camera.

    • Follow the gold strip to where it connects to the device.

    • There is a black piece that is holding the gold strip. Flip this up to release the camera.

    • Follow bullets above for the rear facing camera.

  5. Nextbook Flexx 10  Camera Replacement: crwdns2935265:05crwdnd2935265:01crwdnd2935265:02crwdne2935265:0 Nextbook Flexx 10  Camera Replacement: crwdns2935265:05crwdnd2935265:02crwdnd2935265:02crwdne2935265:0
    • Insert new camera into each slot, make connections, and close the black flap.

    • Snap back panel back onto the back of the screen.

    • Put screen and the keyboard back together.

crwdns2915888:0crwdne2915888:0

To reassemble your device, follow these instructions in reverse order.

Jenna Hummer

crwdns2935283:009/08/17crwdne2935283:0

115 crwdns2915208:0crwdne2915208:0

crwdns2935295:0crwdne2935295:0

crwdns2915084:0crwdne2915084:0

Western Carolina University, Team S1-G4, Virtue Fall 2017 crwdns2935289:0Western Carolina University, Team S1-G4, Virtue Fall 2017crwdne2935289:0

WCU-VIRTUE-F17S1G4

crwdns2931471:05crwdne2931471:0

crwdns2935297:012crwdne2935297:0

crwdns2944067:00crwdne2944067:0

crwdns2917038:0crwdne2917038:0

crwdns2936625:0crwdne2936625:0:

crwdns2936751:024crwdne2936751:0 2

crwdns2936753:07crwdne2936753:0 5

crwdns2936753:030crwdne2936753:0 9

crwdns2942667:0crwdne2942667:0 311