crwdns2915892:0crwdne2915892:0
This guide will take you through the process involved with removing a capacitor. De-soldering and soldering will be required.
crwdns2942213:0crwdne2942213:0
-
-
Lift up all four rubber pads on the bottom of the router with the plastic opening tool.
-
-
-
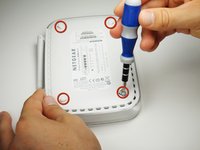
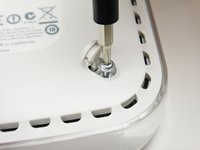
Unscrew the four 11.8 mm T-8 torx screws from the bottom of the router.
-
-
-
Lift the bottom casing straight up from the router.
-
-
-
-
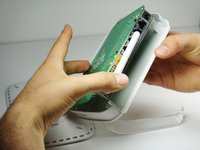
Remove the clear plastic casing by lifting it straight up from the router.
-
-
-
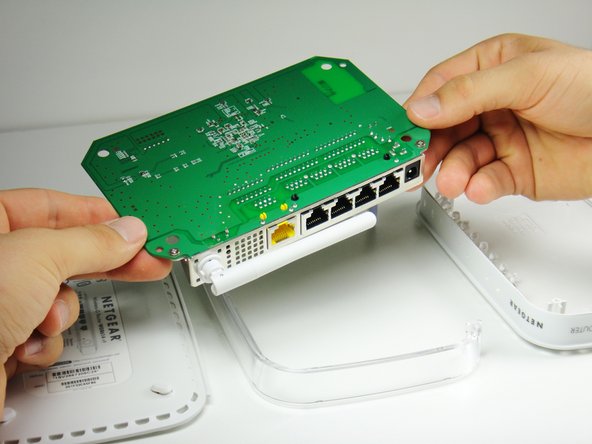
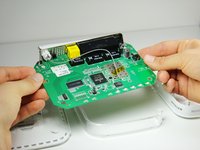
Separate the motherboard from the top shell by lifting it straight up from the router.
-
-
-
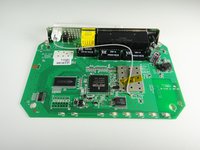
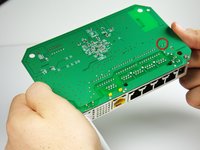
Set the motherboard on a flat clean surface.
-
-
-
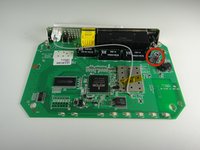
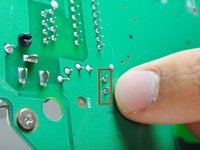
The capacitor can be found at the location shown.
-
-
-
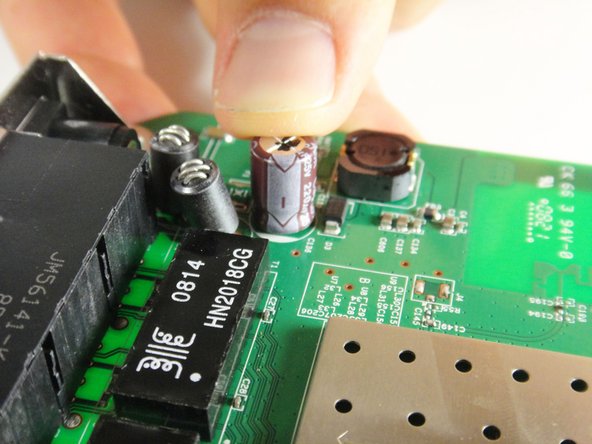
Locate the two soldered contacts of the capacitor.
-
-
-
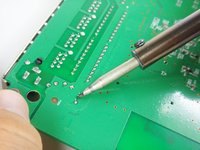
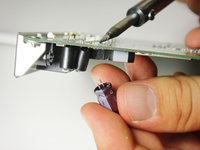
Refer to this link for proper de-soldering and soldering techniques.
-
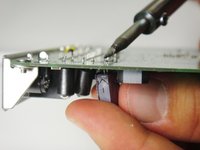
Pull the capacitor from the other side of the circuit board once the solder is liquified.
-


To reassemble your device, follow these instructions in reverse order.
To reassemble your device, follow these instructions in reverse order.
crwdns2935221:0crwdne2935221:0
crwdns2935227:0crwdne2935227:0
crwdns2915084:0crwdne2915084:0

Cal Poly, Team 21-24, Maness Fall 2011 crwdns2935289:0Cal Poly, Team 21-24, Maness Fall 2011crwdne2935289:0
CPSU-MANESS-F11S21G24
crwdns2931471:04crwdne2931471:0
crwdns2935297:011crwdne2935297:0
crwdns2947410:01crwdne2947410:0
looks like that's a 220microF at 25V right ?
probably better to replace it with a similar 220microF, but with higher voltage rating.