crwdns2933423:0crwdne2933423:0

Nespresso inissia Safety Capacitor Replacement

crwdns2942213:0crwdne2942213:0

  1. Nespresso inissia Safety Capacitor Replacement, Emptying the machine: crwdns2935265:01crwdnd2935265:01crwdnd2935265:02crwdne2935265:0 Nespresso inissia Safety Capacitor Replacement, Emptying the machine: crwdns2935265:01crwdnd2935265:02crwdnd2935265:02crwdne2935265:0
    • Remove all water from the system. (From the Nespresso manual.)

    • image 2: exploded view of the machine. Source: buyspares.com

  2. Nespresso inissia Safety Capacitor Replacement, Remove the first part: crwdns2935265:02crwdnd2935265:01crwdnd2935265:02crwdne2935265:0 Nespresso inissia Safety Capacitor Replacement, Remove the first part: crwdns2935265:02crwdnd2935265:02crwdnd2935265:02crwdne2935265:0
    • Pull straight forward with a fair amount of force.

    • Once you hear a click, pull the part straight down. This should go easilly.

  3. Nespresso inissia Safety Capacitor Replacement, Remove the handle: crwdns2935265:03crwdnd2935265:01crwdnd2935265:02crwdne2935265:0 Nespresso inissia Safety Capacitor Replacement, Remove the handle: crwdns2935265:03crwdnd2935265:02crwdnd2935265:02crwdne2935265:0
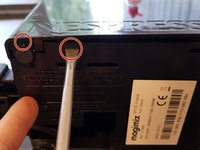
    • Use a T20 torx bit (star-shaped). A screwdriver that fits should work fine.

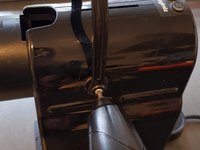
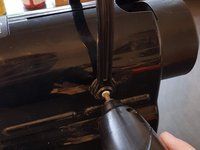
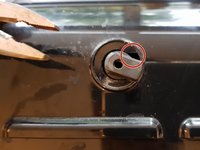
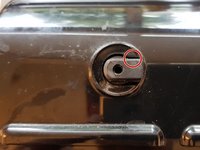
  4. Nespresso inissia Safety Capacitor Replacement, Remove side cover 1/2: crwdns2935265:04crwdnd2935265:01crwdnd2935265:03crwdne2935265:0 Nespresso inissia Safety Capacitor Replacement, Remove side cover 1/2: crwdns2935265:04crwdnd2935265:02crwdnd2935265:03crwdne2935265:0 Nespresso inissia Safety Capacitor Replacement, Remove side cover 1/2: crwdns2935265:04crwdnd2935265:03crwdnd2935265:03crwdne2935265:0
    • Close the cup-holder firmly.

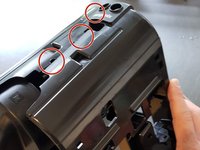
    • Photos 2 and 3, push the screwdriver in and wiggle a bit to undo the clips. There's a total of 4 clips.

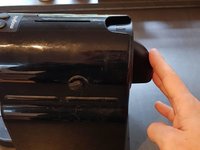
  5. Nespresso inissia Safety Capacitor Replacement, Remove side cover 2/2: crwdns2935265:05crwdnd2935265:01crwdnd2935265:03crwdne2935265:0 Nespresso inissia Safety Capacitor Replacement, Remove side cover 2/2: crwdns2935265:05crwdnd2935265:02crwdnd2935265:03crwdne2935265:0 Nespresso inissia Safety Capacitor Replacement, Remove side cover 2/2: crwdns2935265:05crwdnd2935265:03crwdnd2935265:03crwdne2935265:0
    • Make sure the notch lines up.

    • Pull the cover away. Once there's a little room, move your fingers up a bit and pull on the sides.

  6. Nespresso inissia Safety Capacitor Replacement, Remove other side cover: crwdns2935265:06crwdnd2935265:01crwdnd2935265:02crwdne2935265:0 Nespresso inissia Safety Capacitor Replacement, Remove other side cover: crwdns2935265:06crwdnd2935265:02crwdnd2935265:02crwdne2935265:0
    • Repeat on the other side

  7. Nespresso inissia Safety Capacitor Replacement, Remove the white clip: crwdns2935265:07crwdnd2935265:01crwdnd2935265:01crwdne2935265:0
    • Insert wisdom here.

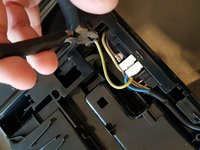
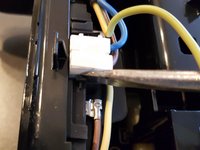
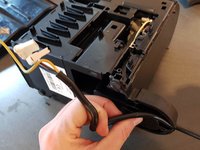
  8. Nespresso inissia Safety Capacitor Replacement, Remove power wires: crwdns2935265:08crwdnd2935265:01crwdnd2935265:03crwdne2935265:0 Nespresso inissia Safety Capacitor Replacement, Remove power wires: crwdns2935265:08crwdnd2935265:02crwdnd2935265:03crwdne2935265:0 Nespresso inissia Safety Capacitor Replacement, Remove power wires: crwdns2935265:08crwdnd2935265:03crwdnd2935265:03crwdne2935265:0
    • Unplug the device first! Remove ground, live and neutral wires.

    • Remove the whole wire from its slot.

  9. Nespresso inissia Safety Capacitor Replacement, Remove the water tank seat: crwdns2935265:09crwdnd2935265:01crwdnd2935265:01crwdne2935265:0
    • Unclip the clips using a thin screwdriver

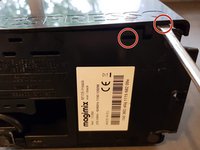
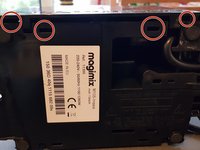
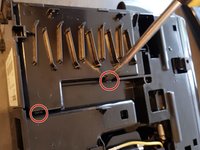
  10. Nespresso inissia Safety Capacitor Replacement, Remove inner housing first side: crwdns2935265:010crwdnd2935265:01crwdnd2935265:03crwdne2935265:0 Nespresso inissia Safety Capacitor Replacement, Remove inner housing first side: crwdns2935265:010crwdnd2935265:02crwdnd2935265:03crwdne2935265:0 Nespresso inissia Safety Capacitor Replacement, Remove inner housing first side: crwdns2935265:010crwdnd2935265:03crwdnd2935265:03crwdne2935265:0
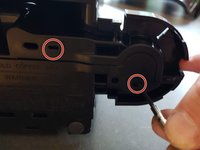
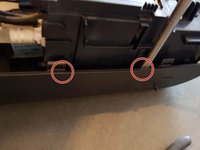
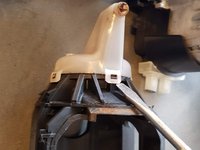
    • Pry loose on these four spots and remove.

  11. Nespresso inissia Safety Capacitor Replacement, Remove inner housing second side: crwdns2935265:011crwdnd2935265:01crwdnd2935265:03crwdne2935265:0 Nespresso inissia Safety Capacitor Replacement, Remove inner housing second side: crwdns2935265:011crwdnd2935265:02crwdnd2935265:03crwdne2935265:0 Nespresso inissia Safety Capacitor Replacement, Remove inner housing second side: crwdns2935265:011crwdnd2935265:03crwdnd2935265:03crwdne2935265:0
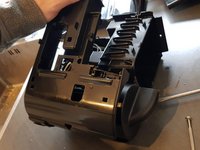
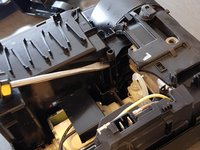
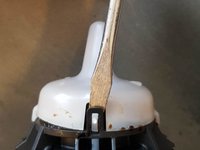
    • Photo 1: Using leverage, pull up.

    • Photo 2: unclip the two clips on the inside of the cover.

    • Photo 3: turn over and lift the cover off.

  12. Nespresso inissia Safety Capacitor Replacement, Remove the lever seats: crwdns2935265:012crwdnd2935265:01crwdnd2935265:02crwdne2935265:0 Nespresso inissia Safety Capacitor Replacement, Remove the lever seats: crwdns2935265:012crwdnd2935265:02crwdnd2935265:02crwdne2935265:0
    • Push on the assembly, front to back, to free up the lever seats. Then pull them out.

  13. Nespresso inissia Safety Capacitor Replacement: crwdns2935265:013crwdnd2935265:01crwdnd2935265:01crwdne2935265:0
    • The top part can be removed by having the metal pins follow the slots in an L shape.

  14. Nespresso inissia Safety Capacitor Replacement: crwdns2935265:014crwdnd2935265:01crwdnd2935265:03crwdne2935265:0 Nespresso inissia Safety Capacitor Replacement: crwdns2935265:014crwdnd2935265:02crwdnd2935265:03crwdne2935265:0 Nespresso inissia Safety Capacitor Replacement: crwdns2935265:014crwdnd2935265:03crwdnd2935265:03crwdne2935265:0
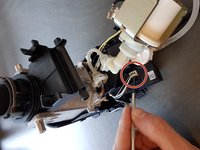
    • Pry open both clips on one side of the spout, then both on the other side.

  15. Nespresso inissia Safety Capacitor Replacement: crwdns2935265:015crwdnd2935265:01crwdnd2935265:03crwdne2935265:0 Nespresso inissia Safety Capacitor Replacement: crwdns2935265:015crwdnd2935265:02crwdnd2935265:03crwdne2935265:0 Nespresso inissia Safety Capacitor Replacement: crwdns2935265:015crwdnd2935265:03crwdnd2935265:03crwdne2935265:0
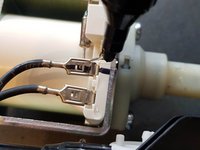
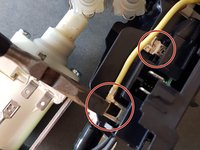
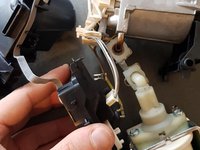
    • Mark one of the black leads for proper reinstallation.

    • Remove the yellow and brown wire.

    • And the white connector.

  16. Nespresso inissia Safety Capacitor Replacement: crwdns2935265:016crwdnd2935265:01crwdnd2935265:03crwdne2935265:0 Nespresso inissia Safety Capacitor Replacement: crwdns2935265:016crwdnd2935265:02crwdnd2935265:03crwdne2935265:0 Nespresso inissia Safety Capacitor Replacement: crwdns2935265:016crwdnd2935265:03crwdnd2935265:03crwdne2935265:0
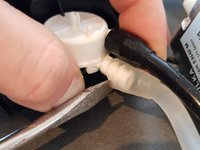
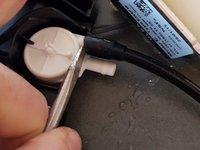
    • Wiggle loose the last bit of black plastic.

    • Pry off the white and black water lines.

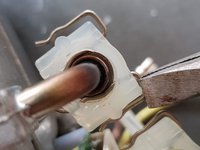
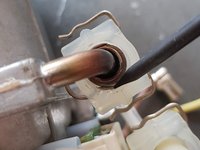
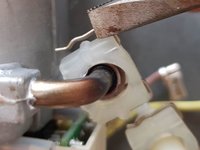
  17. Nespresso inissia Safety Capacitor Replacement, Removal of plastic U-pipe for O Rings within.: crwdns2935265:017crwdnd2935265:01crwdnd2935265:03crwdne2935265:0 Nespresso inissia Safety Capacitor Replacement, Removal of plastic U-pipe for O Rings within.: crwdns2935265:017crwdnd2935265:02crwdnd2935265:03crwdne2935265:0 Nespresso inissia Safety Capacitor Replacement, Removal of plastic U-pipe for O Rings within.: crwdns2935265:017crwdnd2935265:03crwdnd2935265:03crwdne2935265:0
    • These clips are tricky to remove. The plastic rectangles housing the wire clips are part of the U-pipe. Bear this in mind when detaching the U-pipe from the two other (pump and boiler) pipes - which have cone shaped flanges; easy to push U-pipe faces onto, hard to detach.

    • Using the perspective of Photo1 for reference, for ease of working, ensure the background is down towards the floor, and ensure the metal pipe is braced, directly or via the boiler resting on a non-slip surface like a rubber mat or carpeted floor. Set-up the equivalent if working from the pump end of the U-pipe.

    • Push a 2.5mm thick pointed tool (rod or flat) into the wire loop that emerges from the centre-bottom of the plastic face. Do not make the loop emerge farther, but you can widen it <1mm with a suitable width screwdriver.

    • Left and right shoulders of the wire clip are to be pulled apart as far as the plastic face will allow. Start by inserting (and leaving in place) similar 2.5mm-3.5mm thick pointed/tapered tools between the outside edge of the plastic face and the exposed wire ends. Insert near each shoulder.

    • With the wire clip being held apart in three places, check that the wire in the centre of the plastic face is not still hugging the pipe but is just proud of the rim of the cone-flange. Another pointed tool may be needed to manipulate the rest of the wire over the edge of the cone-flange.

    • With the perspective of photo1 (or equivalent view from the pump), use a finger either side of the pipe to push the plastic face away from the boiler or away from the pump (towards the floor if positioned as advised earlier). The plastic face may need rocking during this process to manipulate any remaining wire over the last sub-mm of flange.

    • The joint should disconnect gracefully. If the joint does not disconnect, examine the centre hole of the plastic face again, checking where the wire is fouling the cone-flange. Reposition the three other pointed tools -previously left in place holding the wire apart- as necessary.

    • The 'O' ring each end of the plastic U-pipe will be easily accessible once the joint is apart. The inner diameter is approx 3mm. Outer diameter is approx 5mm ('O' ring is 1mm thick).

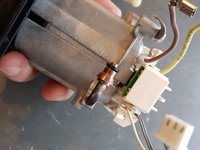
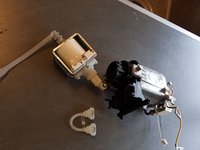
  18. Nespresso inissia Safety Capacitor Replacement: crwdns2935265:018crwdnd2935265:01crwdnd2935265:03crwdne2935265:0 Nespresso inissia Safety Capacitor Replacement: crwdns2935265:018crwdnd2935265:02crwdnd2935265:03crwdne2935265:0 Nespresso inissia Safety Capacitor Replacement: crwdns2935265:018crwdnd2935265:03crwdnd2935265:03crwdne2935265:0
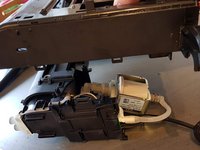
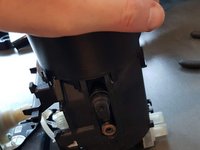
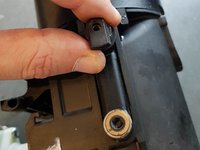
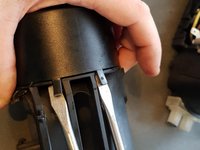
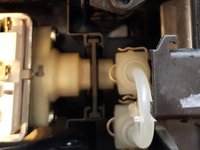
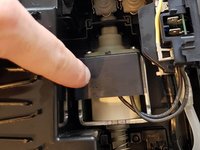
    • Photo 1 and 2, note the tapered edges, these hold the wire clip in place. Reinstallation is simple, just push the on again.

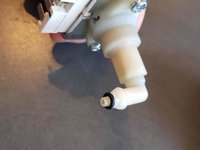
    • This was as far as I was able to go. In my case the part shown on the right in photo 3 was leaking in between the metal and plastic. Sadly it couldn't be disassembled any further.

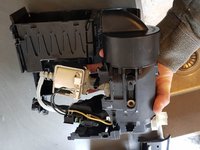
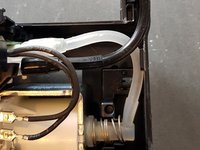
  19. Nespresso inissia Safety Capacitor Replacement: crwdns2935265:019crwdnd2935265:01crwdnd2935265:03crwdne2935265:0 Nespresso inissia Safety Capacitor Replacement: crwdns2935265:019crwdnd2935265:02crwdnd2935265:03crwdne2935265:0 Nespresso inissia Safety Capacitor Replacement: crwdns2935265:019crwdnd2935265:03crwdnd2935265:03crwdne2935265:0
    • Assembly is the reverse of disassembly. The next steps are some points of note.

    • Photo 1: reverse of step 11: The easiest way to reassemble the side is to lay it flat and lower the inner body onto the side.

    • Photo 2: reverse of step 11: Make sure the black line goes over the white one.

    • Fit the rubber collar back over the pump.

  20. Nespresso inissia Safety Capacitor Replacement: crwdns2935265:020crwdnd2935265:01crwdnd2935265:02crwdne2935265:0 Nespresso inissia Safety Capacitor Replacement: crwdns2935265:020crwdnd2935265:02crwdnd2935265:02crwdne2935265:0
    • Photo 1: Don't forget this cover.

    • Photo 2: reverse of step 10: make sure the clips line up with the slots.

  21. Nespresso inissia Safety Capacitor Replacement, Safety Capacitor: crwdns2935265:021crwdnd2935265:01crwdnd2935265:01crwdne2935265:0
    • Replace this with an equivalent safety capacitor: 0.1uF 20% 310V X1

crwdns2915888:0crwdne2915888:0

To reassemble your device, follow these instructions in reverse order.

Serge-Henri Bijou

crwdns2935283:001/02/25crwdne2935283:0

73 crwdns2915208:0crwdne2915208:0

crwdns2935295:0crwdne2935295:0

crwdns2947412:00crwdne2947412:0

crwdns2917038:0crwdne2917038:0

crwdns2936625:0crwdne2936625:0:

crwdns2936751:024crwdne2936751:0 3

crwdns2936753:07crwdne2936753:0 7

crwdns2936753:030crwdne2936753:0 51

crwdns2942667:0crwdne2942667:0 186