crwdns2933423:0crwdne2933423:0
crwdns2947577:0crwdnd2947577:0crwdne2947577:0

Nerf Dart Tag Furyfire Trigger Replacement

crwdns2942213:0crwdne2942213:0

  1. Nerf Dart Tag Furyfire Trigger Replacement, Remove the screws: crwdns2935265:01crwdnd2935265:01crwdnd2935265:01crwdne2935265:0
    • Using a 00 Phillips screwdriver, remove all screws from the front panel. The screws have a length of .95 cm.

    crwdns2952109:0crwdne2952109:0

    crwdns2917038:0crwdne2917038:0

  2. Nerf Dart Tag Furyfire Trigger Replacement, Remove Panel: crwdns2935265:02crwdnd2935265:01crwdnd2935265:01crwdne2935265:0
    • After the screws have been removed, gently lift the panel from the gun and set it aside.

    crwdns2952109:0crwdne2952109:0

    crwdns2917038:0crwdne2917038:0

  3. Nerf Dart Tag Furyfire Trigger Replacement, Remove Black Cylinder: crwdns2935265:03crwdnd2935265:01crwdnd2935265:01crwdne2935265:0
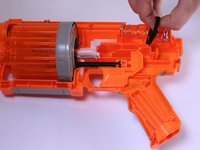
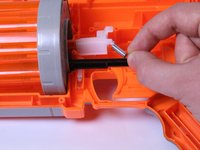
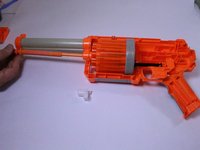
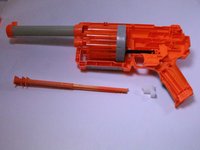
    • Locate the black cylinder connected to the large spring near the top of the device.

    • Once located, push the black cylinder against the spring and lift it out of the device.

    crwdns2952109:0crwdne2952109:0

    crwdns2917038:0crwdne2917038:0

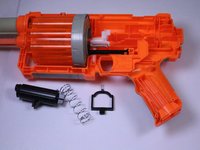
  4. Nerf Dart Tag Furyfire Trigger Replacement, Remove Spring: crwdns2935265:04crwdnd2935265:01crwdnd2935265:02crwdne2935265:0 Nerf Dart Tag Furyfire Trigger Replacement, Remove Spring: crwdns2935265:04crwdnd2935265:02crwdnd2935265:02crwdne2935265:0
    • Using your hand, lift the large spring and attached plastic stabilizing piece out of the gun and set aside.

    • Ensure that the small spring connected to the stabilizing piece remains connected.

    crwdns2952109:0crwdne2952109:0

    crwdns2917038:0crwdne2917038:0

  5. Nerf Dart Tag Furyfire Trigger Replacement, Remove Pump Handle: crwdns2935265:05crwdnd2935265:01crwdnd2935265:01crwdne2935265:0
    • Remove the two screws circled in blue. They are .95 cm in length.

    • Remove the three screw circled in green. They are .7 cm in length.

    crwdns2952109:0crwdne2952109:0

    crwdns2917038:0crwdne2917038:0

  6. Nerf Dart Tag Furyfire Trigger Replacement, Remove the Pump Handle: crwdns2935265:06crwdnd2935265:01crwdnd2935265:01crwdne2935265:0
    • Once all of the screws have been removed lift the pump handle off and set it aside.

    crwdns2952109:0crwdne2952109:0

    crwdns2917038:0crwdne2917038:0

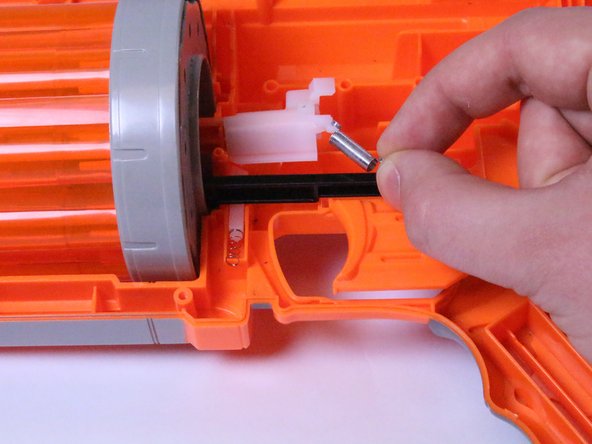
  7. Nerf Dart Tag Furyfire Trigger Replacement, Remove Attached Spring: crwdns2935265:07crwdnd2935265:01crwdnd2935265:02crwdne2935265:0 Nerf Dart Tag Furyfire Trigger Replacement, Remove Attached Spring: crwdns2935265:07crwdnd2935265:02crwdnd2935265:02crwdne2935265:0
    • In order to remove the white plastic holder, you must remove the spring that keeps it in place. Using a 00 Phillips screwdriver, carefully remove the screw while holding the spring in place.

    crwdns2952109:0crwdne2952109:0

    crwdns2917038:0crwdne2917038:0

  8. Nerf Dart Tag Furyfire Trigger Replacement, Disengage White Piece: crwdns2935265:08crwdnd2935265:01crwdnd2935265:01crwdne2935265:0
    • Using a plastic opening tool, lift the white piece out of the gun and set it aside.

    crwdns2952109:0crwdne2952109:0

    crwdns2917038:0crwdne2917038:0

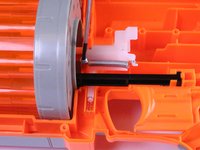
  9. Nerf Dart Tag Furyfire Trigger Replacement, Remove the Pump Track: crwdns2935265:09crwdnd2935265:01crwdnd2935265:02crwdne2935265:0 Nerf Dart Tag Furyfire Trigger Replacement, Remove the Pump Track: crwdns2935265:09crwdnd2935265:02crwdnd2935265:02crwdne2935265:0
    • Using your hand, slide the track out of the gun by pulling it away form the device.

    crwdns2952109:0crwdne2952109:0

    crwdns2917038:0crwdne2917038:0

  10. Nerf Dart Tag Furyfire Trigger Replacement, Detach Black Piece from Trigger: crwdns2935265:010crwdnd2935265:01crwdnd2935265:01crwdne2935265:0
    • Using a plastic opening tool, detach the black piece from the trigger. You do not need to remove the black piece from the gun.

    crwdns2952109:0crwdne2952109:0

    crwdns2917038:0crwdne2917038:0

  11. Nerf Dart Tag Furyfire Trigger Replacement, Remove Trigger: crwdns2935265:011crwdnd2935265:01crwdnd2935265:01crwdne2935265:0
    • Once the black piece has been detached, the trigger can be lifted out of the device.

    crwdns2952109:0crwdne2952109:0

    crwdns2917038:0crwdne2917038:0

crwdns2915888:0crwdne2915888:0

To reassemble your device, follow these instructions in reverse order. Ensure that the spring located behind the trigger is attached to the limb on the backside of the trigger.

crwdns2935221:0crwdne2935221:0

Bradley Penrow

crwdns2935283:009/23/14crwdne2935283:0

37 crwdns2915208:0crwdne2915208:0

crwdns2935297:04crwdne2935297:0

crwdns2935287:0crwdne2935287:0

USF Tampa, Team 11-2, Blackwell Fall 2014 crwdns2935289:0USF Tampa, Team 11-2, Blackwell Fall 2014crwdne2935289:0

USFT-BLACKWELL-F14S11G2

crwdns2931471:04crwdne2931471:0

crwdns2935297:05crwdne2935297:0

crwdns2947412:00crwdne2947412:0

crwdns2917038:0crwdne2917038:0

crwdns2936625:0crwdne2936625:0:

crwdns2936751:024crwdne2936751:0 0

crwdns2936753:07crwdne2936753:0 12

crwdns2936753:030crwdne2936753:0 51

crwdns2942667:0crwdne2942667:0 1,184