crwdns2915892:0crwdne2915892:0
If your Nanit Pro N301 is not turning on or functioning correctly, use this guide to replace the motherboard. Some of the pieces are very small so make sure you have a tool that can grab tiny materials if you are unable to do so with your fingers. Make your device is not plugged in and connected to a power source during the repair.
crwdns2942213:0crwdne2942213:0
-
-
Insert an opening pick into the seam between the front and rear case.
-
Slide the opening pick around the perimeter of the camera until all of the retaining clips are released.
-
Separate the front and rear case.
-
-
-
Remove the four 4 mm T6 Torx screws from each corner of the circuit board.
-
Lift the circuit board out of the chassis.
-
-
-
-
Desolder the black wire's motherboard connection.
-
-
-
Use tweezers to gently lift the two additional circuit boards out of the housing.
-
-
-
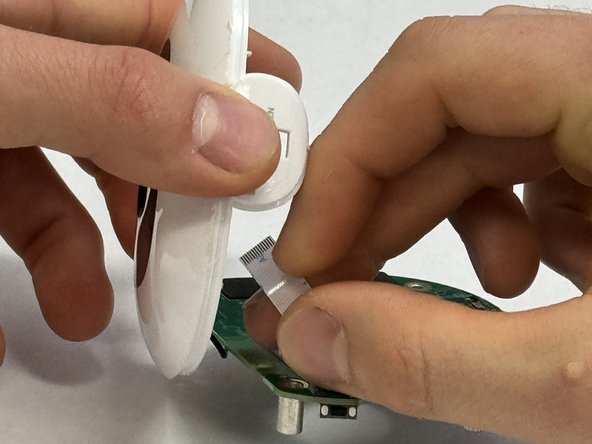
Disconnect the battery ribbon cable strip from the rear case.
-
Remove the motherboard.
-
To reassemble your device, follow these instructions in reverse order.
To reassemble your device, follow these instructions in reverse order.
crwdns2935221:0crwdne2935221:0
crwdns2935229:02crwdne2935229:0
crwdns2947410:01crwdne2947410:0
Seems quite difficult to insert an opening pick into the seam between the front and back cover. Need more photos on how it is done. From the photos, it seems like some force is required to insert based on the marks left on the covers.


