crwdns2915892:0crwdne2915892:0
This guide will show you how to install the Motorola Razr V3 camera. You may need to install a new camera if the camera doesn't show any picture or otherwise does not work.
crwdns2942213:0crwdne2942213:0
crwdns2936621:0crwdne2936621:0
-
-
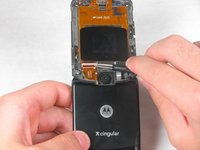
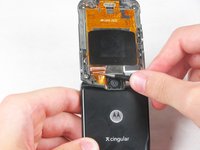
Remove the back cover by pressing down the silver button.
-
Pull the cover away from the phone.
-
-
-
Remove the battery by pushing down on the top and pulling it away from the phone.
-
-
crwdns2935267:0crwdne2935267:0Tweezers$4.99
-
Use tweezers to pry off the four rubber screw covers from the inside face.
-
-
-
-
Remove the four T5 Torx screws that were underneath the rubber covers.
-
-
-
Use the plastic opening tool to pry the top cover away from the phone.
-
-
crwdns2935267:0crwdne2935267:0Tweezers$4.99
-
Use tweezers to flip up the ZIF tab on the camera ribbon cable socket.
-
Gently pull the camera ribbon cable out of the ZIF socket.
-
-
-
Using a pair of tweezers gently grab and remove the camera from the phone.
-


To reassemble your device, follow these instructions in reverse order.
To reassemble your device, follow these instructions in reverse order.
crwdns2935221:0crwdne2935221:0
crwdns2935227:0crwdne2935227:0
crwdns2915084:0crwdne2915084:0

Cal Poly, Team 3-46, Amido Spring 2013 crwdns2935289:0Cal Poly, Team 3-46, Amido Spring 2013crwdne2935289:0
CPSU-AMIDO-S13S3G46
crwdns2931471:04crwdne2931471:0
crwdns2935297:012crwdne2935297:0