crwdns2915892:0crwdne2915892:0
This guide will focus on disassembling the necessary components for the phone in order to get to the camera hardware and remove it from the motherboard.
crwdns2942213:0crwdne2942213:0
-
-
Turn the phone face down.
-
Press and hold the release button in the middle of the back panel.
-
Slide the bottom panel down to remove.
-
-
-
Remove the battery pack by prying it out with a fingernail, screw driver or other opening tool at the tab shown.
-
-
-
Press inward on the upper casing.
-
-
-
Slide the upper case to the right and lift up.
-
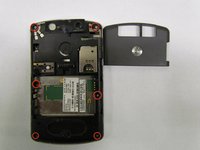
Lift the camera sticker so that it doesn't get damaged.
-
-
-
-
Remove the six labeled screws with a T5 Torx Screwdriver.
-
-
-
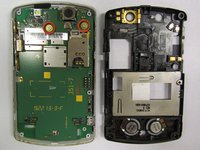
Once the screws are removed, use the plastic opening tool to remove the black casing.
-
-
-
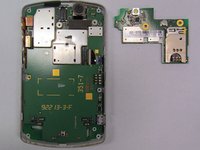
Remove both screws on the mounted surface with a T5 screwdriver.
-
-
-
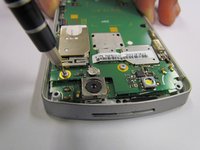
Remove the glued, mounted surface by lifting it from underneath the SIM card slot by using the plastic opening tool.
-
-
-
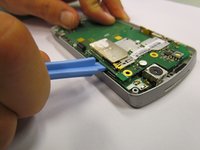
Use the plastic opening tool to lift the camera from the phone.
-
-
-
The new camera can now be attached to the motherboard.
-


To reassemble your device, follow these instructions in reverse order.

crwdns2935287:0crwdne2935287:0

Cal Poly, Team 6-31, Regan Fall 2012 crwdns2935289:0Cal Poly, Team 6-31, Regan Fall 2012crwdne2935289:0
CPSU-REGAN-F12S6G31
crwdns2931471:05crwdne2931471:0
crwdns2935297:09crwdne2935297:0