crwdns2933423:0crwdne2933423:0

Motorola Moto Z Play Transferring Display Components

crwdns2862623:0crwdne2862623:0
crwdns2942641:0crwdne2942641:0

crwdns2942213:0crwdne2942213:0

  1. Motorola Moto Z Play Transferring Display Components, Display Components: crwdns2935265:01crwdnd2935265:01crwdnd2935265:01crwdne2935265:0
    • If your replacement display does not already include a flash assembly and fingerprint sensor, complete the following steps to transfer those components from your old display to your new display.

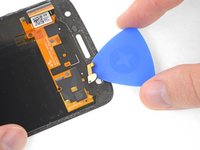
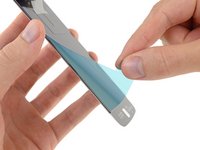
    • Apply heat for 2-3 minutes to the bezel area below the display on your old display assembly, in order to soften the adhesive securing the fingerprint sensor.

  2. Motorola Moto Z Play Transferring Display Components: crwdns2935265:02crwdnd2935265:01crwdnd2935265:02crwdne2935265:0 Motorola Moto Z Play Transferring Display Components: crwdns2935265:02crwdnd2935265:02crwdnd2935265:02crwdne2935265:0
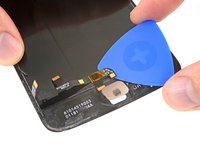
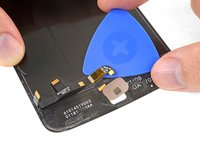
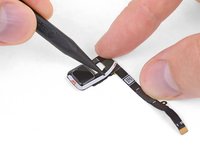
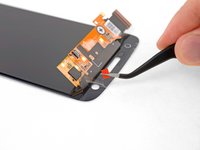
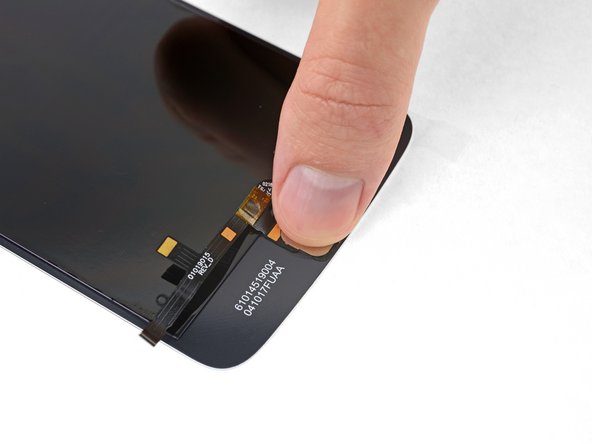
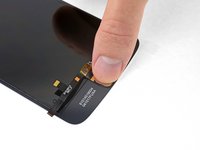
    • Using your finger, press firmly on the outward-facing side of the fingerprint sensor until it separates from the display assembly.

  3. Motorola Moto Z Play Transferring Display Components: crwdns2935265:03crwdnd2935265:01crwdnd2935265:02crwdne2935265:0 Motorola Moto Z Play Transferring Display Components: crwdns2935265:03crwdnd2935265:02crwdnd2935265:02crwdne2935265:0
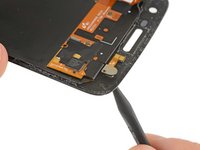
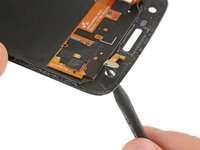
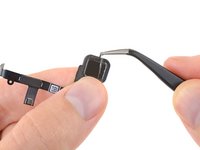
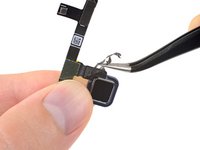
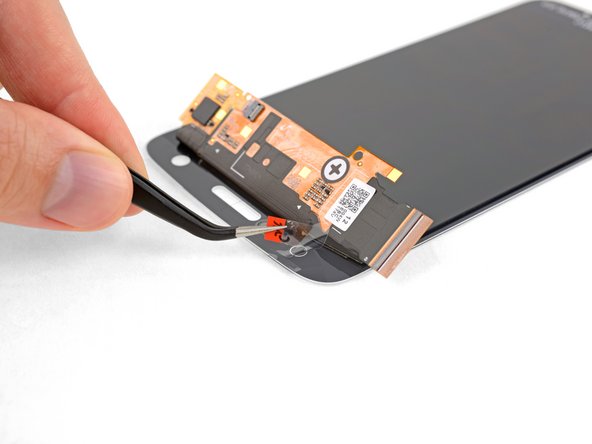
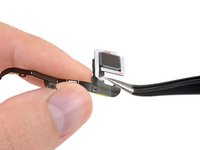
    • Slide an opening pick underneath the fingerprint sensor's flex cable, and carefully cut through the adhesive securing it in place.

    • Be careful not to damage the flex cable. If necessary, apply more heat to further soften the adhesive.

  4. Motorola Moto Z Play Transferring Display Components: crwdns2935265:04crwdnd2935265:01crwdnd2935265:01crwdne2935265:0
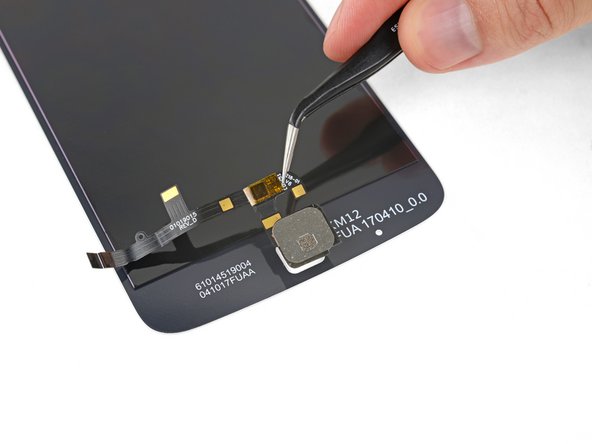
    • Remove the fingerprint sensor from the old display and set it aside.

  5. Motorola Moto Z Play Transferring Display Components: crwdns2935265:05crwdnd2935265:01crwdnd2935265:01crwdne2935265:0
    • Apply heat for 2-3 minutes to the top bezel area above the display on your old display assembly, in order to soften the adhesive securing the front camera flash.

  6. Motorola Moto Z Play Transferring Display Components: crwdns2935265:06crwdnd2935265:01crwdnd2935265:02crwdne2935265:0 Motorola Moto Z Play Transferring Display Components: crwdns2935265:06crwdnd2935265:02crwdnd2935265:02crwdne2935265:0
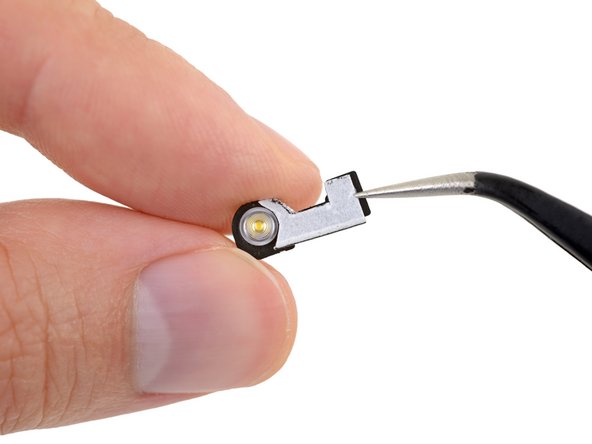
    • Use the point of a spudger to push the outward-facing side of the camera flash until it separates from the display assembly.

  7. Motorola Moto Z Play Transferring Display Components: crwdns2935265:07crwdnd2935265:01crwdnd2935265:02crwdne2935265:0 Motorola Moto Z Play Transferring Display Components: crwdns2935265:07crwdnd2935265:02crwdnd2935265:02crwdne2935265:0
    • Slide an opening pick underneath the flash flex cable, and carefully cut through the adhesive securing it in place.

    • Remove the front camera flash and set it aside.

  8. Motorola Moto Z Play Transferring Display Components: crwdns2935265:08crwdnd2935265:01crwdnd2935265:03crwdne2935265:0 Motorola Moto Z Play Transferring Display Components: crwdns2935265:08crwdnd2935265:02crwdnd2935265:03crwdne2935265:0 Motorola Moto Z Play Transferring Display Components: crwdns2935265:08crwdnd2935265:03crwdnd2935265:03crwdne2935265:0
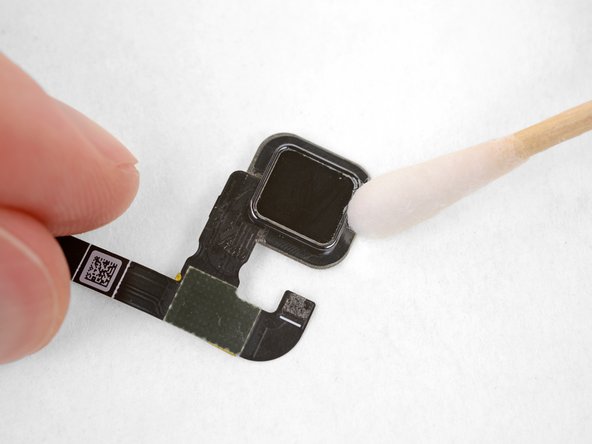
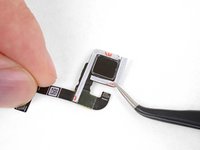
    • Carefully peel away and remove any remaining old adhesive from the fingerprint sensor.

    • For best results, clean the adhered areas with isopropyl alcohol to help prep the surface for the new adhesive.

  9. Motorola Moto Z Play Transferring Display Components: crwdns2935265:09crwdnd2935265:01crwdnd2935265:01crwdne2935265:0
    • Remove any remaining adhesive from the flash assembly as well. If desired, clean it thoroughly with isopropyl alcohol.

  10. Motorola Moto Z Play Transferring Display Components: crwdns2935265:010crwdnd2935265:01crwdnd2935265:03crwdne2935265:0 Motorola Moto Z Play Transferring Display Components: crwdns2935265:010crwdnd2935265:02crwdnd2935265:03crwdne2935265:0 Motorola Moto Z Play Transferring Display Components: crwdns2935265:010crwdnd2935265:03crwdnd2935265:03crwdne2935265:0
    • Cut two pieces of L-shaped double-sided adhesive tape, and stick them firmly to the perimeter of the fingerprint sensor as shown.

  11. Motorola Moto Z Play Transferring Display Components: crwdns2935265:011crwdnd2935265:01crwdnd2935265:02crwdne2935265:0 Motorola Moto Z Play Transferring Display Components: crwdns2935265:011crwdnd2935265:02crwdnd2935265:02crwdne2935265:0
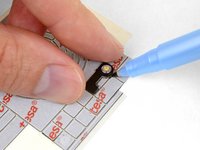
    • Use the flash assembly and a fine-point pen or marker to trace out an appropriately-sized piece of double-sided adhesive tape.

    • Cut the tape to about the right size and shape and apply it to the front-facing side of the flash assembly.

  12. Motorola Moto Z Play Transferring Display Components: crwdns2935265:012crwdnd2935265:01crwdnd2935265:03crwdne2935265:0 Motorola Moto Z Play Transferring Display Components: crwdns2935265:012crwdnd2935265:02crwdnd2935265:03crwdne2935265:0 Motorola Moto Z Play Transferring Display Components: crwdns2935265:012crwdnd2935265:03crwdnd2935265:03crwdne2935265:0
    • Remove any protective tapes or films from the back of your new display assembly.

  13. Motorola Moto Z Play Transferring Display Components: crwdns2935265:013crwdnd2935265:01crwdnd2935265:03crwdne2935265:0 Motorola Moto Z Play Transferring Display Components: crwdns2935265:013crwdnd2935265:02crwdnd2935265:03crwdne2935265:0 Motorola Moto Z Play Transferring Display Components: crwdns2935265:013crwdnd2935265:03crwdnd2935265:03crwdne2935265:0
    • Peel off and remove the liner from the adhesive tape on the fingerprint sensor.

    • Place your new display face-down, and carefully lower the fingerprint sensor into position on the back.

    • Press firmly on the back of the fingerprint sensor for several seconds to allow the adhesive to bond and secure it in place.

  14. Motorola Moto Z Play Transferring Display Components: crwdns2935265:014crwdnd2935265:01crwdnd2935265:01crwdne2935265:0
    • Peel away the liner from the adhesive tape on the flash assembly, and press the flash into place on the back of the new display.

    • Be sure to install the flash assembly in its original, horizontal alignment, or the copper pads on the back won't line up with the spring contacts in the phone, and your flash won't work.

crwdns2915888:0crwdne2915888:0

To reassemble your device, follow these instructions in reverse order.

Jeff Suovanen

crwdns2935283:008/06/13crwdne2935283:0

441.202 crwdns2915208:0crwdne2915208:0

crwdns2935297:0259crwdne2935297:0

crwdns2915084:0crwdne2915084:0

iFixit crwdns2935289:0iFixitcrwdne2935289:0

Staff

crwdns2931471:0120crwdne2931471:0

crwdns2935297:020.083crwdne2935297:0

crwdns2947412:00crwdne2947412:0

crwdns2917038:0crwdne2917038:0

crwdns2936625:0crwdne2936625:0:

crwdns2936751:024crwdne2936751:0 0

crwdns2936753:07crwdne2936753:0 0

crwdns2936753:030crwdne2936753:0 0

crwdns2942667:0crwdne2942667:0 87