crwdns2915892:0crwdne2915892:0
The Motorola Moto G6 contains a speaker that can be replaced without taking off the motherboard. To access the speaker, the interior plate must be removed. If the speaker is too quiet or broken, a speaker replacement will most likely be the solution.
This guide teaches how to perform a speaker replacement. No repair experience is required this is a simple process with no hard to find tools that can be purchased on iFixit. The specific device model in this guide is XT1925-12. Other model numbers include: XT1925-4, XT1925-5, XT1925-6, and XT1925DL.
Before you begin, download the Rescue and Smart Assistant app to backup your device and diagnose whether your problem is software or hardware related.
Before beginning the repair, make sure the device is turned off and disconnected from an external power source. Gather the suggested tools listed below and begin the replacement.
crwdns2942213:0crwdne2942213:0
-
-
If possible, drain the battery before disassembly. When the battery is charged, there's an increased risk of a dangerous thermal event if the battery is overheated or damaged during repairs.
-
Prepare an iOpener and heat the back of the phone along its bottom edge for about two minutes, or until it's slightly too hot to touch. This will help soften the adhesive securing the rear glass.
-
-
-
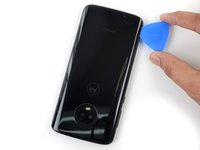
Apply a suction cup to the bottom edge of the rear glass.
-
Pull up on the suction cup with firm, constant pressure to create a slight gap between the rear glass and the frame.
-
If you have trouble, apply more heat to further soften the adhesive, and try again. The adhesive cools quickly, so you may need to heat it repeatedly.
-
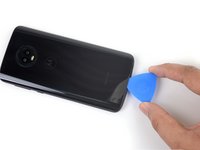
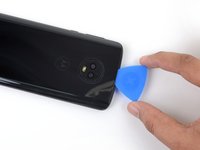
Insert an opening pick into the gap you created under the rear glass.
-
-
-
Slide the pick all along the bottom edge of the phone to slice through the adhesive securing the rear glass.
-
-
-
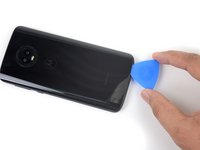
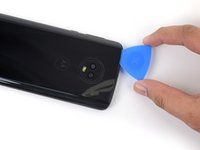
Heat the right edge of the back of the phone to soften the adhesive underneath.
-
-
-
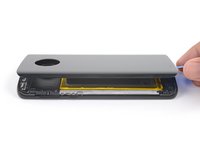
Slide the pick along the right edge of the rear glass to separate the adhesive underneath.
-
-
-
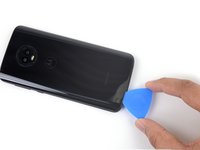
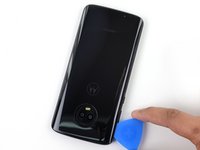
Heat the top edge of the back of the phone to soften the rear glass adhesive.
-
-
-
-
Slide the pick all along the top edge of the phone to slice through the adhesive securing the rear glass.
-
-
-
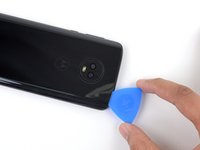
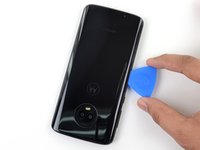
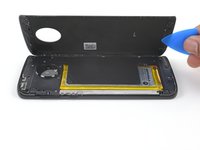
Heat the left edge of the back of the phone to soften the adhesive underneath.
-
-
-
Slide a pick along the left edge of the phone to slice through the rear glass adhesive.
-
-
crwdns2935267:0crwdne2935267:0Tesa 61395 Tape$5.99
-
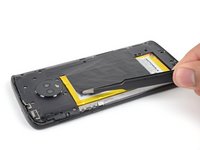
If the glass remains stuck, re-heat and slice the adhesive repeatedly as needed.
-
Lift the rear glass carefully, making sure it's fully separated from any adhesive.
-
Remove the rear glass.
-
-
crwdns2935267:0crwdne2935267:0Tweezers$4.99
-
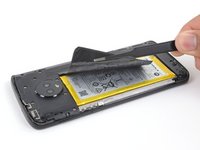
Use a pair of tweezers to carefully peel up the black tape covering the battery.
-
Remove the tape.
-
-
-
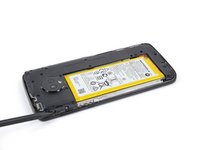
Use a Phillips driver to remove seventeen screws securing the plastic cover:
-
Eleven grey 3 mm-long screws
-
Five black 2.5 mm-long screws
-
One silver 3.5 mm-long screw
-
-
-
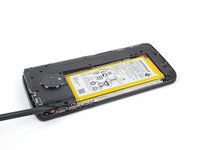
Insert the pointed end of a spudger into the notch at the top left edge of the plastic cover.
-
Pry up with the spudger to lift the upper edge of the cover and release the clips holding the cover down.
-
Remove the plastic cover.
-
-
-
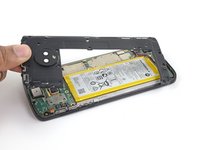
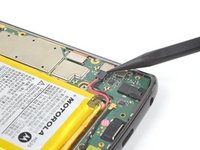
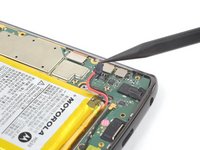
Use the pointed end of a spudger to pry up the battery connector and disconnect it.
-
-
-
With the interior plate removed, locate the speaker.
-
-
crwdns2935267:0crwdne2935267:0Tweezers$4.99
-
Using tweezers gently lift the speaker out of the device.
-


To reassemble your device, follow these instructions in reverse order.
To reassemble your device, follow these instructions in reverse order.
crwdns2935221:0crwdne2935221:0
crwdns2935229:012crwdne2935229:0

crwdns2915084:0crwdne2915084:0

Cal Poly, Team S11-G1, Regan Fall 2019 crwdns2935289:0Cal Poly, Team S11-G1, Regan Fall 2019crwdne2935289:0
CPSU-REGAN-F19S11G1
crwdns2931471:04crwdne2931471:0
crwdns2935297:014crwdne2935297:0
crwdns2947410:01crwdne2947410:0
Excellent guide Bradley - distinguishing all the screw sizes and positions really made me sure of the correct reassembly. Thank you for contributing.