crwdns2915892:0crwdne2915892:0
Full Device Name: Motorola Moto Stylus 4G (2023)
Model Number: XT2317
Alternate Name: Moto Stylus 4G (2023)
Objective: This guide aims to provide step-by-step instructions for replacing the battery in the Motorola Moto Stylus 4G (2023).
About the Battery: This device sports a model PG50 lithium ion battery (XT 2317) with a 5000 mAh capacity.
Device Symptoms: If the device begins to show a low battery life, longer charge times, or overheats, then use this guide to replace the battery.
crwdns2942213:0crwdne2942213:0
-
-
Insert an opening pick under the edge of the case and slide it around the edges.
-
Separate the back panel from the rest of the phone.
-
-
-
Remove the seven 4 mm screws from the phone’s top with a Torx T5 screwdriver.
-
-
-
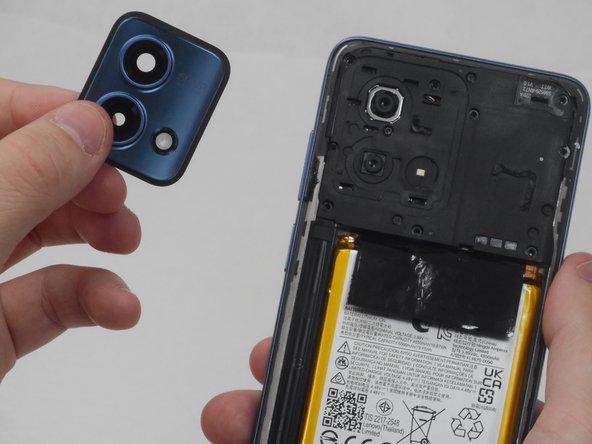
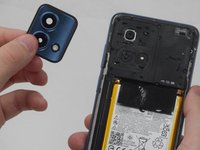
Use the opening pick along the edges to separate the camera lens glass from the board. If you begin to pry where the picture indicates, you will only get the top plastic and it will peal away from the paint. Instead begin at the gap in the lower left hand corner where there is a space between the actual frame that contains the lenses and the phone.
-
-
-
-
Remove three 4 mm screws with a Torx T5 screwdriver.
-
-
-
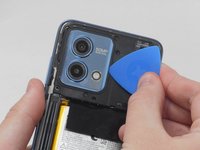
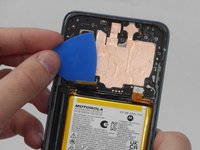
Pry off the top perimeter with an ESD-safe spudger and set it aside.
-
-
-
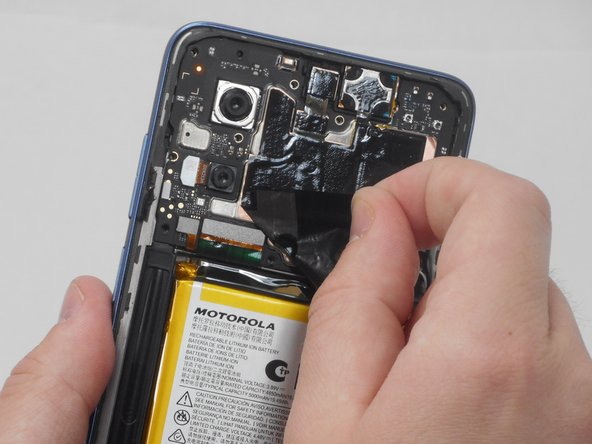
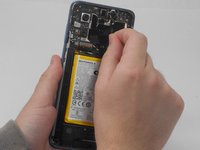
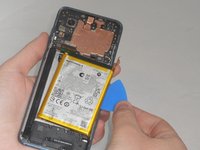
Pull the black tab off of the battery gently with your hand.
-
-
-
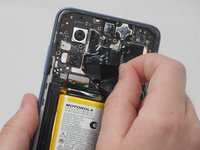
Disconnect the four cables by inserting the opening pick beneath the edge of each.
-
-
-
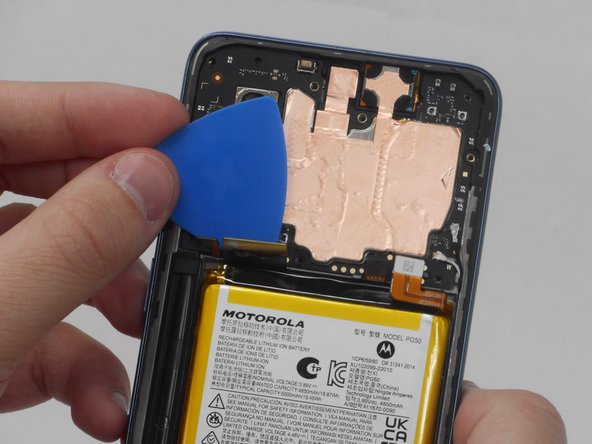
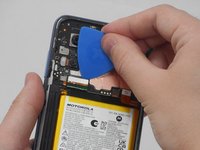
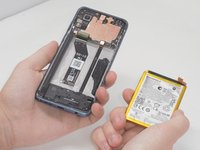
Together with the opening pick and an ESD-safe spudger, remove the old battery.
-


To reassemble your device, follow these instructions in reverse order.
To reassemble your device, follow these instructions in reverse order.
crwdns2935221:0crwdne2935221:0
crwdns2935227:0crwdne2935227:0

crwdns2915084:0crwdne2915084:0

University of Memphis, Team 3-2, Sneed Spring 2024 crwdns2935289:0University of Memphis, Team 3-2, Sneed Spring 2024crwdne2935289:0
UM-SNEED-S24S3G2
crwdns2931471:04crwdne2931471:0
crwdns2935297:06crwdne2935297:0
crwdns2947412:02crwdne2947412:0
Thank you for this guide @camilleholley , it was extrememly helpful. Thankfully, the problem charging my phone (Moto G Stylus 5G, 2023) seems to be resolved with a fresh battery replacement.
>>>For anyone with this phone having problems charging, here's what I was experiencing: (a) battery would charge only with one cable (it was a USB-A to USB-C) (b) battery would drain extremely quickly once charged (c) battery would only charge to about 20% and then lasted for less than 1 hour with minimal to no usage.<<<
Also, for anyone reading this who's about to replace the battery - I recommend getting the battery & a magnetic dry-erase board project mat (~$20 USD) from ifixit. The battery I got came with a repair tool kit, and it had everything I needed to use to remove the back. The magnetic project mat was perfect for keeping the tiny screws in one place, and it even came with a really nice dry erase marker to take notes with (like how many screws go to a certain area or what the name of the removed part is/where it goes).
- You can do this! This was my first time taking this phone apart, and I'm not a professional phone repair person. While it took me a few hours to do (mostly because I was messing around with figuring out adhesives) I'm glad that I decided to save the additional money it would have cost to have someone replace it for me.
Can i get a Battery