crwdns2915892:0crwdne2915892:0
The front camera not working? This guide will show you how to unplug the camera from the motherboard and replace the front camera.
crwdns2942213:0crwdne2942213:0
-
-
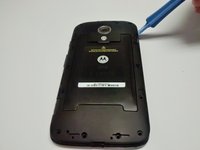
You can remove the outer cover on the back of the phone by using a plastic opening tool. After removal the inner back cover will be exposed as shown.
-
This part is moderately difficult, especially if you've never taken the outer back cover off before this point.
-
It may take you several tries, but please be patient. The cover is surprisingly flexible, but not enough to withstand a lot of pressure.
-
-
-
Shut down the phone.
-
Push SIM card until it pops out.
-
Remove SIM card.
-
Be careful as to not damage the microSD memory card. Unlike the SIM card, pushing this in may not spring release, as there may not be an eject mechanism.
-
If there is no spring release eject mechanism, hopefully your microSD card has a ridge/raised edge that you can push on with your fingernail or plastic/rubber tool to push the card out. This may be difficult - be patient and do not use excessive force/sharp tools that could cause permanent damage and permanent loss of data.
-
-
-
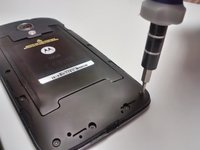
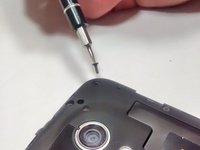
Using a T5 Torx screwdriver head, take out the 14 screws (3.5 mm diameter and 5 mm long) that hold the back plate in place.
-
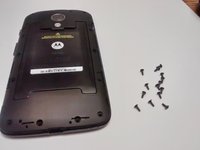
Make sure to keep all of the screws together, as they are very easily lost.
-
The magnetic project mat or a container is a great way to keep all the little metal screws as well as other small metal pieces from being lost.
-
-
-
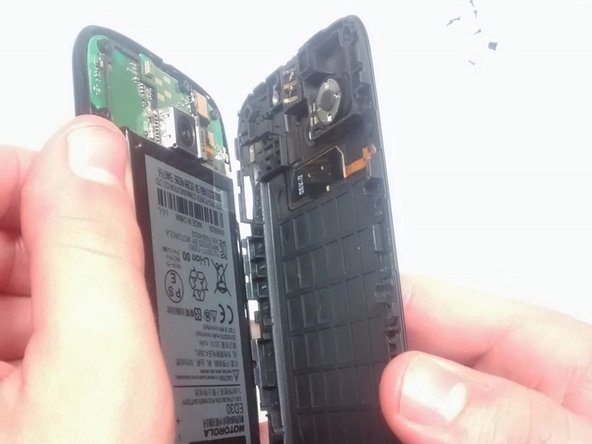
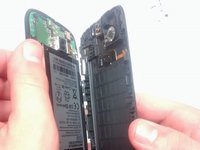
Use the plastic opening tool to take out the inner back cover after all the screws have been removed.
-
This will expose the motherboard and the attached battery.
-
Take note that once the inner back cover is removed the volume and power buttons on the side can easily fall out or be removed.
-
-
-
-
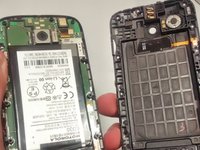
When you remove the back inner cover, the battery will be exposed on the motherboard. The label is upside down, so do not be alarmed.
-
It is attached by adhesive and connected to the motherboard by an electrical ribbon. So a plastic pry tool will be needed for this task.
-
-
-
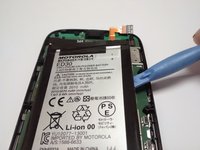
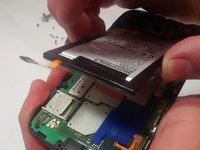
The battery is attached to the motherboard via an orange ribbon and a plug.
-
Use a flat pry tool to unplug the ribbon from the motherboard. Place the tool underneath the right edge and push up. The plug should come free with minimal resistance.
-
-
-
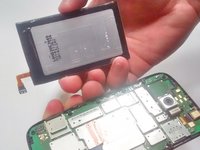
The right edge of the battery will give you the most leverage when removing the battery from the motherboard.
-
Use the pry tool to lift the edge of the battery. Remember: the battery is attached using adhesive.
-
You will meet a lot of resistance in this step. If the battery seems like it is pulling too much at the motherboard, try moving the tool along the edges to work the battery free.
-
Try not to rush. It is important that you don't ruin anything in the process of removing the battery. The battery will come free, it will just take some patience and finding the right spot to lift the battery free of the motherboard.
-
-
-
Once the battery is removed, you will be able to replace it by fitting the new battery underneath back camera (the raised silver box on the motherboard) and plugging the ribbon in.
-
When putting the new battery in, make sure the blue cover (shown in the top left orange circle) is in place. It is a protector for delicate circuitry, so it is important that the cover is in its place when the battery is put in.
-
-
-
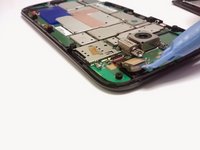
The front camera is located at the top edge of the device near the back camera. We highlighted will red circle for easy recognition.
-
It is covered by a small piece of orange tape.
-
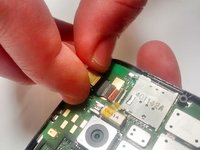
Use a plastic opening tool to lift the piece of tape as seen in picture. This will expose the clamp that hold the ribbon connection in place.
-
-
-
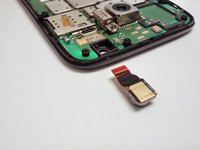
Underneath the tape is a small plug that connects the front camera to the motherboard.
-
Use the tool to gently flip open the cover of the plug.
-
The ribbon will then slide out of the slot.
-
-
-
Using the tool, lift the camera out of its socket. It should come free with little to no hastle.
-
-
-
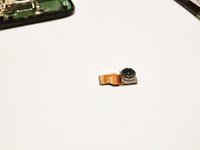
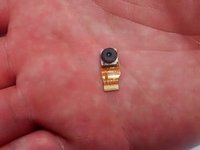
The camera can then be taken out.
-
This should be your final product.
-


To reassemble your device, follow these instructions in reverse order.
To reassemble your device, follow these instructions in reverse order.
crwdns2935221:0crwdne2935221:0
crwdns2935229:05crwdne2935229:0
crwdns2915084:0crwdne2915084:0

USF Tampa, Team 1-6, Brown Fall 2014 crwdns2935289:0USF Tampa, Team 1-6, Brown Fall 2014crwdne2935289:0
USFT-BROWN-F14S1G6
crwdns2931471:04crwdne2931471:0
crwdns2935297:017crwdne2935297:0