crwdns2915892:0crwdne2915892:0
This guide's main purpose is to show how to replace the motherboard. It will not only show steps to disassemble the phone, but will also provide the knowledge needed to successfully complete each step. This guide will show the necessary tools one would need to completely disassemble this device to the motherboard and will furthermore indicate what to look for to determine if it is damaged.
crwdns2942213:0crwdne2942213:0
-
-
Slide the tab off the back of the device.
-
-
-
Use the tab located at the top of the battery to release the battery.
-
-
-
-
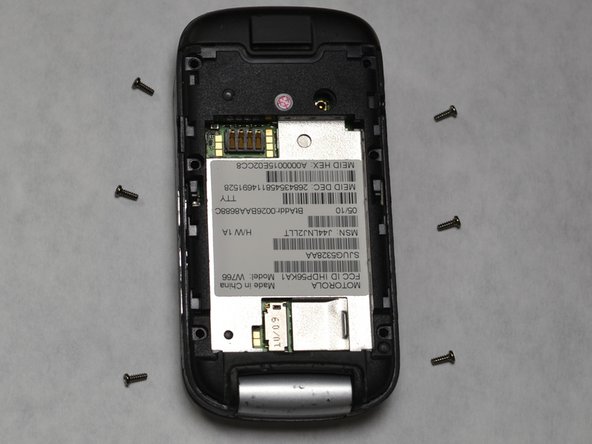
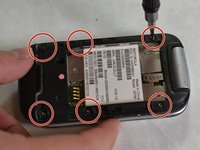
The six screws need to be taken out with any conventional screw driver tool.
-
You will have to unscrew the six 5.31 mm Star Head #5 screws with the appropriate six star bit.
-
There should be six screws removed from the casing after completion.
-
-
-
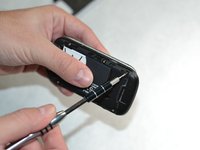
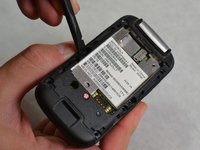
First you will need to locate the lip on the left side of the device.
-
Next you will insert the black spudger firmly into side opening to loosen the casing.
-
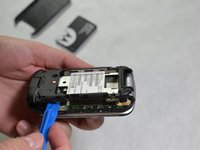
Using the blue pry tool gently remove the black and silver casing.
-
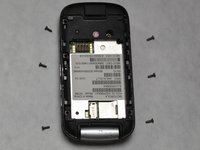
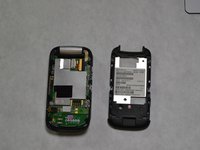
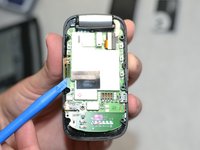
The motherboard should then be exposed after removal.
-
-
crwdns2935267:0crwdne2935267:0Tweezers$4.99
-
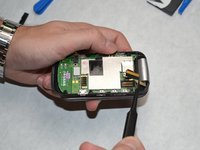
Remove the flex cable with a pair of tweezers.
-
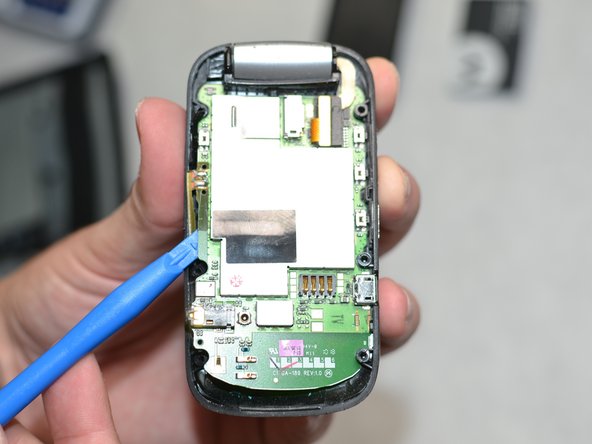
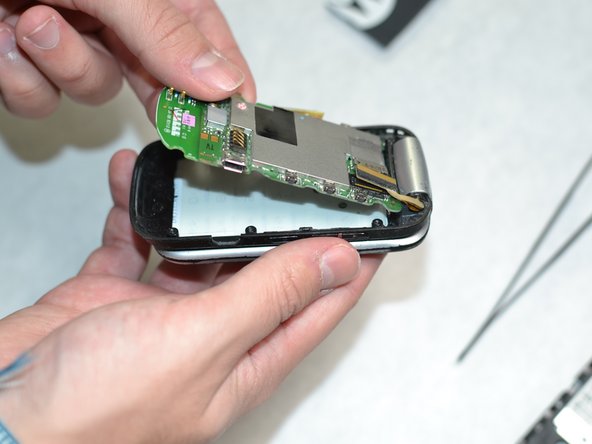
Now use a spudger or pry tool to place firmly under the motherboard.
-
After creating clearance with the spudging device grab and remove the motherboard with a clamping tool or hand.
-
Look at the motherboard for scorches or loose pieces which could indicate damage.
-
Refer to the troubleshooting page for further advice to replace the motherboard.
-


To reassemble your device, follow these instructions in reverse order.
crwdns2935287:0crwdne2935287:0

IUPUI-Harley-F16S2G4 crwdns2935289:0IUPUI-Harley-F16S2G4crwdne2935289:0
Community
crwdns2931471:04crwdne2931471:0
crwdns2935297:02crwdne2935297:0