crwdns2915892:0crwdne2915892:0
This guide will show you how to replace the screen as your may be scratched or cracked. This process does require tools, a heat gun in particular. Be careful to not heat your screen for too long as it can damage the electronics.
crwdns2942213:0crwdne2942213:0
-
-
Slide the plastic case off of the back of the phone, exposing the battery.
-
-
-
Pull up on the red battery release tab and pull the battery out of the phone.
-
-
-
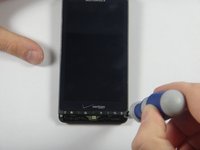
Remove the circled screws using a T-5 torques. These screws will be 4.3 millimeters in length.
-
-
-
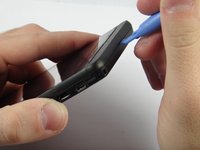
Using a prying tool, snap off the front casing on the top and bottom of the phone.
-
-
-
Remove the circled screws using a T-5 torques.. These screws should be 5.8 millimeters in length.
-
-
-
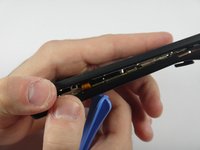
Using a plastic opening tool, snap open the phone. It should separate into a front piece with the hardware and a plastic backing.
-
-
crwdns2935267:0crwdne2935267:0Tweezers$4.99
-
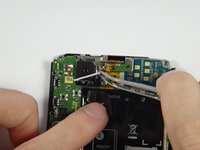
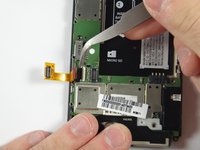
Using tweezers, remove the white wire at the top of the phone near the camera.
-
-
-
Remove these nine screws using a T-3 torques. These screws should be 2.40 mm in length
-
-
-
-
Using tweezers, removed the white electrical tape on the motherboard.
-
-
-
Using the plastic opening tool, lift up to remove the connector.
-
-
-
Using a pry tool, lift the jawbone connector.
-
-
-
Using tweezers, carefully disconnect the cable connector by pulling the cable out.
-
-
-
Use a spudger to disconnect the cable connector.
-
-
-
Using a spudger, remove the camera. Lift up the motherboard and slide the spudger under the camera.
-
-
-
Remove the 4 screws using a T-3 torques.. These screws are 2.40 mm in length.
-
-
crwdns2935267:0crwdne2935267:0Tweezers$4.99
-
Using tweezers, remove the white tape to reveal the connector
-
-
-
Using the plastic opening tool, lift the jawbone connector.
-
-
-
Using tweezers, remove cable from the connector
-
-
-
Using a plastic opening tool, lift the connector from the device
-
-
-
Using a heat gun, gently heat the edges of the screen
-
To reassemble your device, follow these instructions in reverse order.
crwdns2947410:01crwdne2947410:0
I recently ran into an interesting situation with the Droid X2 at my repair shop. I know this is an older device, but this is still a very important piece of information: there are 2 different types of digitizers and 2 different types of LCD's, depending on the Droid X2's transceiver number. Type A digitizer has a smaller front row button connector, Type B is larger. Same with the LCD, there is a Type A small connector and a Type B larger connector. Under the battery on the barcode sticker, right below the "MB870" barcode is the transceiver number, starting with "SJUG" and ending in either 6250 (type A) or 6065 (type B). Anyone buying a replacement LCD or digitizer needs to know which one to get, or else the connectors won't fit.
Andrew F - crwdns2934203:0crwdne2934203:0 crwdns2950251:0crwdne2950251:0


