crwdns2933423:0crwdne2933423:0

Motorola Droid RAZR M Headphone Jack Replacement

crwdns2942213:0crwdne2942213:0

  1. Motorola Droid RAZR M Headphone Jack Replacement, Front Assembly: crwdns2935265:01crwdnd2935265:01crwdnd2935265:03crwdne2935265:0 Motorola Droid RAZR M Headphone Jack Replacement, Front Assembly: crwdns2935265:01crwdnd2935265:02crwdnd2935265:03crwdne2935265:0 Motorola Droid RAZR M Headphone Jack Replacement, Front Assembly: crwdns2935265:01crwdnd2935265:03crwdnd2935265:03crwdne2935265:0
    • Open the small latch on the left side of the device by lifting gently with your finger, exposing the SIM card and microSD card slots.

    • If either of these cards are present, remove them to prevent damaging them while taking apart the phone. Our device does not have either.

    • Close the latch once the two cards are removed.

  2. Motorola Droid RAZR M Headphone Jack Replacement: crwdns2935265:02crwdnd2935265:01crwdnd2935265:03crwdne2935265:0 Motorola Droid RAZR M Headphone Jack Replacement: crwdns2935265:02crwdnd2935265:02crwdnd2935265:03crwdne2935265:0 Motorola Droid RAZR M Headphone Jack Replacement: crwdns2935265:02crwdnd2935265:03crwdnd2935265:03crwdne2935265:0
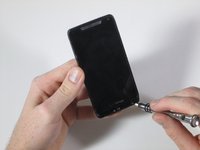
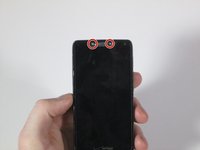
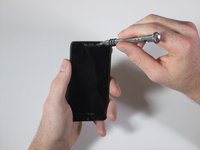
    • Remove the six 4mm T3 Torx screws. There are 3 on each side of the device.

  3. Motorola Droid RAZR M Headphone Jack Replacement: crwdns2935265:03crwdnd2935265:01crwdnd2935265:03crwdne2935265:0 Motorola Droid RAZR M Headphone Jack Replacement: crwdns2935265:03crwdnd2935265:02crwdnd2935265:03crwdne2935265:0 Motorola Droid RAZR M Headphone Jack Replacement: crwdns2935265:03crwdnd2935265:03crwdnd2935265:03crwdne2935265:0
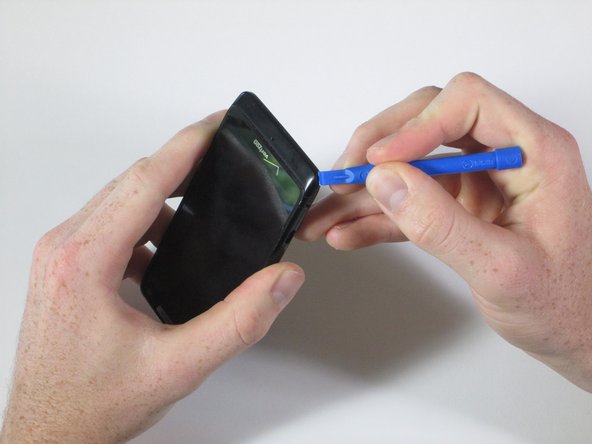
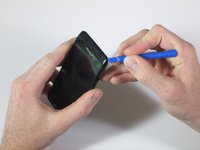
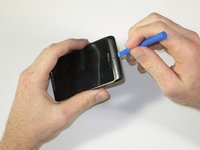
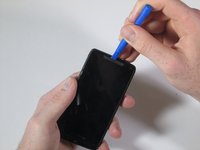
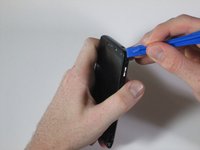
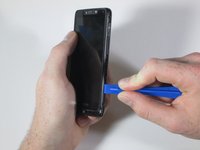
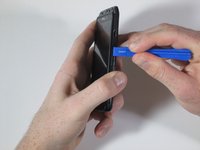
    • Run the plastic opening tool under the bottom edge of the phone to detach the small plastic cover below the Verizon logo.

    • It will take some force to remove this piece. Work around the bottom corners to unlatch the two hooks holding the piece in place.

    • The small plastic hooks can break during removal. Be careful that you don't damage them, but it will take some force to get them undone.

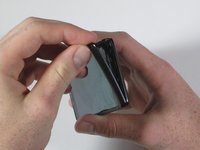
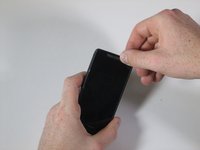
    • Once the plastic cover is detached, pull the piece away with your fingers.

  4. Motorola Droid RAZR M Headphone Jack Replacement: crwdns2935265:04crwdnd2935265:01crwdnd2935265:02crwdne2935265:0 Motorola Droid RAZR M Headphone Jack Replacement: crwdns2935265:04crwdnd2935265:02crwdnd2935265:02crwdne2935265:0
    • Remove the three T4 Torx screws. There are three at the bottom of the device.

  5. Motorola Droid RAZR M Headphone Jack Replacement: crwdns2935265:05crwdnd2935265:01crwdnd2935265:03crwdne2935265:0 Motorola Droid RAZR M Headphone Jack Replacement: crwdns2935265:05crwdnd2935265:02crwdnd2935265:03crwdne2935265:0 Motorola Droid RAZR M Headphone Jack Replacement: crwdns2935265:05crwdnd2935265:03crwdnd2935265:03crwdne2935265:0
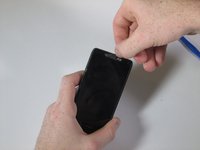
    • Using the plastic opening tool, peel away the silver Motorola plate at the top of the phone. There is a fair amount of adhesive underneath, so you may have to pry it from a few different angles.

    • As soon as you can get your finger underneath, pull away the silver plate.

  6. Motorola Droid RAZR M Headphone Jack Replacement: crwdns2935265:06crwdnd2935265:01crwdnd2935265:02crwdne2935265:0 Motorola Droid RAZR M Headphone Jack Replacement: crwdns2935265:06crwdnd2935265:02crwdnd2935265:02crwdne2935265:0
    • Remove the two 7mm T4 Torx screws at the top of the device.

  7. Motorola Droid RAZR M Headphone Jack Replacement: crwdns2935265:07crwdnd2935265:01crwdnd2935265:03crwdne2935265:0 Motorola Droid RAZR M Headphone Jack Replacement: crwdns2935265:07crwdnd2935265:02crwdnd2935265:03crwdne2935265:0 Motorola Droid RAZR M Headphone Jack Replacement: crwdns2935265:07crwdnd2935265:03crwdnd2935265:03crwdne2935265:0
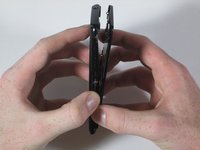
    • When you detach the front from the back, don't pull the two pieces entirely apart. There is a flat orange wire that connects the two pieces that will be disconnected in the next step.

    • Snap apart the two internal clips located on the top corners of the device, and the two clips in the bottom corners.

    • Run the plastic opening tool around the edge of the entire device to pry apart the front of the phone from the back.

    • There is a small black plastic piece located at the bottom of the front assembly. Do not worry if the strip falls off; just simply snap it back on and proceed.

  8. Motorola Droid RAZR M Headphone Jack Replacement: crwdns2935265:08crwdnd2935265:01crwdnd2935265:03crwdne2935265:0 Motorola Droid RAZR M Headphone Jack Replacement: crwdns2935265:08crwdnd2935265:02crwdnd2935265:03crwdne2935265:0 Motorola Droid RAZR M Headphone Jack Replacement: crwdns2935265:08crwdnd2935265:03crwdnd2935265:03crwdne2935265:0
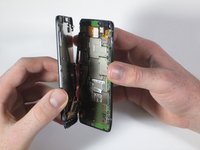
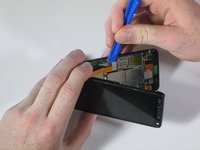
    • Like a clamshell, slowly open the device from the top. Open the remainder of the device slowly while being mindful of the flat orange wire that connects the motherboard to the front assembly.

    • Undo the snap connection in the lower left corner by inserting the plastic opening tool under the end of the orange wire connected to the motherboard. Lift gently.

    • Once the snap connection is undone, pull apart the front assembly from the rest of the phone.

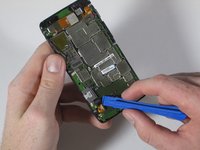
  9. Motorola Droid RAZR M Headphone Jack Replacement, Motherboard: crwdns2935265:09crwdnd2935265:01crwdnd2935265:02crwdne2935265:0 Motorola Droid RAZR M Headphone Jack Replacement, Motherboard: crwdns2935265:09crwdnd2935265:02crwdnd2935265:02crwdne2935265:0
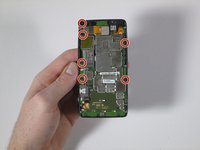
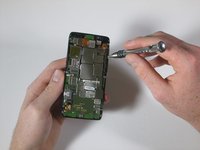
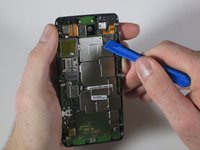
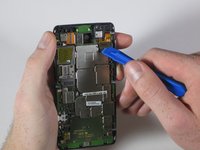
    • Remove the six 4mm T5 Torx screws located along the outer edge of the motherboard.

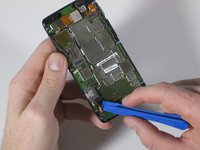
  10. Motorola Droid RAZR M Headphone Jack Replacement: crwdns2935265:010crwdnd2935265:01crwdnd2935265:02crwdne2935265:0 Motorola Droid RAZR M Headphone Jack Replacement: crwdns2935265:010crwdnd2935265:02crwdnd2935265:02crwdne2935265:0
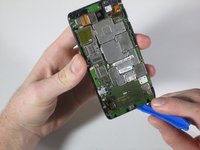
    • Disconnect the snap connection in the lower left corner by prying underneath using the plastic opening tool.

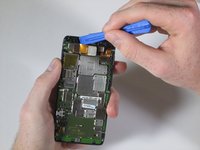
  11. Motorola Droid RAZR M Headphone Jack Replacement: crwdns2935265:011crwdnd2935265:01crwdnd2935265:02crwdne2935265:0 Motorola Droid RAZR M Headphone Jack Replacement: crwdns2935265:011crwdnd2935265:02crwdnd2935265:02crwdne2935265:0
    • Disconnect the snap connection in the upper left corner by prying underneath using the plastic opening tool.

    • As you undo the snap connection, pull the rear facing camera off completely. It will slide out of its slot in the motherboard.

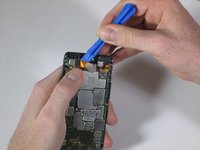
  12. Motorola Droid RAZR M Headphone Jack Replacement: crwdns2935265:012crwdnd2935265:01crwdnd2935265:02crwdne2935265:0 Motorola Droid RAZR M Headphone Jack Replacement: crwdns2935265:012crwdnd2935265:02crwdnd2935265:02crwdne2935265:0
    • Disconnect the snap connection in the upper right corner by prying underneath using the plastic opening tool.

  13. Motorola Droid RAZR M Headphone Jack Replacement: crwdns2935265:013crwdnd2935265:01crwdnd2935265:03crwdne2935265:0 Motorola Droid RAZR M Headphone Jack Replacement: crwdns2935265:013crwdnd2935265:02crwdnd2935265:03crwdne2935265:0 Motorola Droid RAZR M Headphone Jack Replacement: crwdns2935265:013crwdnd2935265:03crwdnd2935265:03crwdne2935265:0
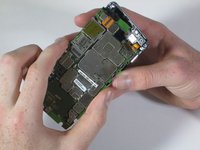
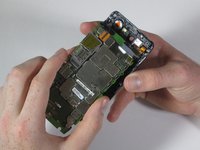
    • By inserting the plastic opening tool between the motherboard and rear casing, lift the bottom of the motherboard from the rear casing.

    • Use your fingers to gently pull the motherboard down and out of the rear casing.

  14. Motorola Droid RAZR M Headphone Jack Replacement, Headphone Jack: crwdns2935265:014crwdnd2935265:01crwdnd2935265:02crwdne2935265:0 Motorola Droid RAZR M Headphone Jack Replacement, Headphone Jack: crwdns2935265:014crwdnd2935265:02crwdnd2935265:02crwdne2935265:0
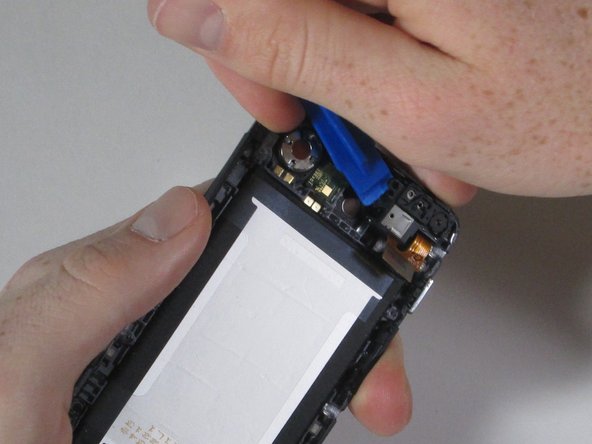
    • Wedge the plastic opening tool between the front-facing camera’s casing and the rear assembly. Pry until the camera snaps off.

  15. Motorola Droid RAZR M Headphone Jack Replacement: crwdns2935265:015crwdnd2935265:01crwdnd2935265:01crwdne2935265:0
    • Wedge a small plastic opening tool between the top edge of the headphone jack and the rear assembly casing. There is adhesive securing the headphone jack so you may need to use a decent amount of force to pry away the headphone jack from its clear plastic casing.

crwdns2915888:0crwdne2915888:0

To reassemble your device, follow these instructions in reverse order.

crwdns2935227:0crwdne2935227:0

Ethan Look

crwdns2935283:004/21/15crwdne2935283:0

498 crwdns2915208:0crwdne2915208:0

crwdns2935297:03crwdne2935297:0
crwdns2915084:0crwdne2915084:0
Cal Poly, Team 15-1, Amido Spring 2015 crwdns2935289:0Cal Poly, Team 15-1, Amido Spring 2015crwdne2935289:0

CPSU-AMIDO-S15S15G1

crwdns2931471:04crwdne2931471:0

crwdns2935297:014crwdne2935297:0

crwdns2944067:00crwdne2944067:0

crwdns2917038:0crwdne2917038:0

crwdns2936625:0crwdne2936625:0:

crwdns2936751:024crwdne2936751:0 0

crwdns2936753:07crwdne2936753:0 8

crwdns2936753:030crwdne2936753:0 11

crwdns2942667:0crwdne2942667:0 551