crwdns2933423:0crwdne2933423:0
crwdns2947577:0crwdnd2947577:0crwdne2947577:0

Motorola Droid RAZR HD Power Button Replacement

crwdns2942213:0crwdne2942213:0

    1. Motorola Droid RAZR HD Power Button Replacement, Front Panel Assembly: crwdns2935265:01crwdnd2935265:01crwdnd2935265:01crwdne2935265:0
      • Power off the device before disassembly to avoid damage or harm from electrical surges.

      • Remove the two 4.5mm screws in the bottom left and right corners of the device using a T4 Torx Screwdriver.

      crwdns2952109:0crwdne2952109:0

      crwdns2917038:0crwdne2917038:0

    2. Motorola Droid RAZR HD Power Button Replacement: crwdns2935265:02crwdnd2935265:01crwdnd2935265:01crwdne2935265:0
      • Holding the device in your hand, push the screen towards the top of the phone until it disconnects from the base of the phone.

      crwdns2952109:0crwdne2952109:0

      crwdns2917038:0crwdne2917038:0

    3. Motorola Droid RAZR HD Power Button Replacement: crwdns2935265:03crwdnd2935265:01crwdnd2935265:01crwdne2935265:0
      • Use a plastic opening tool to lift the screen from the phone.

      • Do not try to completely detach the screen; cables are still connected to the device and can be damaged.

      crwdns2952109:0crwdne2952109:0

      crwdns2917038:0crwdne2917038:0

    4. Motorola Droid RAZR HD Power Button Replacement: crwdns2935265:04crwdnd2935265:01crwdnd2935265:02crwdne2935265:0 Motorola Droid RAZR HD Power Button Replacement: crwdns2935265:04crwdnd2935265:02crwdnd2935265:02crwdne2935265:0
      crwdns2935267:0crwdne2935267:0
      Tweezers
      $4.99
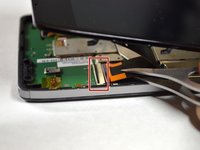
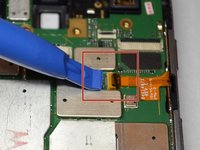
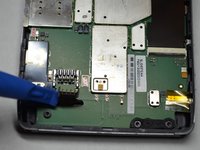
      • Use tweezers to remove the yellow tape covering the lcd/digitizer cable connector.

      • Carefully lift up the black locking tab to release the lcd/digitizer cable.

      • The cable connector is located on the bottom right section of the phone.

      crwdns2952109:0crwdne2952109:0

      crwdns2917038:0crwdne2917038:0

    5. Motorola Droid RAZR HD Power Button Replacement: crwdns2935265:05crwdnd2935265:01crwdnd2935265:01crwdne2935265:0
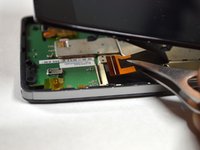
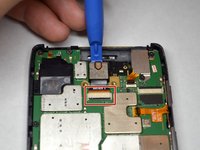
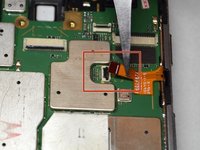
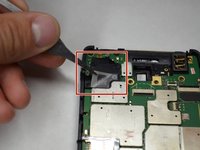
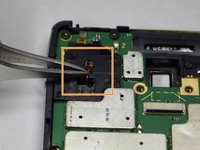
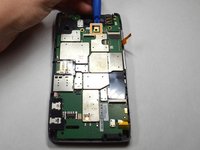
      • Lift up the screen further to reveal another cable at the top of the device connecting the motherboard to the screen.

      • This connector is located on the top right section of the phone.

      • Use tweezers to lift the black bar on top of the ZIF connector.

      • Pull the ribbon cable out of the connector with tweezers.

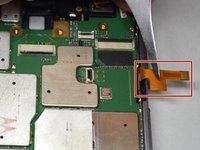
      • Now that there are no cables connecting the screen to the motherboard, remove the screen.

      crwdns2952109:0crwdne2952109:0

      crwdns2917038:0crwdne2917038:0

    1. Motorola Droid RAZR HD Power Button Replacement, Rear Facing Camera: crwdns2935265:06crwdnd2935265:01crwdnd2935265:02crwdne2935265:0 Motorola Droid RAZR HD Power Button Replacement, Rear Facing Camera: crwdns2935265:06crwdnd2935265:02crwdnd2935265:02crwdne2935265:0
      crwdns2935267:0crwdne2935267:0
      Tweezers
      $4.99
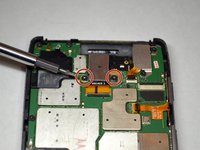
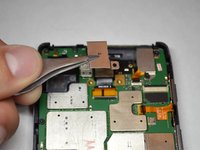
      • Remove the two 3.5mm Torx T4 screws securing the rear facing camera.

      • Using tweezers, remove the metal shield protecting the rear facing camera.

      crwdns2952109:0crwdne2952109:0

      crwdns2917038:0crwdne2917038:0

    2. Motorola Droid RAZR HD Power Button Replacement: crwdns2935265:07crwdnd2935265:01crwdnd2935265:02crwdne2935265:0 Motorola Droid RAZR HD Power Button Replacement: crwdns2935265:07crwdnd2935265:02crwdnd2935265:02crwdne2935265:0
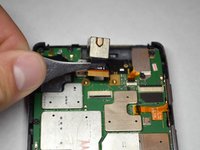
      • Use a plastic opening tool to lift up the rear camera.

      • Use tweezers to lift and unlock the black bar on top of the rear camera's ZIF connector.

      • Pull the camera out of the connector.

      • You will need to unplug the rear camera from its connector on the motherboard.

      crwdns2952109:0crwdne2952109:0

      crwdns2917038:0crwdne2917038:0

    1. Motorola Droid RAZR HD Power Button Replacement, Motherboard: crwdns2935265:08crwdnd2935265:01crwdnd2935265:02crwdne2935265:0 Motorola Droid RAZR HD Power Button Replacement, Motherboard: crwdns2935265:08crwdnd2935265:02crwdnd2935265:02crwdne2935265:0
      crwdns2935267:0crwdne2935267:0
      Tweezers
      $4.99
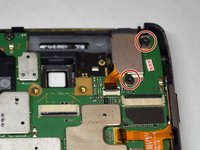
      • Remove the two 3.5mm Torx T4 screws securing the headphone jack cable/cover.

      • Using tweezers, disconnect the headphone jack cable/cover and remove it. The headphone jack will stay where it is.

      • The metal shield is attached to the headphone jack.

      crwdns2952109:0crwdne2952109:0

      crwdns2917038:0crwdne2917038:0

    2. Motorola Droid RAZR HD Power Button Replacement: crwdns2935265:09crwdnd2935265:01crwdnd2935265:03crwdne2935265:0 Motorola Droid RAZR HD Power Button Replacement: crwdns2935265:09crwdnd2935265:02crwdnd2935265:03crwdne2935265:0 Motorola Droid RAZR HD Power Button Replacement: crwdns2935265:09crwdnd2935265:03crwdnd2935265:03crwdne2935265:0
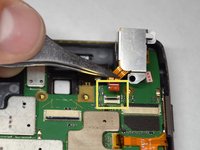
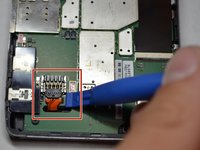
      • Using a plastic opening tool or tweezers, disconnect the power button connector.

      • Carefully peel back the adhesive cable with the tweezers so it is not in the way of the motherboard.

      crwdns2952109:0crwdne2952109:0

      crwdns2917038:0crwdne2917038:0

    3. Motorola Droid RAZR HD Power Button Replacement: crwdns2935265:010crwdnd2935265:01crwdnd2935265:02crwdne2935265:0 Motorola Droid RAZR HD Power Button Replacement: crwdns2935265:010crwdnd2935265:02crwdnd2935265:02crwdne2935265:0
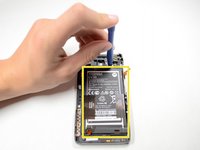
      • Disconnect the battery from the motherboard by lifting up with the plastic opening tool near the base of the cable.

      • Bend the battery cable straight up and out of the way of the motherboard.

      crwdns2952109:0crwdne2952109:0

      crwdns2917038:0crwdne2917038:0

    4. Motorola Droid RAZR HD Power Button Replacement: crwdns2935265:011crwdnd2935265:01crwdnd2935265:02crwdne2935265:0 Motorola Droid RAZR HD Power Button Replacement: crwdns2935265:011crwdnd2935265:02crwdnd2935265:02crwdne2935265:0
      • Using tweezers, peel back the adhesive covering the speaker connector.

      • Using tweezers, disconnect the speaker connector by lifting underneath the base of the connector.

      crwdns2952109:0crwdne2952109:0

      crwdns2917038:0crwdne2917038:0

    5. Motorola Droid RAZR HD Power Button Replacement: crwdns2935265:012crwdnd2935265:01crwdnd2935265:01crwdne2935265:0
      • Locate the sim card/micro sd tray on the side of the device.

      • Push a small rod, such as a paper clip or sim card tool, into the opening to eject and remove the tray.

      crwdns2952109:0crwdne2952109:0

      crwdns2917038:0crwdne2917038:0

    6. Motorola Droid RAZR HD Power Button Replacement: crwdns2935265:013crwdnd2935265:01crwdnd2935265:02crwdne2935265:0 Motorola Droid RAZR HD Power Button Replacement: crwdns2935265:013crwdnd2935265:02crwdnd2935265:02crwdne2935265:0
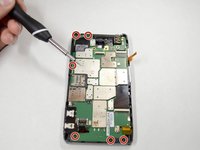
      • Remove the six 3.5mm Torx T4 screws securing the motherboard to the device frame.

      • Carefully pry up the motherboard from the frame using a plastic opening tool.

      • Watch for obstructions such as loose cables.

      crwdns2952109:0crwdne2952109:0

      crwdns2917038:0crwdne2917038:0

    1. Motorola Droid RAZR HD Power Button Replacement, Battery: crwdns2935265:014crwdnd2935265:01crwdnd2935265:02crwdne2935265:0 Motorola Droid RAZR HD Power Button Replacement, Battery: crwdns2935265:014crwdnd2935265:02crwdnd2935265:02crwdne2935265:0
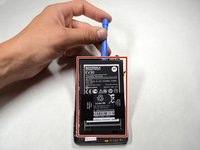
      • Use a plastic opening tool to lift up the battery from the frame of the device.

      • Remove the battery.

      crwdns2952109:0crwdne2952109:0

      crwdns2917038:0crwdne2917038:0

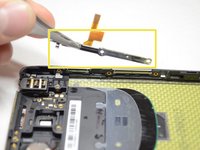
    1. Motorola Droid RAZR HD Power Button Replacement, Power Button: crwdns2935265:015crwdnd2935265:01crwdnd2935265:01crwdne2935265:0
      • Remove the three 3.5mm Torx T3 screws holding the power/volume button cable to the side of the frame.

      crwdns2952109:0crwdne2952109:0

      crwdns2917038:0crwdne2917038:0

    2. Motorola Droid RAZR HD Power Button Replacement: crwdns2935265:016crwdnd2935265:01crwdnd2935265:02crwdne2935265:0 Motorola Droid RAZR HD Power Button Replacement: crwdns2935265:016crwdnd2935265:02crwdnd2935265:02crwdne2935265:0
      crwdns2935267:0crwdne2935267:0
      Tweezers
      $4.99
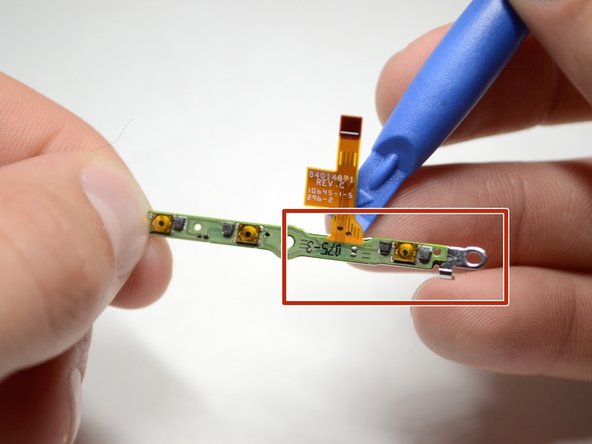
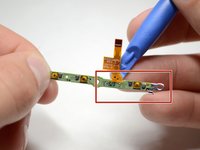
      • Using tweezers, remove the power/volume button flex cable.

      • Remove the flex cable from the metal bracket using a plastic opening tool.

      crwdns2952109:0crwdne2952109:0

      crwdns2917038:0crwdne2917038:0

crwdns2915888:0crwdne2915888:0

To reassemble your device, follow these instructions in reverse order.

crwdns2935221:0crwdne2935221:0

crwdns2935229:05crwdne2935229:0

Blake Nielsen

crwdns2935283:004/14/15crwdne2935283:0

536 crwdns2915208:0crwdne2915208:0

crwdns2935297:03crwdne2935297:0

crwdns2935287:0crwdne2935287:0

Cal Poly, Team 4-4, Maness Spring 2015 crwdns2935289:0Cal Poly, Team 4-4, Maness Spring 2015crwdne2935289:0

CPSU-MANESS-S15S4G4

crwdns2931471:05crwdne2931471:0

crwdns2935297:072crwdne2935297:0

crwdns2947412:00crwdne2947412:0

crwdns2917038:0crwdne2917038:0

crwdns2936625:0crwdne2936625:0:

crwdns2936751:024crwdne2936751:0 11

crwdns2936753:07crwdne2936753:0 26

crwdns2936753:030crwdne2936753:0 40

crwdns2942667:0crwdne2942667:0 2,547