crwdns2933423:0crwdne2933423:0
crwdns2947577:0crwdnd2947577:0crwdne2947577:0

Motorola Droid Pro Motherboard Replacement

crwdns2942213:0crwdne2942213:0

    1. Motorola Droid Pro Motherboard Replacement, Battery: crwdns2935265:01crwdnd2935265:01crwdnd2935265:01crwdne2935265:0
      • Remove the back cover using the thumb tab located on the bottom of the phone.

      crwdns2952109:0crwdne2952109:0

      crwdns2917038:0crwdne2917038:0

    2. Motorola Droid Pro Motherboard Replacement: crwdns2935265:02crwdnd2935265:01crwdnd2935265:02crwdne2935265:0 Motorola Droid Pro Motherboard Replacement: crwdns2935265:02crwdnd2935265:02crwdnd2935265:02crwdne2935265:0
      • Remove the battery using the thumb tab.

      crwdns2952109:0crwdne2952109:0

      crwdns2917038:0crwdne2917038:0

    1. Motorola Droid Pro Motherboard Replacement, SD Card/SIM Card PCB Board: crwdns2935265:03crwdnd2935265:01crwdnd2935265:02crwdne2935265:0 Motorola Droid Pro Motherboard Replacement, SD Card/SIM Card PCB Board: crwdns2935265:03crwdnd2935265:02crwdnd2935265:02crwdne2935265:0
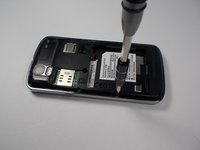
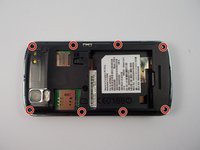
      • Using a T4 Torx driver, remove the eight 4 mm back panel screws.

      crwdns2952109:0crwdne2952109:0

      crwdns2917038:0crwdne2917038:0

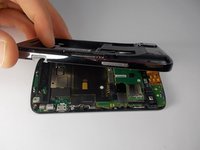
    2. Motorola Droid Pro Motherboard Replacement: crwdns2935265:04crwdnd2935265:01crwdnd2935265:03crwdne2935265:0 Motorola Droid Pro Motherboard Replacement: crwdns2935265:04crwdnd2935265:02crwdnd2935265:03crwdne2935265:0 Motorola Droid Pro Motherboard Replacement: crwdns2935265:04crwdnd2935265:03crwdnd2935265:03crwdne2935265:0
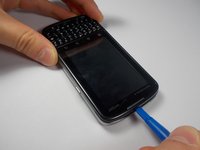
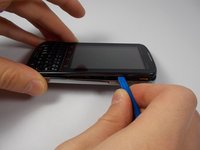
      • Use a plastic opening tool to open the phone along the sides between the front panel and the chrome trim.

      • It is held together by small clips that lock in. You may have to use extra force to unlock them.

      • Go around on all sides of the phone, unlocking the clips. Then pull the back panel off.

      crwdns2952109:0crwdne2952109:0

      crwdns2917038:0crwdne2917038:0

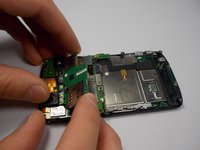
    3. Motorola Droid Pro Motherboard Replacement: crwdns2935265:05crwdnd2935265:01crwdnd2935265:02crwdne2935265:0 Motorola Droid Pro Motherboard Replacement: crwdns2935265:05crwdnd2935265:02crwdnd2935265:02crwdne2935265:0
      • Gently lift the SD & SIM card board (PCB) as shown.

      • There is a ribbon cable attached underneath. Gently pull the PCB board away from the phone and it will detach easily.

      crwdns2952109:0crwdne2952109:0

      crwdns2917038:0crwdne2917038:0

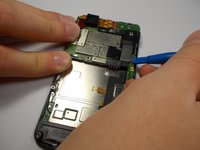
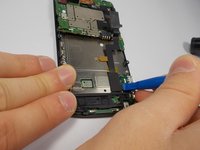
    1. Motorola Droid Pro Motherboard Replacement, Motherboard: crwdns2935265:06crwdnd2935265:01crwdnd2935265:02crwdne2935265:0 Motorola Droid Pro Motherboard Replacement, Motherboard: crwdns2935265:06crwdnd2935265:02crwdnd2935265:02crwdne2935265:0
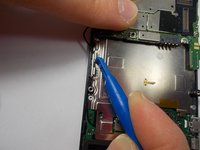
      • Use your plastic opening tool to disconnect the motherboard/keyboard ribbon cable.

      • There are small tabs on the side of the connectors to wedge your tool under.

      crwdns2952109:0crwdne2952109:0

      crwdns2917038:0crwdne2917038:0

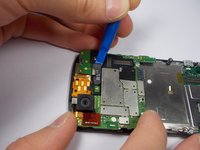
    2. Motorola Droid Pro Motherboard Replacement: crwdns2935265:07crwdnd2935265:01crwdnd2935265:02crwdne2935265:0 Motorola Droid Pro Motherboard Replacement: crwdns2935265:07crwdnd2935265:02crwdnd2935265:02crwdne2935265:0
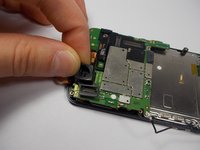
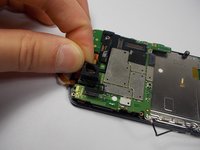
      • Use your plastic opening tool to disconnect the two ribbon cables at the top of the phone.

      crwdns2952109:0crwdne2952109:0

      crwdns2917038:0crwdne2917038:0

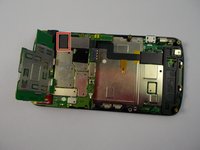
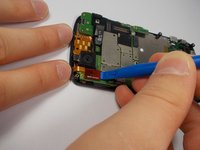
    3. Motorola Droid Pro Motherboard Replacement: crwdns2935265:08crwdnd2935265:01crwdnd2935265:02crwdne2935265:0 Motorola Droid Pro Motherboard Replacement: crwdns2935265:08crwdnd2935265:02crwdnd2935265:02crwdne2935265:0
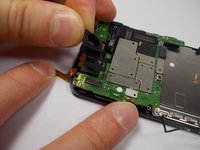
      • Disconnect the 2nd keyboard connector from the motherboard and remove it from its side holders.

      • This cable is fragile so be careful when disconnecting and moving it around.

      crwdns2952109:0crwdne2952109:0

      crwdns2917038:0crwdne2917038:0

    4. Motorola Droid Pro Motherboard Replacement: crwdns2935265:09crwdnd2935265:01crwdnd2935265:01crwdne2935265:0
      • Use a T5 Torx Screwdriver to unscrew the 2mm screw.

      crwdns2952109:0crwdne2952109:0

      crwdns2917038:0crwdne2917038:0

    5. Motorola Droid Pro Motherboard Replacement: crwdns2935265:010crwdnd2935265:01crwdnd2935265:03crwdne2935265:0 Motorola Droid Pro Motherboard Replacement: crwdns2935265:010crwdnd2935265:02crwdnd2935265:03crwdne2935265:0 Motorola Droid Pro Motherboard Replacement: crwdns2935265:010crwdnd2935265:03crwdnd2935265:03crwdne2935265:0
      • Remove the camera's rubber seal by pulling it off. It is not connected to anything.

      crwdns2952109:0crwdne2952109:0

      crwdns2917038:0crwdne2917038:0

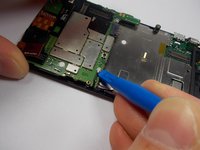
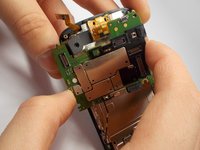
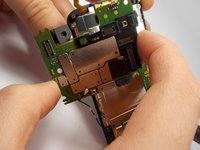
    6. Motorola Droid Pro Motherboard Replacement: crwdns2935265:011crwdnd2935265:01crwdnd2935265:02crwdne2935265:0 Motorola Droid Pro Motherboard Replacement: crwdns2935265:011crwdnd2935265:02crwdnd2935265:02crwdne2935265:0
      • To remove the motherboard, pull it to the side. The camera that is connected to the motherboard does not pull straight up and out from its holder.

      crwdns2952109:0crwdne2952109:0

      crwdns2917038:0crwdne2917038:0

crwdns2915888:0crwdne2915888:0

To reassemble your device, follow these instructions in reverse order.

crwdns2935221:0crwdne2935221:0

crwdns2935229:03crwdne2935229:0

Richard Bellizzi

crwdns2935283:010/28/15crwdne2935283:0

352 crwdns2915208:0crwdne2915208:0

crwdns2935297:02crwdne2935297:0

crwdns2935287:0crwdne2935287:0

UMass Dartmouth, Team 1-6, Miles Fall 2015 crwdns2935289:0UMass Dartmouth, Team 1-6, Miles Fall 2015crwdne2935289:0

UMASSD-MILES-F15S1G6

crwdns2931471:03crwdne2931471:0

crwdns2935297:042crwdne2935297:0

crwdns2947412:00crwdne2947412:0

crwdns2917038:0crwdne2917038:0

crwdns2936625:0crwdne2936625:0:

crwdns2936751:024crwdne2936751:0 1

crwdns2936753:07crwdne2936753:0 9

crwdns2936753:030crwdne2936753:0 35

crwdns2942667:0crwdne2942667:0 689