crwdns2933423:0crwdne2933423:0
crwdns2947577:0crwdnd2947577:0crwdne2947577:0

Motorola Droid 2 Rear Case Replacement

crwdns2942213:0crwdne2942213:0

    1. Motorola Droid 2 Rear Case Replacement, Battery: crwdns2935265:01crwdnd2935265:01crwdnd2935265:03crwdne2935265:0 Motorola Droid 2 Rear Case Replacement, Battery: crwdns2935265:01crwdnd2935265:02crwdnd2935265:03crwdne2935265:0 Motorola Droid 2 Rear Case Replacement, Battery: crwdns2935265:01crwdnd2935265:03crwdnd2935265:03crwdne2935265:0
      • Slide the battery cover toward the bottom edge of the phone.

      • Remove the battery cover from the rear of the phone.

      crwdns2952109:0crwdne2952109:0

      crwdns2917038:0crwdne2917038:0

    2. Motorola Droid 2 Rear Case Replacement: crwdns2935265:02crwdnd2935265:01crwdnd2935265:02crwdne2935265:0 Motorola Droid 2 Rear Case Replacement: crwdns2935265:02crwdnd2935265:02crwdnd2935265:02crwdne2935265:0
      • Lift the battery out of the Droid 2 from the edge closest to the bottom of the phone.

      • Remove the battery from the Droid 2.

      crwdns2952109:0crwdne2952109:0

      crwdns2917038:0crwdne2917038:0

    1. Motorola Droid 2 Rear Case Replacement, Rear Case: crwdns2935265:03crwdnd2935265:01crwdnd2935265:02crwdne2935265:0 Motorola Droid 2 Rear Case Replacement, Rear Case: crwdns2935265:03crwdnd2935265:02crwdnd2935265:02crwdne2935265:0
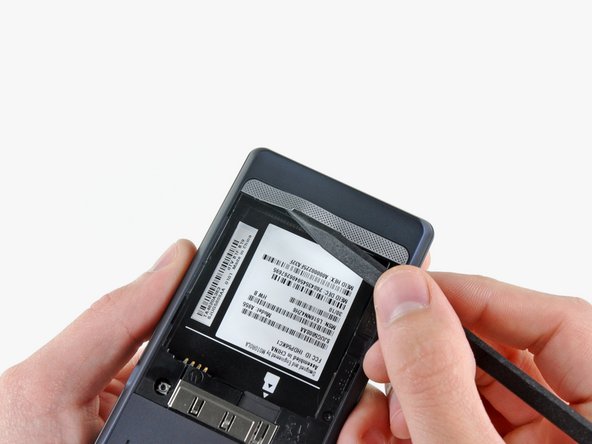
      • Using the tip of a spudger, peel up one corner of the silver ribbon below the battery compartment.

      • Peel the ribbon off the phone.

      crwdns2952109:0crwdne2952109:0

      crwdns2917038:0crwdne2917038:0

    2. Motorola Droid 2 Rear Case Replacement: crwdns2935265:04crwdnd2935265:01crwdnd2935265:01crwdne2935265:0
      • Insert the flat end of a spudger and pry the plastic camera cover up off the phone.

      • The thin plastic cover is attached to the phone with an adhesive. Work slowly and carefully.

      crwdns2952109:0crwdne2952109:0

      crwdns2917038:0crwdne2917038:0

    3. Motorola Droid 2 Rear Case Replacement: crwdns2935265:05crwdnd2935265:01crwdnd2935265:01crwdne2935265:0
      • Use the tip of a spudger to remove the camera bezel stuck to the rear case.

      crwdns2952109:0crwdne2952109:0

      crwdns2917038:0crwdne2917038:0

    4. Motorola Droid 2 Rear Case Replacement: crwdns2935265:06crwdnd2935265:01crwdnd2935265:01crwdne2935265:0
      • Remove the seven 5.5 mm T5 Torx screws securing the rear case to the inner case.

      crwdns2952109:0crwdne2952109:0

      crwdns2917038:0crwdne2917038:0

    5. Motorola Droid 2 Rear Case Replacement: crwdns2935265:07crwdnd2935265:01crwdnd2935265:01crwdne2935265:0
      • Insert the flat end of a spudger and pry downwards to release the plastic tab holding the rear case to the motherboard screw.

      crwdns2952109:0crwdne2952109:0

      crwdns2917038:0crwdne2917038:0

    6. Motorola Droid 2 Rear Case Replacement: crwdns2935265:08crwdnd2935265:01crwdnd2935265:01crwdne2935265:0
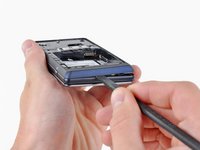
      • Gently insert a spudger between the rear case and front case at the top of the phone, near the audio jack.

      • Carefully pry the top edge of the rear case up from the rest of the phone.

      crwdns2952109:0crwdne2952109:0

      crwdns2917038:0crwdne2917038:0

    7. Motorola Droid 2 Rear Case Replacement: crwdns2935265:09crwdnd2935265:01crwdnd2935265:02crwdne2935265:0 Motorola Droid 2 Rear Case Replacement: crwdns2935265:09crwdnd2935265:02crwdnd2935265:02crwdne2935265:0
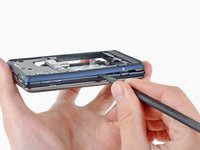
      • With the spudger still inserted between the rear case and front case, slide the spudger along the right edge of the device, moving toward the bottom, prying as you go.

      • Continue prying along the bottom edge of the device from right to left, freeing it from the front panel.

      crwdns2952109:0crwdne2952109:0

      crwdns2917038:0crwdne2917038:0

    8. Motorola Droid 2 Rear Case Replacement: crwdns2935265:010crwdnd2935265:01crwdnd2935265:02crwdne2935265:0 Motorola Droid 2 Rear Case Replacement: crwdns2935265:010crwdnd2935265:02crwdnd2935265:02crwdne2935265:0
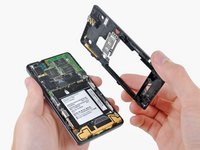
      • Continue prying the rear case from the front case along the left side, moving from bottom to top.

      • Lift the rear case up out of the phone.

      • At this point, the button covers on the side of the phone are free and may fall out if you tip the phone upside down.

      crwdns2952109:0crwdne2952109:0

      crwdns2917038:0crwdne2917038:0

crwdns2915888:0crwdne2915888:0

To reassemble your device, follow these instructions in reverse order.

crwdns2935221:0crwdne2935221:0

crwdns2935229:03crwdne2935229:0

crwdns2947412:00crwdne2947412:0

crwdns2917038:0crwdne2917038:0

crwdns2936625:0crwdne2936625:0:

crwdns2936751:024crwdne2936751:0 4

crwdns2936753:07crwdne2936753:0 23

crwdns2936753:030crwdne2936753:0 61

crwdns2942667:0crwdne2942667:0 6,718