crwdns2915892:0crwdne2915892:0
This guide has been created to help replace the full screen (not just the glass) on a Droid Maxx.
crwdns2942213:0crwdne2942213:0
-
-
Find the volume buttons located on the side of the Droid Maxx.
-
Take the plastic opening tool and insert it into the gap between the volume buttons and the case.
-
Using the flat tip of the plastic opening tool, press firmly against the case until you hear a “snap” sound.
-
Remove the buttons carefully. Do not bend or force the part since it also serves as a tray for placing a SIM Card.
-
-
-
Using the flat tip of the plastic opening tool, press firmly against the case until you hear an audible click.
-
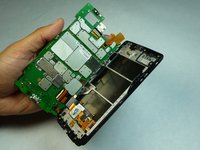
Once the top part of the case is separated from the frame, grip the bottom part of the rubber case with your finger and slide the case down to remove it completely.
-
-
-
-
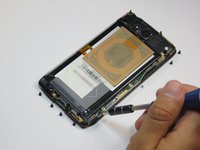
Using the Torx T5 Screwdriver, carefully remove all of the screws in the motherboard.
-
There are 8 black screws: 4 at the top and 4 at the bottom of the motherboard.
-
There are 2 silver screws on the side: 1 at the bottom and 1 in the middle.
-
Use either a T3 (Ultra) or T4 (MAXX) to remove the single screw securing the camera housing.
-
Using the plastic opening tool, gently lift the two tabs in the upper plastic cover that surrounds the camera to release the cover.
-
-
-
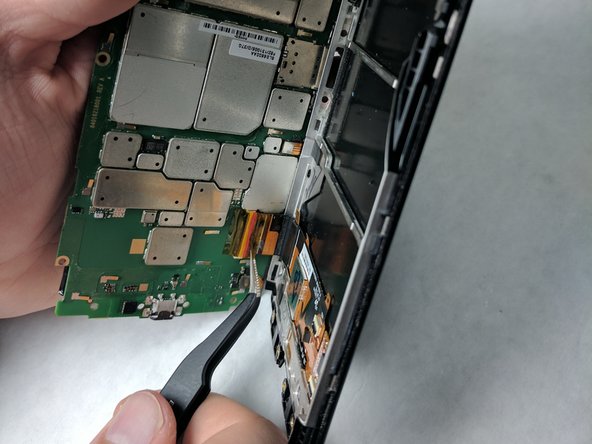
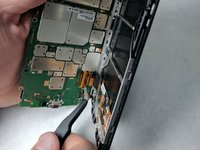
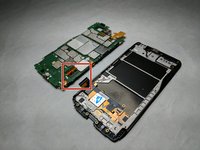
Carefully disconnect the ribbon cable from the motherboard and front screen.
-


To reassemble your device, follow these instructions in reverse order.
To reassemble your device, follow these instructions in reverse order.
crwdns2935221:0crwdne2935221:0
crwdns2935229:06crwdne2935229:0
crwdns2915084:0crwdne2915084:0

IUPUI, Team S2-G4, Harley Spring 2017 crwdns2935289:0IUPUI, Team S2-G4, Harley Spring 2017crwdne2935289:0
IUPUI-HARLEY-S17S2G4
crwdns2931471:04crwdne2931471:0
crwdns2935303:01crwdne2935303:0
crwdns2947412:02crwdne2947412:0
Where can I purchase the screen replacement for the droid maxx
That 3mm screw is a ##&&%. BE VERY CAREFUL WITH IT! I haven’t figured out how to best loosen it yet; maybe small turn bursts so you don’t break the tines?