crwdns2915892:0crwdne2915892:0
Prerequisite-only guide for removing the midframe from the Moto G4, in order to access internal components for servicing.
crwdns2942213:0crwdne2942213:0
-
-
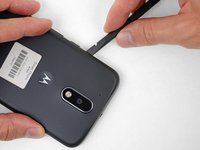
Insert a fingernail or a spudger into the notch on the bottom edge of the phone, near the charge port.
-
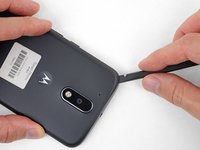
Gently twist or pry to open a small gap between the back cover and the body of the phone.
-
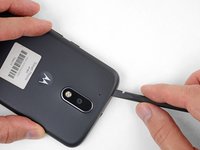
While keeping your tool (or fingernail) inserted into the gap between the back cover and the body of the phone, slide it around the corner to begin loosening the plastic clips holding the cover in place.
-
-
-
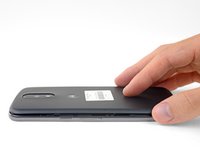
Slide your tool all along the side of the phone to separate more of the clips securing the back cover.
-
-
-
Keep your tool inserted slightly under the back cover, and slide it around the top corner.
-
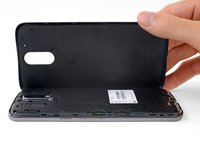
If necessary, continue prying around the remaining edges of the phone until the back cover comes free.
-
-
-
-
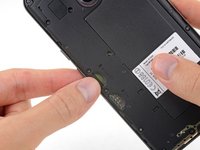
Push to eject and remove the MicroSD and SIM cards (if installed).
-
-
-
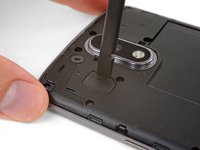
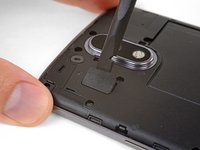
Use a spudger to pry up the rubber cover for the camera flash connector.
-
-
-
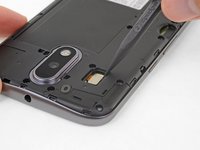
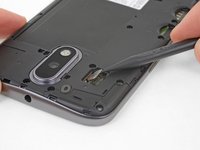
Use a spudger to disconnect the camera flash connector by prying it straight up.
-
-
-
Use a T3 Torx driver to remove the nineteen identical 3.1 mm screws securing the midframe.
-
-
-
Insert a spudger under the midframe at the top left corner, and gently twist to separate it from the body of the phone.
-


To reassemble your device, follow these instructions in reverse order.
To reassemble your device, follow these instructions in reverse order.

