
Motherboard Replacement

crwdns2959932:0crwdnd2959932:0John Wisthoffcrwdnd2959932:0crwdnd2959932:0crwdnd2959932:02crwdnd2959932:0crwdne2959932:0
crwdns2959936:0N'w 23, 2016crwdne2959936:0
crwdns2869540:0crwdne2869540:0: 1.5K
crwdns2959988:0crwdne2959988:0
- crwdns2959990:0crwdne2959990:0
- 0
- crwdns2959992:0crwdne2959992:0
- 16
- crwdns2959994:0crwdne2959994:0
- 102
- crwdns2959996:0crwdne2959996:0
- 1,458
crwdns2955950:0crwdne2955950:0: 1
crwdns2960002:01crwdne2960002:0.
crwdns2959984:0crwdne2959984:0: 0 1
crwdns2959956:0crwdne2959956:0
crwdns2959968:01crwdne2959968:0
crwdns2959986:0crwdne2959986:0: 0 1
crwdns2959958:0crwdne2959958:0
crwdns2959976:01crwdne2959976:0
crwdns2862601:0crwdne2862601:0
crwdns2862602:0crwdne2862602:0
crwdns2862603:0crwdne2862603:0
crwdns2862604:0crwdne2862604:0
crwdns2915892:0crwdne2915892:0
crwdns2959928:0crwdne2959928:0 ↓This guide will show you how to replace the motherboard in the Fellowes T7CM.
crwdns2959930:0crwdne2959930:0
crwdns2943213:0crwdne2943213:0
crwdns2943215:0crwdne2943215:0


-
-
-
Check to make sure the shredder is not plugged in to any electrical outlet.
-
Remove the shredder from the catch basket and place the silver side down on a flat surface.
-
Place the catch basket aside as you will not be needing it for the rest of the disassembly.
 crwdns2952109:0crwdne2952109:0
-
-
-
Flip the shredder silver side down and place on a flat even surface.
-
Remove the manufacturer's label in order to gain access to the hidden screw hole.
-
Locate all five of the case screws and remove them with a Phillips-Head screwdriver. The screws are located within the five marked circles in the photo. The size of the screws are 18 mm in length and head diameter of 5 mm.
-
-
-
Once all of the screws are removed, slowly pull apart the casing.
-
If the casing is not separating, gently wiggle the top part of the casing from the bottom part of the casing.
-
-
-
Open the casing as shown to prevent tangling or damaging the wires.
-
Take note to how the trigger assembly is attached before removal.
-
The trigger assembly is one part and should come off all together with little to no force applied.
-
Remove the trigger assembly.
-
-
-
-
-
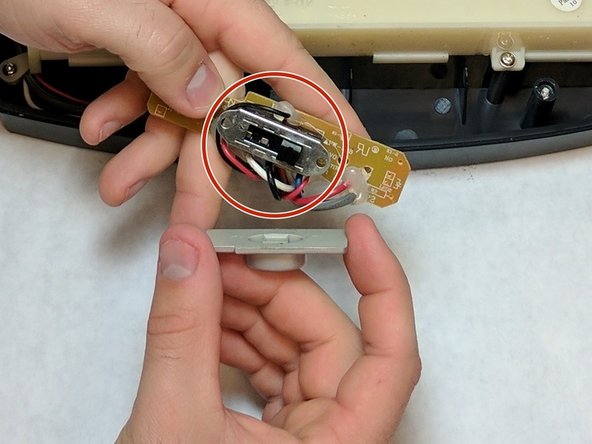
Unscrew both of the screws from the circuit board of the switch . Lift the circuit board away from the device. The screw length is 10 mm and the head diameter is 6 mm.
-
-
-
Remove the plastic switch case.
-
After the plastic case is removed, the switch can be replaced.
-
During the switch replacement, be careful of the springs that are held in side. They can potentially come loose and get lost.
-
-
-
-
-
-
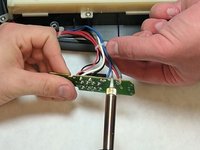
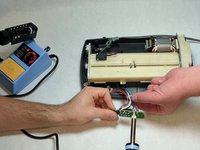
Desolder the wires from the motherboard. Learn more about soldering componentshere!
-
-
-
After all of the wires are removed, the motherboard can be lifted off and removed with ease.
-
-





To reassemble your device, follow these instructions in reverse order.

crwdns2935287:0crwdne2935287:0

IUPUI, Team 2-2, Baechle Fall 2016 crwdns2935289:0IUPUI, Team 2-2, Baechle Fall 2016crwdne2935289:0
IUPUI-BAECHLE-F16S2G2
crwdns2931471:04crwdne2931471:0
crwdns2935297:096crwdne2935297:0
