crwdns2942213:0crwdne2942213:0
-
-
The detergent drawer is removed, push down the yellow lever to remove it completely.
-
-
-
The lid has a small panel on both sides that can be levered out with a small screwdriver.
-
-
-
There is a Tx20 screw under each of these covers, remove this.
How to remove this screw
@sehrishnaz "is a Tx20 screw under each of these covers" You need a Tx20 wrench to remove those.
Diese Schrauben brauchen nicht heraus gedreht werden, sondern nur einige Umdrehungen lösen und dann wieder hinein drücken. Dadurch wird die Haltenase im Inneren frei gegeben und der Deckel kann dann angehoben werden.
-
-
-
The cover can now be lifted at the front and then pushed back slightly. At the rear end it is only slightly hooked.
-
-
-
The left side panel has three clearly visible screws at the top and three at the back, all Tx20. These must be removed. Caution, the three screws above are only identical to the bottom screw at the back, the other two screws from the back are different.
-
Caution, the side panel cannot be removed yet, in this step only loosen the screws.
Da es noch drei weitere Schrauben gibt, die hinter dem Frontteil versteckt sind, kann man das Seitenteil erst später abnehmen, wie in "Schritt 13" beschrieben wird. Dort wird das Seitenteil "linke Front" genannt.
Das rechte Seitenteil lässt sich übrigens fast analog entfernen, nur gibt es vorne evtl. eine Schraube mehr.
Ich habe übrigens eine Miele W4144 WPS.
@plachand Danke für den Hinweis der ungeschickten Wortwahl in Schritt 13, habe das geändert. Habe auch noch den Kommentar aufgenommen dass man hier in diesem Schritt das Seitenteil noch nicht abnehmen kann.
-
-
-
-
Remove the two Tx20 screws from the door lock.
-
-
-
Remove the Tx30 screw below the filler hole.
-
-
-
Lift the cover of the control bar slightly from behind and remove it.
-
-
-
The control panel is secured with one screw on the right side, remove this Tx20 screw.
Ich würde dringend empfehlen die Elektronik, die mit den zwei weiteren Torx 20 befestigt ist, auch auszubauen. Dann kommt man nämlich an die beiden Halteclip die die Bedienblende an der Vorderwand halten. Bei mir war leider ein Clip abgebrochen. Das hätte so vermieden werden können!
-
-
-
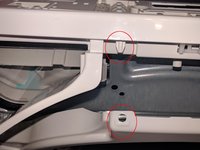
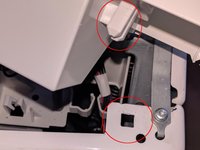
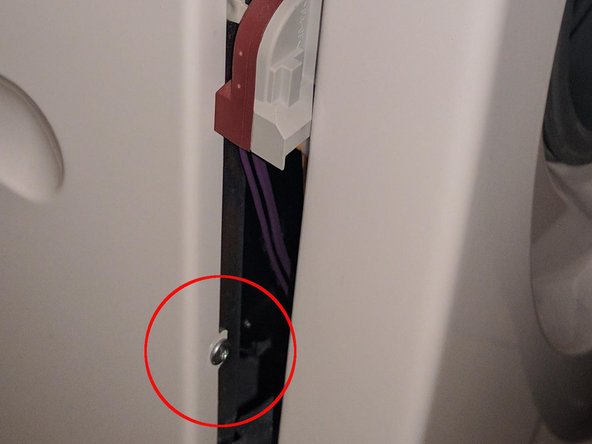
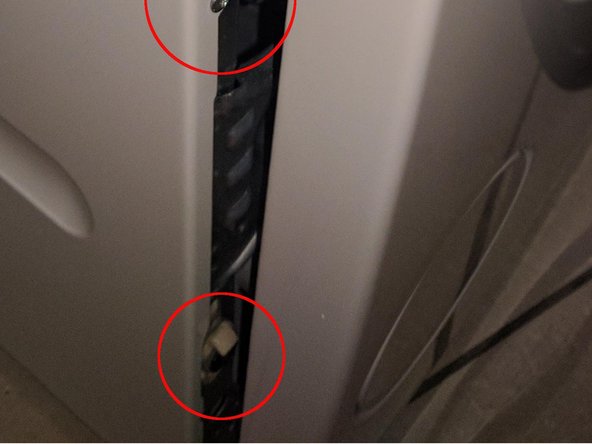
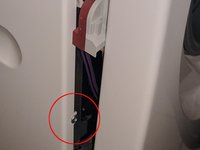
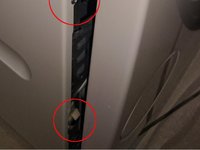
The control unit is hooked into two places, one to the right of the detergent drawer and one to the far right.
Wie ist diese Einhakung zu lösen?
Mit viel Kraft in die Höhe ziehen? Oder?
Ich hatte auf der linken Seite leider auch erhebliche Probleme das zu lösen. Leider ist mir dann die blaßweiße Klammer etwas rechts von den roten Kreisen abgebrochen. Keine Ahnung wie man das zerstörungsfrei raus bekommen soll.
-
-
-
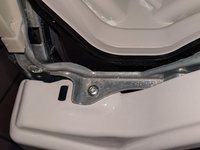
The front front is hooked to small feet, lift slightly to release. Make sure that the damper rubber remains on the feet. The front is still connected to the machine via the rubber boot. Keep holding the front.
Den Gummiring, den man im Bild sieht, findet man nicht an allen Maschinen dieses Typs.
-
-
-
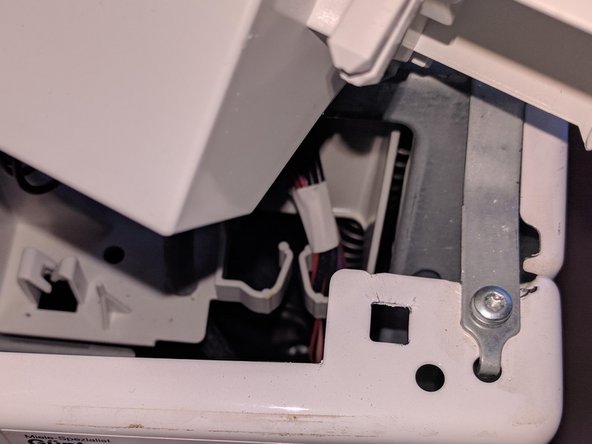
Now move the front a bit so that you can loosen the 3 Tx20 screws on the left front. Then reinsert the front panel and fix it with the two upper screws. The left front can now be removed. Attention when installing the left front later, it will be hooked in at the lower end.
-
Be careful when installing the left side cover later, it will be slightly hooked at the lower end.
Das Einhaken unten erfolgt über ein kleines weißes Plastikteil, das bei der Demontage gern herausspringt und man dann überlegen muss, wie es gesessen hat. Es liegt auf der Unterkante der Seitenwand in der rechteckigen Aussparung, höhere Seite der U-Form auf der Blechseite, der kleine Haken hält das Teil in der Aussparung fest.
Bei der rechten Seitenabdeckung beachten: Es gibt vier statt drei Schrauben. Die vierte sitzt in einem kleinen weißen Plastik-Kegel, der in die Frontseite ragt und ihren richtigen Sitz garantiert.
-
-
-
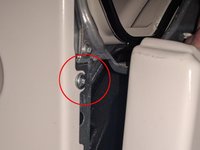
If the machine is to be operated while it is open, the door lock must be fastened first. The screw underneath the door collar has to be fastened as well.
-


Work the steps in reverse order to reassemble your device.
Work the steps in reverse order to reassemble your device.
crwdns2935221:0crwdne2935221:0
crwdns2935229:06crwdne2935229:0
crwdns2934873:0crwdne2934873:0
100%

crwdns2934883:0oldturkey03crwdne2934883:0 crwdns2934875:0crwdne2934875:0
crwdns2934877:0crwdne2934877:0 ›
crwdns2947412:05crwdne2947412:0
Vielen Dank an kapott für das Verfassen des Artikels. Ohne diese Anleitung hätte ich ziemliche Bedenken bei der Demontage gehabt, da man nie weiß, ob man eine Klammer oder ein Kabel abreißt.
Vielen Dank!
Sehr gute Erlärung, vielen Dank!
Bei dieser Maschine wurde leider viel zu lange mit dem Tausch der Stoßdämpfer gewartet und deshalb hat eine scharfe Kante vom Bottich die Rücklaufsperre vom Abwasser beschädigt. Ärgerlich, da das Teil teuer ist!
Ich bräuchte bitte nochmal Hilfe: Leider hat es sehr lange, bis jetzt, gedauert bis ich alle erforderlichen Ersatzteile zusammen hatte. Und nun habe ich blöderweise (die berühmte) eine Schraube übrig. Das ärgert mich! Kann mir bitte jemand sagen wo die hingehört? Torx 20 mit fester Unterlegscheibe und für Kunststoffgewinde, insgesamt 15 mm lang. Da sie sehr sauber ist, muss sie irgendwo verdeckt sitzen, aber ich finde nicht wo.
Ach ich Esel, Problem gelöst! Diese übrig gebliebenen Schraube gehörte zu dem gebraucht gekauften Rückflussverhinderer und ist somit doppelt vorhanden bzw überflüssig.
Guten Rutsch und langes Leben für die Mieles.