crwdns2942213:0crwdne2942213:0
-
-
The detergent drawer is removed, push down the yellow lever to remove it completely.
-
-
-
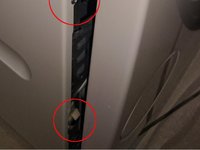
The lid has a small panel on both sides that can be levered out with a small screwdriver.
-
-
-
There is a Tx20 screw under each of these covers, remove this.
-
-
-
The cover can now be lifted at the front and then pushed back slightly. At the rear end it is only slightly hooked.
-
-
-
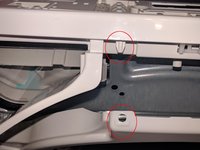
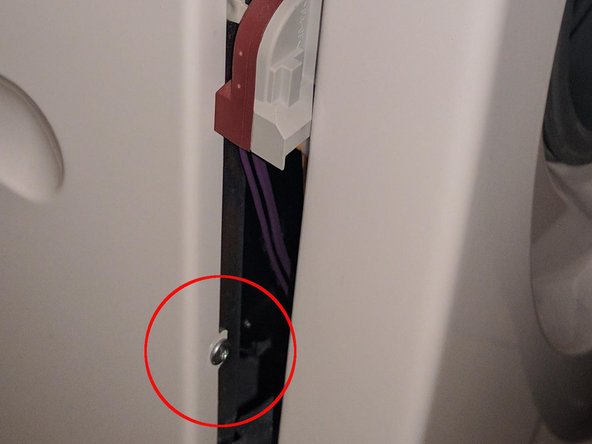
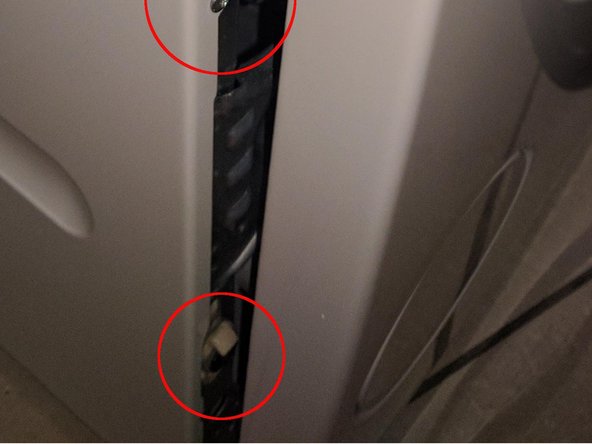
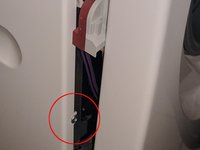
The left side panel has three clearly visible screws at the top and three at the back, all Tx20. These must be removed. Caution, the three screws above are only identical to the bottom screw at the back, the other two screws from the back are different.
-
Caution, the side panel cannot be removed yet, in this step only loosen the screws.
-
-
-
-
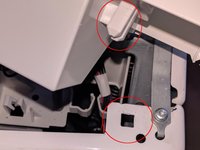
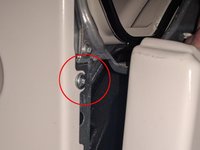
Remove the two Tx20 screws from the door lock.
-
-
-
Remove the Tx30 screw below the filler hole.
-
-
-
Lift the cover of the control bar slightly from behind and remove it.
-
-
-
The control panel is secured with one screw on the right side, remove this Tx20 screw.
-
-
-
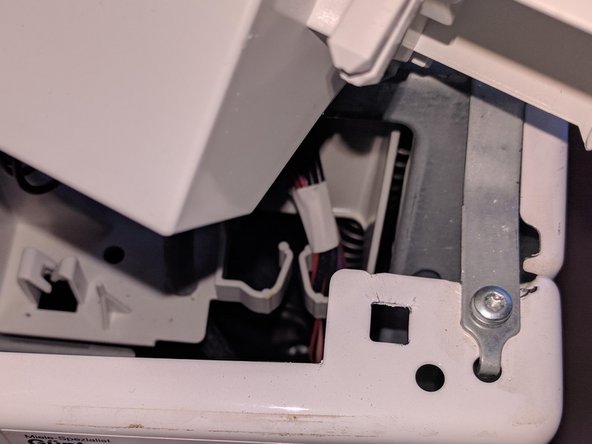
The control unit is hooked into two places, one to the right of the detergent drawer and one to the far right.
-
-
-
The front front is hooked to small feet, lift slightly to release. Make sure that the damper rubber remains on the feet. The front is still connected to the machine via the rubber boot. Keep holding the front.
-
-
-
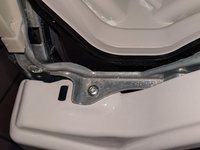
Now move the front a bit so that you can loosen the 3 Tx20 screws on the left front. Then reinsert the front panel and fix it with the two upper screws. The left front can now be removed. Attention when installing the left front later, it will be hooked in at the lower end.
-
Be careful when installing the left side cover later, it will be slightly hooked at the lower end.
-
-
-
If the machine is to be operated while it is open, the door lock must be fastened first. The screw underneath the door collar has to be fastened as well.
-


Work the steps in reverse order to reassemble your device.
Work the steps in reverse order to reassemble your device.
crwdns2935221:0crwdne2935221:0
crwdns2935229:07crwdne2935229:0
crwdns2934873:0crwdne2934873:0
100%

crwdns2934883:0oldturkey03crwdne2934883:0 crwdns2934875:0crwdne2934875:0
crwdns2934877:0crwdne2934877:0 ›
crwdns2947412:05crwdne2947412:0
Vielen Dank an kapott für das Verfassen des Artikels. Ohne diese Anleitung hätte ich ziemliche Bedenken bei der Demontage gehabt, da man nie weiß, ob man eine Klammer oder ein Kabel abreißt.
Vielen Dank!
Sehr gute Erlärung, vielen Dank!
Bei dieser Maschine wurde leider viel zu lange mit dem Tausch der Stoßdämpfer gewartet und deshalb hat eine scharfe Kante vom Bottich die Rücklaufsperre vom Abwasser beschädigt. Ärgerlich, da das Teil teuer ist!
Ich bräuchte bitte nochmal Hilfe: Leider hat es sehr lange, bis jetzt, gedauert bis ich alle erforderlichen Ersatzteile zusammen hatte. Und nun habe ich blöderweise (die berühmte) eine Schraube übrig. Das ärgert mich! Kann mir bitte jemand sagen wo die hingehört? Torx 20 mit fester Unterlegscheibe und für Kunststoffgewinde, insgesamt 15 mm lang. Da sie sehr sauber ist, muss sie irgendwo verdeckt sitzen, aber ich finde nicht wo.
Ach ich Esel, Problem gelöst! Diese übrig gebliebenen Schraube gehörte zu dem gebraucht gekauften Rückflussverhinderer und ist somit doppelt vorhanden bzw überflüssig.
Guten Rutsch und langes Leben für die Mieles.