crwdns2915892:0crwdne2915892:0
This guide is used to explain how to open up the tablet portion of the Microsoft Surface Book 2 15 and gain access to the motherboard. The motherboard of the Microsoft Surface Book 2 15 has a majority of the cables for parts that can be replaced on it.
This is a difficult task to perform and can lead to other damage that can be done to the Microsoft Surface Book 2 15. A majority of the issues that are found with the Microsoft Surface Book 2 15 can be solved through software solutions. Therefore make sure to review troubleshooting page and try the solutions listed their before making any repairs to the device.
crwdns2942213:0crwdne2942213:0
-
-
Open the laptop, then orient it so the touchpad is on your left.
-
Starting at the hinge, count six holes up on the tablet portion of the laptop.
-
-
-
Take a paper clip and unfold it.
-
Place the paper clip in the sixth hole and push until you hear a click.
-
Once you hear the click, lift up on the right side of the tablet from the base until it separates.
-
After the right side has been detached, lift up the left side as well.
-
-
-
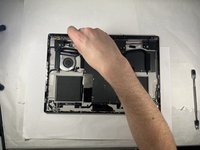
Place the tablet on a flat surface.
-
Using a heat gun or iOpener, heat up the edges of the screen to soften up the adhesive.
-
-
-
-
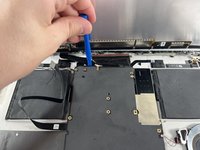
Using a plastic pick, slice underneath the edge of the screen.
-
Slowly make your way around the screen, and carefully cut the adhesive that secures the screen to the frame.
-
-
-
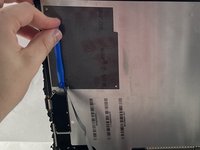
Lift up the screen.
-
Detach the ribbon cables connecting the underside of the screen to the motherboard.
-
-
-
Use a T3 Torx screwdriver to remove eleven 4 mm screws from the motherboard.
-
Use a T3 Torx screwdriver to remove the ten 2.5 mm screws from the top bar.
-
-
-
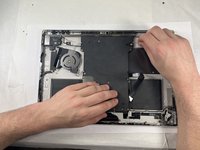
Once the screws are removed from the top bar, gently lift up and remove it.
-
Gently lift up on the motherboard to remove it.
-


To reassemble your device, follow these instructions in reverse order. Make sure to add some new adhesive to the screen to keep it in place.

crwdns2935287:0crwdne2935287:0

UMass Dartmouth, Team 3-3, Petersen Spring 2023 crwdns2935289:0UMass Dartmouth, Team 3-3, Petersen Spring 2023crwdne2935289:0
UMASSD-PETERSEN-S23S3G3
crwdns2931471:04crwdne2931471:0
crwdns2935297:023crwdne2935297:0