crwdns2915892:0crwdne2915892:0
You will need to take apart the Screen Frame, the LCD screen, and the sensor ribbon as a prerequisite to get to the motherboard. You might want to use a magnetic mat to make sure you don't lose the small screws.
Warning: The following guide is likely to ruin the water resistance of the device.
crwdns2942213:0crwdne2942213:0
-
-
Heat the iOpener. Instructions on how to do this can be found here: iOpener Instructions
-
Firmly press the frame of the band against the iOpener, and hold it in place for about 90 seconds.
-
-
-
Using a spudger, lightly press upwards against one corner of the frame, then the other along the corner of the short edge.
-
Alternating between the same two corners, continue pressing until there's about a 1-2 mm gap between that end of the frame and the body.
-
-
-
Insert the spudger into the gap under the frame, and lightly slide it about 3/4 of the way down one of the long edges, then repeat with the other.
-
If the frame doesn't simply pop off, try sliding the spudger the rest of the way down the long edges, and lightly lift the frame with your fingers.
-
-
-
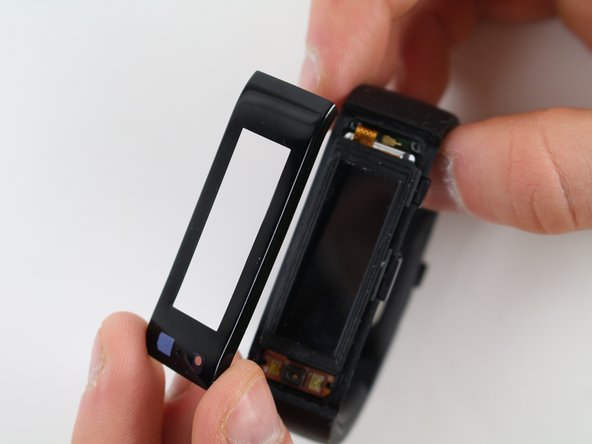
Gently lift the LCD screen from the components using your fingertips.
-
-
-
-
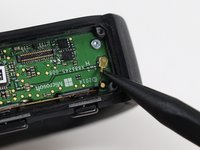
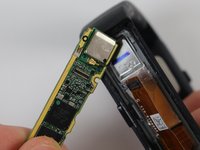
Lightly pry up the black connector from the motherboard using a spudger.
-
Pull the entire LCD screen gently upward to detach the yellow ribbon cable.
-
-
-
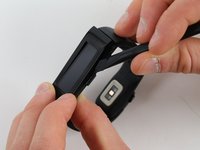
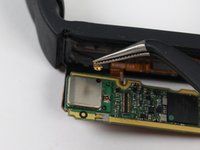
Using the spudger or the plastic opening tool, gently lift the sensor ribbon.
-
-
crwdns2935267:0crwdne2935267:0Tweezers$4.99
-
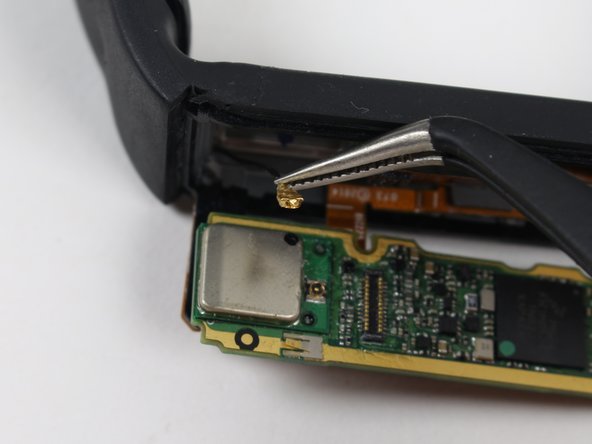
Using the spudger or the tweezers, gently detach the golden connector from the motherboard.
-
-
-
Using the T3 Torx screwdriver, remove the two 2 mm T3 screws.
-
-
-
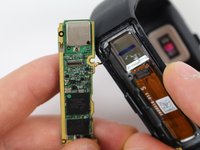
Using the spudger and your fingers, gently lift the motherboard from the band socket.
-
You should feel a "pop."
-
-
-
Gently flip the motherboard so that you are viewing the motherboard from underneath.
-
Using the tweezers, gently detach the golden connector from the back of the motherboard.
-


To reassemble your device, follow these instructions in reverse order.
To reassemble your device, follow these instructions in reverse order.
crwdns2935221:0crwdne2935221:0
crwdns2935229:07crwdne2935229:0
crwdns2915084:0crwdne2915084:0

Cal Poly, Team 17-34, Amido Winter 2015 crwdns2935289:0Cal Poly, Team 17-34, Amido Winter 2015crwdne2935289:0
CPSU-AMIDO-W15S17G34
crwdns2931471:04crwdne2931471:0
crwdns2935297:06crwdne2935297:0