crwdns2915892:0crwdne2915892:0
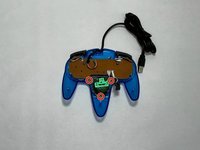
If your Miadore Classic N64 Controller is not properly working, or it is damaged, it may be time to replace it. Nonetheless overtime, the joystick can be overused, or you might just want to update the look for aesthetic purposes. This is a step-by-step guide that you can follow to properly replace your old joystick with a new one.
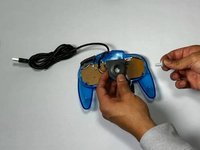
The Miadore Classic N64 Controller joystick is an important component for the functionality of the Nintendo 64 analog stick game experience. This component enables precision movements, 360-degree control, and game-specific actions.
Some of the warning signs to identify joystick problems are joystick drift, unresponsive movement, sticky or stiff feel, inconsistent sensitivity, or no input detection.
Before you begin the replacement process, make sure your controller is powered off or disconnected from any power source. There are no special skills required other than knowing how to use a screwdriver and holding the motherboard in-place.
crwdns2942213:0crwdne2942213:0
-
-
Use a Phillips #000 screwdriver to remove all nine 3.2 mm screws from the back of the controller.
-
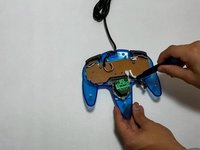
Place the end of a spudger in the seam between the top and bottom of the controller to release the clips holding them together.
-
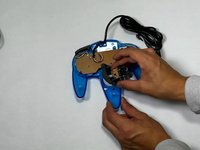
Separate the top and bottom cover of the controller.
-
-
-
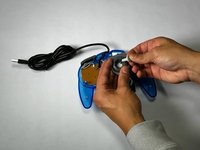
Remove the three 3.2 mm Phillips #000 screws holding the motherboard in place.
-
-
-
Remove the three 3.2 mm Phillips #000 screws holding the joystick module in place.
-
Remove the joystick module.
-
-
-
Remove the joystick by pulling it away from the plastic needle-like object holding it in place.
-


To reassemble your device, follow these instructions in reverse order. If all goes well, the joystick should work good as new.
crwdns2935221:0crwdne2935221:0
crwdns2935227:0crwdne2935227:0
crwdns2935287:0crwdne2935287:0

CSU Los Angeles, Team 5-3, Kershman Fall 2024 crwdns2935289:0CSU Los Angeles, Team 5-3, Kershman Fall 2024crwdne2935289:0
CSULA-KERSHMAN-F24S5G3
crwdns2931471:05crwdne2931471:0
crwdns2935297:02crwdne2935297:0