crwdns2915892:0crwdne2915892:0
We will be disassembling the laptop down to the heatsink and CPU, to apply some thermal paste with a higher grade of conductivity.
crwdns2942213:0crwdne2942213:0
-
-
Remove the battery by sliding both sliders to the left.
-
Hold the left slider as you slide the battery away from you.
-
-
-
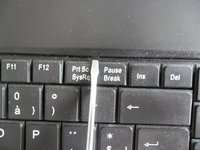
Press and hold the power button for 10 - 15 seconds, to release any excess power from the laptop.
-
-
-
After removing the battery, undo the single screw holding the RAM compartment lid.
-
Gently pop out the lid with a few clicks.
-
-
-
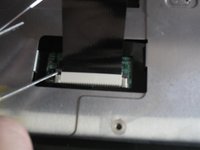
Undo the white and black cable, and the screw.
-
Lift the wifi board up and away from you.
-
-
-
Pry the metal clips holding the RAM units outward which will make the uint pop upwards.
-
Slide the unit out, towards you.
-
-
-
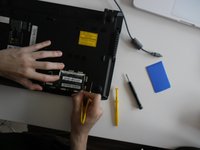
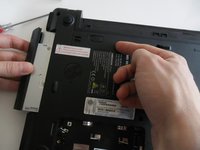
Undo the single screw holding the hard drive lid.
-
-
-
Undo the single screw holding the hard drive.
-
-
-
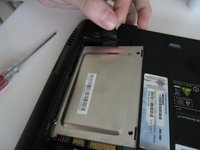
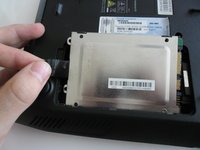
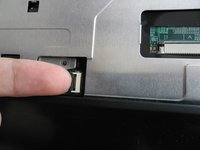
Use the black tab to slide the hard drive backwards.
-
Pry the hard drive up, on the far side and it slides out.
-
-
-
-
Push the 4 black tabs located at the top of the keyboard, under the case.
-
-
-
Pry the black tab backwards, to remove the cable.
-
-
-
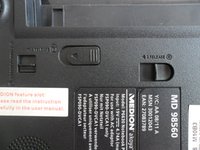
On the bottom of the case there are 2 sliders, use these to release the optical drive.
-
-
-
Undo the 11 screws holding the bottom of the case.
-
-
-
Remove the 2 cables, revealed by removing the keyboard. The cables mentioning "MB" can only be removed after opening the case.
-
-
-
Pry open the case using something soft, preferably your hands or a spudger.
-
-
-
When the case is completely lose it will still be attached by the "MB" cables. Remove those before completely removing the case.
-
-
-
Undo the single screw holding the motherboard.
-
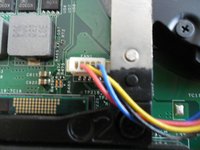
Undo the 4 cables highlighted in blue.
-
-
-
Also remove the black and white wifi cable from under the motherboard.
-
-
-
Lift the motherboard out of its socket. The bottom left may get stuck a bit. Don't force the USB sockets.
-
-
-
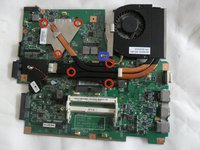
On the flipside of the motherboard is the CPU covered by the heatsink.
-
Before removing the heatsink, remove the fan cable looping over the heatsink.
-
Remove the 6 screws, holding the heatsink.
-
-
-
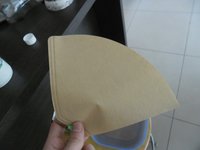
First you will need a card to scrape off the old paste. Keep a coffee filter ready to clean the card.
-
Both the heatsink and CPU's must be totally cleaned of any remaining grease.
-
-
-
Reverse engineer this guide to put the laptop back together.
-
Let the paste settle in by letting the computer run for a few consecutive hours.
-


To reassemble your device, follow these instructions in reverse order.
crwdns2935221:0crwdne2935221:0
crwdns2935229:09crwdne2935229:0

crwdns2947412:03crwdne2947412:0
Diese Anleitung zum Öffnen und Ausbauen des Kühlers ist ebenfalls anwendbar für das Medion Akoya P6624 (MD98390)
works for some other Aldi Akoya models too! quite versatile.
this disassembly is required to access the knob cell . remove knob cell and do a BIOS full reset for a proper RESET. still UEFI variables in NVRAM may have gone haywire, thus killing the laptop machine.