crwdns2915892:0crwdne2915892:0
This guide will provide the necessary details to replacing the joysticks in a DJI Mavic 2 Pro controller. This could be useful if your controller joysticks are experiencing drift or have been damaged in any way.
crwdns2942213:0crwdne2942213:0
-
-
Use a Phillips #0 screwdriver to remove the two 5.7 mm screws from the bottom of the controller.
-
-
-
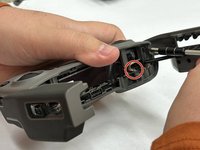
Insert the opening tool to separate the small plastic part from the main housing of the controller that was unscrewed in the last part.
-
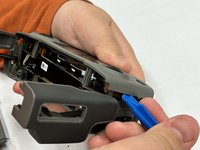
Remove the remaining plastic cover by unclipping the tabs located next to the charging port. Detach the clips that are below the screen that are holding the plastic part in place.
-
Now you should be able to pull out the bottom cover piece.
-
-
-
crwdns2935267:0crwdne2935267:0Tweezers$4.99
-
Use a Phillips #0 screwdriver to remove the two 5.7 mm screws that are secure the top cover.
-
Remove the cable connecting the joystick to the board with a pair of tweezers.
-
Go around the top cover, undoing all clips holding the top cover on. Insert the opening tool in between the top cover and the lower base of the controller.
-
-
-
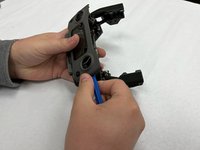
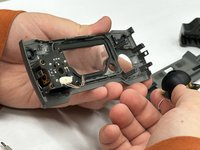
Now that the top cover is removed flip it over and you will see something similar to picture one.
-
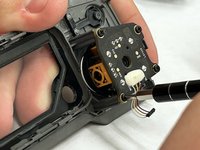
You will need to use the Phillip #0 to remove the four screws holding the joystick to the top cover plate.
-
This will allow you to replace the joystick with a new one.
-


To reassemble your device, follow these instructions in reverse order.
To reassemble your device, follow these instructions in reverse order.
crwdns2915084:0crwdne2915084:0

IUPUI, Team 2-3, Harley Fall 2023 crwdns2935289:0IUPUI, Team 2-3, Harley Fall 2023crwdne2935289:0
IUPUI-HARLEY-F23S2G3
crwdns2931471:03crwdne2931471:0
crwdns2935297:04crwdne2935297:0