crwdns2915892:0crwdne2915892:0
If the Display of your Matsunichi M97 9 inch has stopped working or is damaged, this guide will show you how to replace it step by step. This guide requires the removal of tape which may be difficult to replace. You will need to replace the Kapton tape with a new strip once it is removed.
crwdns2942213:0crwdne2942213:0
-
-
Open the micro SD cover located on the back of the device.
-
-
-
Using the Phillips #00 screwdriver, remove the two 4mm screws next to the micro SD port.
-
-
-
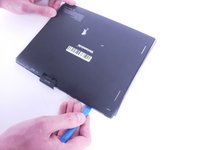
Use the iFixit opening tool to pry off the back cover of the device.
-
-
crwdns2935267:0crwdne2935267:0Tweezers$4.99
-
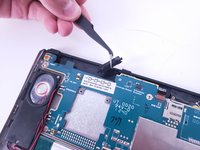
Use a pair of tweezers to disconnect the battery from the motherboard.
-
-
-
Carefully unstick the battery from the frame using the spudger.
-
-
-
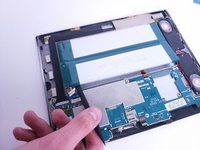
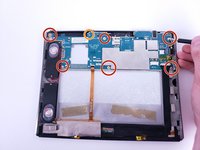
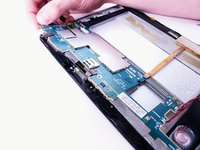
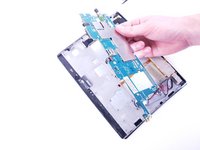
Remove the six 2mm screws that hold the motherboard onto the case using the Phillips #00 screwdriver.
-
Use the same screwdriver to remove the single 4mm screw.
-
-
-
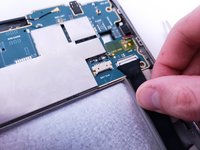
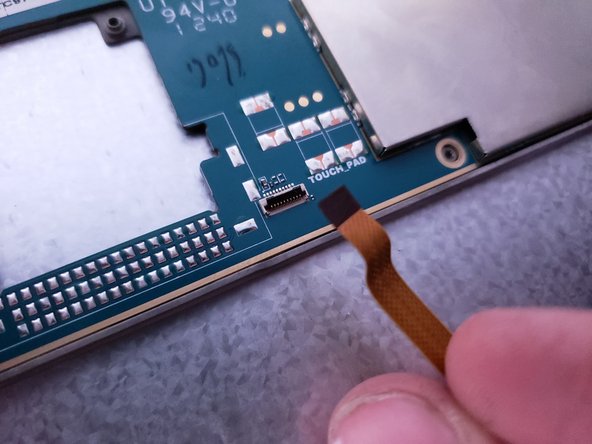
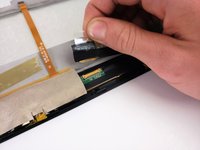
Gently pull the display ribbon cable to unplug it from the motherboard.
-
-
-
-
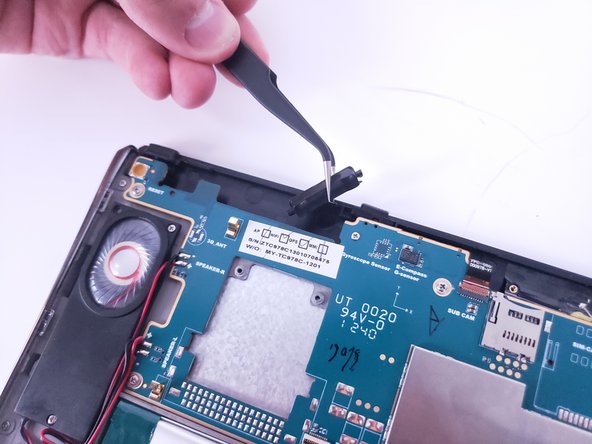
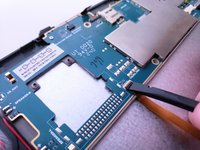
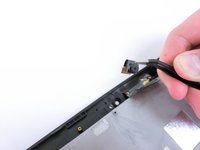
Use a spudger or an iFixit opening tool to lift the locking mechanism holding the camera ribbon cable.
-
-
-
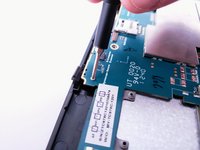
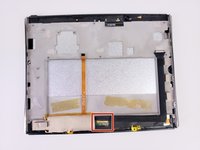
Lift up on the wifi antenna cable to unsnap it from the motherboard.
-
Then unhook the cable from the holding bracket.
-
-
-
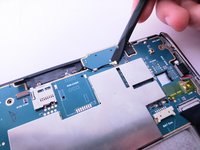
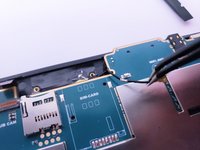
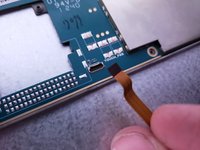
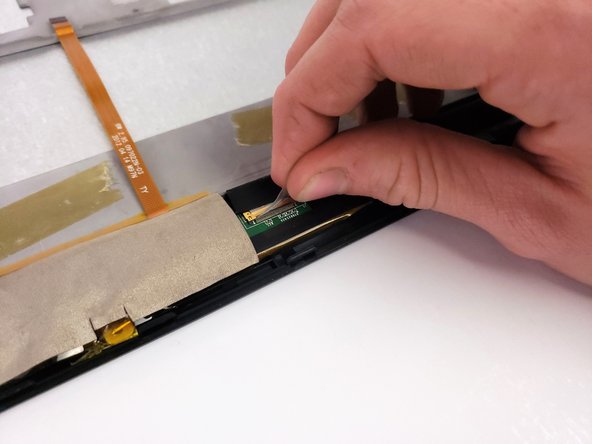
Use the spudger or iFixit opening tool to lift up on the locking mechanism for the digitizer ribbon cable.
-
Pull the cable from its connection.
-
-
-
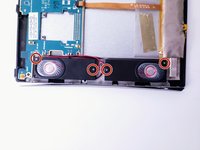
Use the Phillips #00 screwdriver to remove the four 4mm screws that hold the speakers in place.
-
-
-
Pull the vibration motor out of its housing.
-
-
-
Remove the camera from the device.
-
-
-
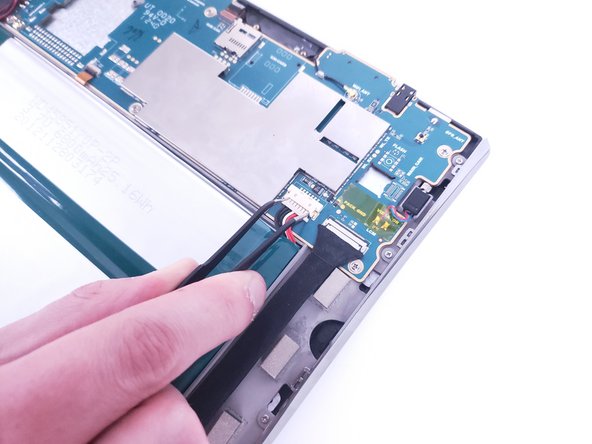
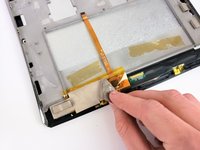
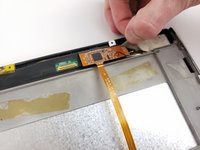
Peel off the black and the clear tape covering the display cable connection.
-
Pull the display cable to disconnect it from the display.
-
-
-
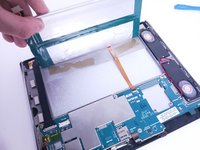
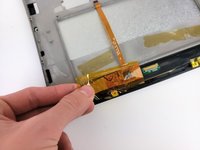
Peel off the conductive tape covering the display board.
-
-
-
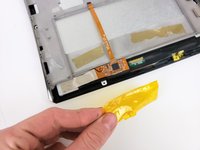
Peel off the Kapton thermal tape from the display board.
-
-
-
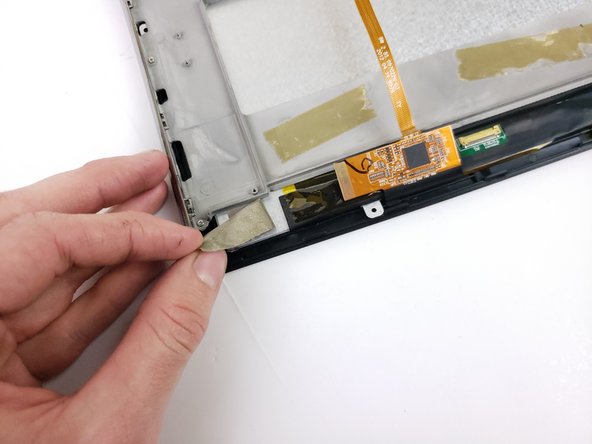
Peel off the grounding tape attached to the display board.
-
-
-
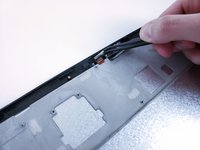
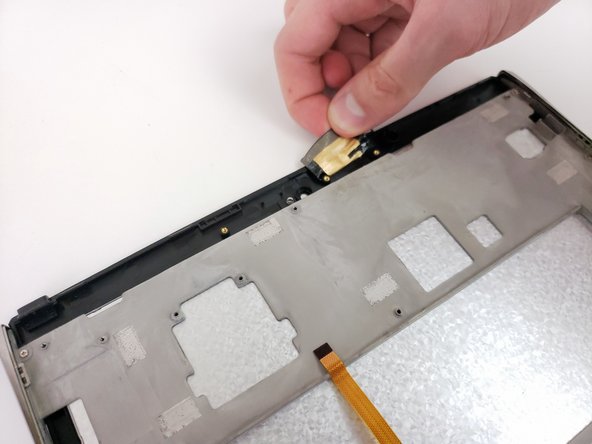
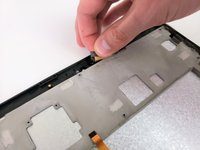
Peel off the black tape near the wifi antenna from the frame.
-
-
-
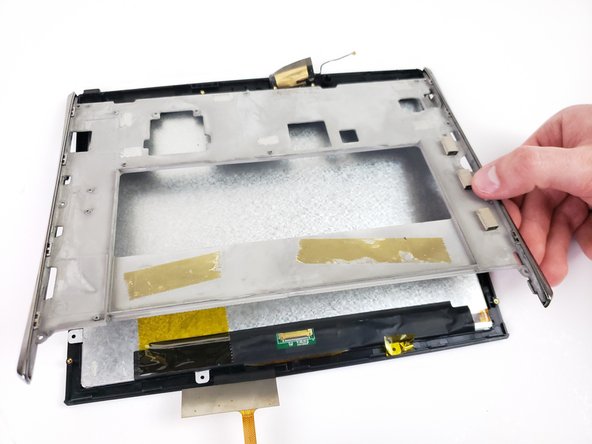
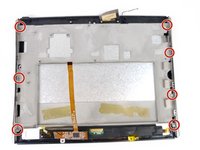
Using the Phillips #00 screwdriver, unscrew the seven 4mm screws holding the frame to the front glass.
-
Gently lift the frame off the LCD panel
-
-
-
Lift up the LCD panel from the glass digitizer.
-


To reassemble your device, follow these instructions in reverse order.
To reassemble your device, follow these instructions in reverse order.

crwdns2915084:0crwdne2915084:0

Embry-Riddle Aeronautical University, Team S7-G8, Rauch Spring 2020 crwdns2935289:0Embry-Riddle Aeronautical University, Team S7-G8, Rauch Spring 2020crwdne2935289:0
ERAU-RAUCH-S20S7G8
crwdns2931471:04crwdne2931471:0
crwdns2935297:05crwdne2935297:0