crwdns2915892:0crwdne2915892:0
The outer casing of the drill needs to be taken out in order to replace the other parts of the drill. There are a total of nine 18 mm screws that needs to be taken out of the outer casing. This guide serves as a prerequisite guide for the other replacement guides.
crwdns2942213:0crwdne2942213:0
-
-
Hold the drill upright.
-
Place your finger on the white battery-release button.
-
-
-
Press and hold the white release button located on the front of the battery.
-
-
-
Slide the battery forward while pressing down on the white battery-release button.
-
-
-
-
Hold the drill upright with the back panel facing you.
-
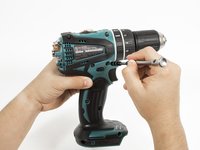
Unscrew the two 18 mm screws from the back panel using a Phillips PH2 screwdriver.
-
-
-
Apply slight pressure to the sides of the backplate and pull away from the drill.
-
-
-
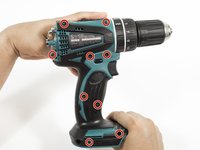
Unscrew the nine 18 mm screws from the outer casing using a Phillips PH2 screwdriver.
-
-
-
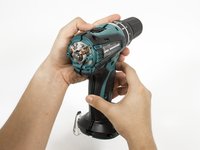
Apply slight pressure to the sides of the outer casing and pull away from the drill.
-


To reassemble your device, follow these instructions in reverse order.
To reassemble your device, follow these instructions in reverse order.
crwdns2915084:0crwdne2915084:0

Cal Poly, Team 15-4, Livingston Fall 2016 crwdns2935289:0Cal Poly, Team 15-4, Livingston Fall 2016crwdne2935289:0
CPSU-LIVINGSTON-F16S15G4
crwdns2931471:04crwdne2931471:0
crwdns2935297:07crwdne2935297:0