crwdns2915892:0crwdne2915892:0
It is recommended to have had some experience soldering before attempting this replacement.
crwdns2942213:0crwdne2942213:0
-
-
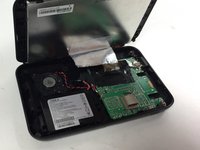
Place the device face down on a flat surface.
-
Remove the four 5mm screws at each corner using a #000 Phillips head screwdriver.
-
-
-
Gently wedge a plastic opening tool into the seam along the side of the device.
-
Slide the tool along the seam to pry apart the front and back covers.
-
-
crwdns2935267:0crwdne2935267:0Tweezers$4.99
-
A ribbon cable attaches the display screen and the motherboard via a ZIF connector. Remove the tape covering where the ZIF connector connects to the mother board.
-
Use tweezers to disconnect the ZIF connector from the motherboard.
-
-
-
-
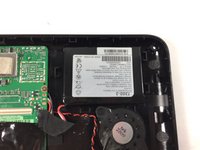
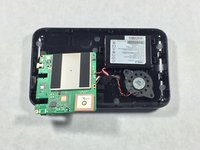
Lay the back panel on a flat surface with the battery, motherboard, and speaker facing up.
-
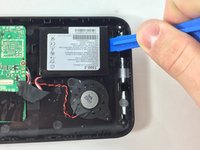
Use a plastic opening tool to gently pull the battery away from the back panel in order to remove the adhesive that helps the battery stick to the panel.
-
-
-
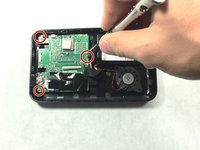
Unscrew the two 5mm screws using a Phillips #000 screwdriver.
-
-
-
Use a Phillips #000 screwdriver to remove three 5mm screws that hold the motherboard down to the the back panel.
-
Remove the battery, speaker and motherboard. Place them on a flat surface upside down.
-
-
-
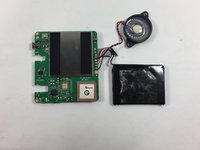
Use a soldering iron to desolder the 3 wires that connect the battery to the motherboard.
-
-
-
Using the soldering iron, carefully desolder the two wires connected to the speaker.
-
The motherboard should now be separated from both the battery and the speaker.
-


To reassemble your device, follow these instructions in reverse order.
crwdns2935221:0crwdne2935221:0
crwdns2935227:0crwdne2935227:0
crwdns2935287:0crwdne2935287:0

UMass Dartmouth, Team 4-7, Catania Fall 2016 crwdns2935289:0UMass Dartmouth, Team 4-7, Catania Fall 2016crwdne2935289:0
UMASSD-CATANIA-F16S4G7
crwdns2931471:03crwdne2931471:0
crwdns2935297:05crwdne2935297:0
crwdns2947410:01crwdne2947410:0
Is the hard drive solded to the motherboard as a chip? Do someone have the pinout/things-in-the-diagram of the mother board?