crwdns2915892:0crwdne2915892:0
When replacing your hard drive, you must transfer the Torx screws from the old drive to the new one.
crwdns2942213:0crwdne2942213:0
crwdns2936621:0crwdne2936621:0
-
-
Remove the eight 4 mm Phillips screws securing the lower case to the MacBook.
-
-
-
Slightly lift the lower case near the vent opening.
-
Continue running your fingers between the lower and upper cases until the upper case pops off its retaining clips.
-
-
-
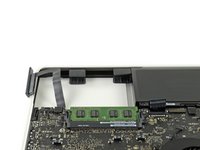
Use the flat end of a spudger to lift the battery connector up out of its socket on the logic board.
-
-
-
-
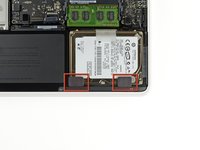
Remove two 11 mm Phillips screws securing the hard drive bracket to the upper case.
-
-
-
Lift the retaining bracket out of the upper case.
-
When putting the bracket back after replacing the drive, it is easy to put in backwards. If it doesn't seat smoothly, then reverse it and try again.
-
-
-
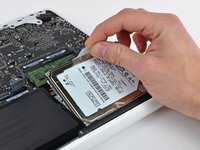
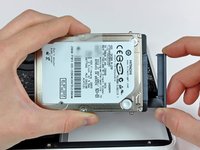
Lift the hard drive by its pull tab and pull it away from the upper case, minding the cable still attaching it to the logic board.
-
-
-
Remove the hard drive cable by pulling its connector straight away from the hard drive.
-
-
-
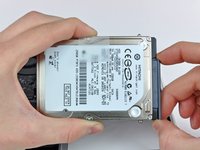
Remove the two T6 Torx screws from each side of the hard drive (four screws total).
-


To reassemble your device, follow these instructions in reverse order.
To reassemble your device, follow these instructions in reverse order.
crwdns2935221:0crwdne2935221:0
crwdns2935229:0354crwdne2935229:0

crwdns2947412:021crwdne2947412:0
awesome guide! This really made it so easy to figure out exactly what I was doing. The large, sharp pictures really made me feel confident that I was doing everything properly. Thanks!
can i install an ssd instead of a normal hd?
Yes, absolutely. I switched mine out with a Kingston 120GB SSD.
can this model A1342 take an SSD with SATA3 instead of SATA2?
By the looks of it. The Crucial MX100 is explicitly said to be compatible and has SATA III:
Albert -