crwdns2915892:0crwdne2915892:0
Use this guide to remove the bottom cover, a.k.a. lower case. This serves as the starting point for every repair on your MacBook Pro.
For your safety, discharge your MacBook Pro's battery below 25% before you begin this procedure. A charged lithium-ion battery can create a dangerous and uncontrollable fire if accidentally punctured.
crwdns2942213:0crwdne2942213:0
-
-
Power on your Mac and launch Terminal.
-
Copy and paste the following command (or type it exactly) into Terminal:
-
sudo nvram AutoBoot=%00
-
Press [return]. If prompted, enter your administrator password and press [return] again. Note: Your return key may also be labeled ⏎ or "enter."
-
sudo nvram AutoBoot=%03
-
-
crwdns2935267:0crwdne2935267:0Magnetic Project Mat$17.96
-
Close the display and flip the entire laptop upside-down.
-
Use a P5 Pentalobe driver to remove six screws securing the lower case, of the following lengths:
-
Four 4.7 mm screws
-
Two 6.6 mm screws
-
-
-
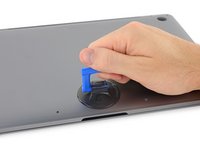
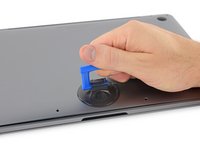
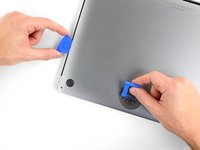
Press a suction handle into place near the front edge of the lower case, between the screw holes.
-
Lift up on the suction handle just enough to open a small gap under the lower case.
-
-
-
-
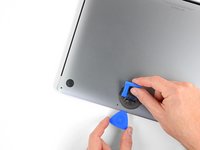
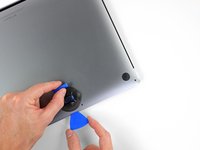
Slide the corner of an opening pick into the gap you just created underneath the lower case.
-
Slide the opening pick around the nearest corner and then halfway up the side of the MacBook Pro.
-
-
-
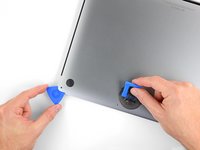
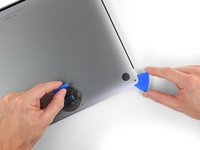
Repeat the previous step on the opposite side, using your opening pick to release the second clip.
-
-
-
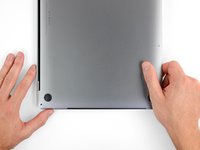
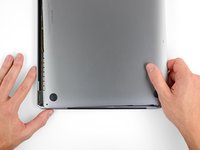
Lift the front edge of the lower case (the side opposite the display hinge) just enough to slide your fingertips underneath and get a good grip on it.
-
-
-
Pull the lower case firmly towards the front of the MacBook (away from the hinge area) to separate the last of the clips securing the lower case.
-
Pull first at one corner, then the other.
-
-
-
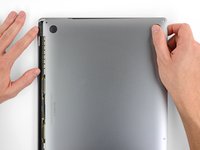
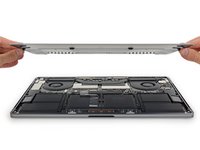
Remove the lower case.
-
Set it in place and align the sliding clips near the display hinge. Press down and slide the cover toward the hinge. It should stop sliding as the clips engage.
-
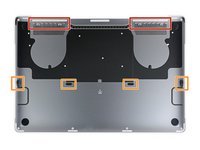
When the sliding clips are fully engaged and the lower case looks correctly aligned, press down firmly on the lower case to engage the four hidden clips. You should feel and hear them click into place.
-


To reassemble your device, follow the above steps in reverse order.
Repair didn’t go as planned? Check out our Answers community for troubleshooting help.
To reassemble your device, follow the above steps in reverse order.
Repair didn’t go as planned? Check out our Answers community for troubleshooting help.
crwdns2935221:0crwdne2935221:0
crwdns2935229:017crwdne2935229:0

