crwdns2915892:0crwdne2915892:0
Use this guide to replace the I/O board containing a USB 3.0 port, HDMI port, and SDXC card reader.
It's not strictly necessary to remove the SSD in order to replace the I/O board, but doing so provides some additional clearance to make this process easier. If you are comfortable replacing the I/O board without removing the SSD, feel free to skip the SSD steps.
crwdns2942213:0crwdne2942213:0
-
-
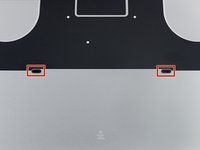
Remove the following P5 pentalobe screws securing the lower case to the MacBook Pro:
-
Eight 3.1 mm
-
Two 2.3 mm
-
-
-
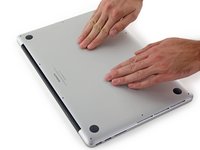
Lifting from the edge nearest the clutch cover, lift the lower case off the MacBook Pro.
-
-
-
Peel back the sticker covering the battery connector.
-
-
-
Gently lift each side of the battery connector to pry the connector out of its socket on the logic board.
-
Bend the connector back toward the battery, ensuring that the battery connector doesn't accidentally make contact with the logic board.
-
-
crwdns2935267:0crwdne2935267:0Tweezers$4.99
-
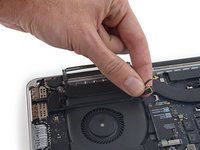
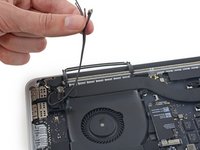
Use a spudger or tweezers to pry the three AirPort antenna cables straight up off of their sockets on the AirPort board, and bend them up and out of the way.
-
-
-
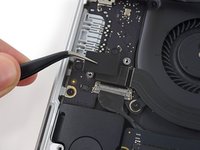
Peel the right rubber cover up off the fan and fold it out of the way.
-
-
-
-
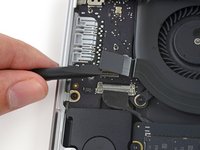
Use the tip of a spudger to push the camera cable connector out of its socket on the logic board.
-
-
-
Use your fingers to pull the AirPort/Camera cables up off the fan.
-
Carefully de-route the cables from the plastic cable guide.
-
-
-
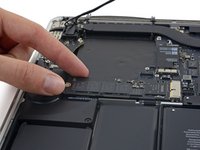
Remove the four 2.2 mm T5 Torx screws securing the I/O board cable connector covers.
-
-
-
Remove the left connector cover.
-
Use the flat end of a spudger to pry the left end of the I/O board cable up from its socket on the logic board.
-
-
-
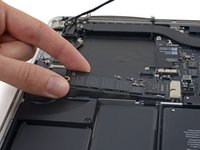
Remove the right connector cover.
-
Use the flat end of a spudger to pry the right end of the I/O board cable up from its socket on the logic board.
-
-
-
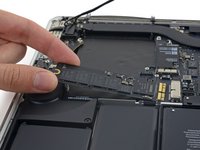
Peel the I/O board cable up from the adhesive securing it to the fan.
-
Remove the cable.
-
-
-
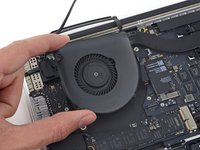
Use a T5 Torx driver to remove the following three screws securing the right fan to the logic board:
-
One 5.0 mm screw with a 2.0 mm long shoulder
-
One 4.0 mm screw with a wide head
-
One 4.4 mm screw
-
-
-
Use the tip of a spudger to flip up the retaining flap on the right fan ribbon cable ZIF socket.
-
-
-
Lift the fan and push it gently towards the back edge of the MacBook to free the fan cable from its socket.
-
Remove the fan.
-
-
-
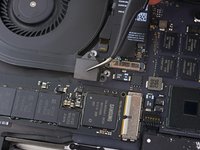
Remove the single 2.9 mm T5 Torx screw securing the SSD to the logic board.
-
-
-
Lift the end of the SSD up enough to pass over the speaker directly behind it.
-
Pull the SSD straight out of its socket on the logic board.
-
-
-
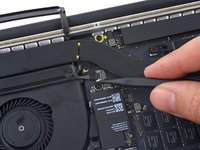
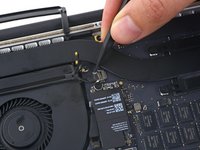
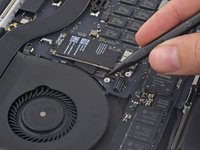
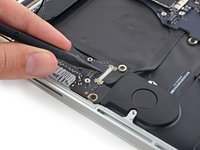
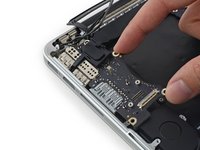
Use the point of a spudger to flip up the locking mechanism on the I/O board connector.
-
Flip the spudger around and use the flat end to slide the I/O cable out of the connector.
-
-
-
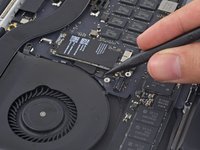
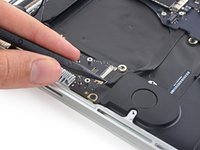
Remove the two 3.1 mm T5 Torx screws from the I/O board.
-
-
-
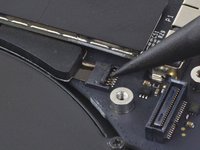
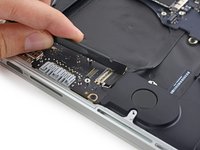
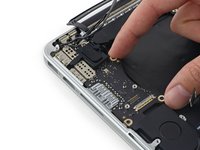
Slightly lift the interior edge of the I/O board and pull it toward the center of the MacBook, away from the side of the case.
-
Remove the I/O board.
-


To reassemble your device, follow these instructions in reverse order.
crwdns2935221:0crwdne2935221:0
crwdns2935229:016crwdne2935229:0

crwdns2947410:01crwdne2947410:0
Be _VERY_ careful with the connector on the end of the I/O cable. Especially since it abuts to the speaker. It is easy to insert it diagonally but that could break the edge pins on the connector. Step 19 of this job (and the inverse) needs at least three hands.