crwdns2915892:0crwdne2915892:0
Do you have a cracked screen or see weird vertical lines? Fear not! Use this guide to remove/replace the display assembly if something terrible has happened to the beautiful Retina display of your MacBook Pro.
crwdns2942213:0crwdne2942213:0
-
-
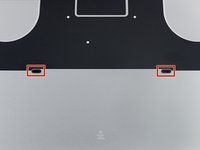
Remove the following P5 pentalobe screws securing the lower case to the MacBook Pro:
-
Eight 3.1 mm
-
Two 2.3 mm
-
-
-
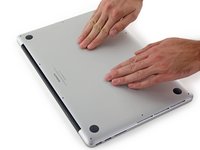
Lifting from the edge nearest the clutch cover, lift the lower case off the MacBook Pro.
-
-
-
Peel back the sticker covering the battery connector.
-
-
-
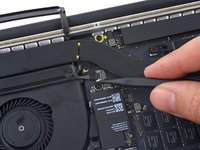
Gently lift each side of the battery connector to pry the connector out of its socket on the logic board.
-
Bend the connector back toward the battery, ensuring that the battery connector doesn't accidentally make contact with the logic board.
-
-
crwdns2935267:0crwdne2935267:0Tweezers$4.99
-
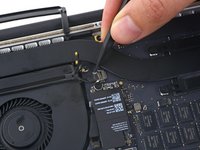
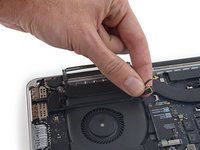
Use a spudger or tweezers to pry the three AirPort antenna cables straight up off of their sockets on the AirPort board, and bend them up and out of the way.
-
-
-
-
Peel the right rubber cover up off the fan and fold it out of the way.
-
-
-
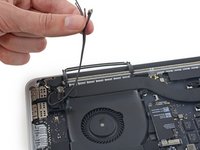
Use the tip of a spudger to push the camera cable connector out of its socket on the logic board.
-
-
-
Use your fingers to pull the AirPort/Camera cables up off the fan.
-
Carefully de-route the cables from the plastic cable guide.
-
-
-
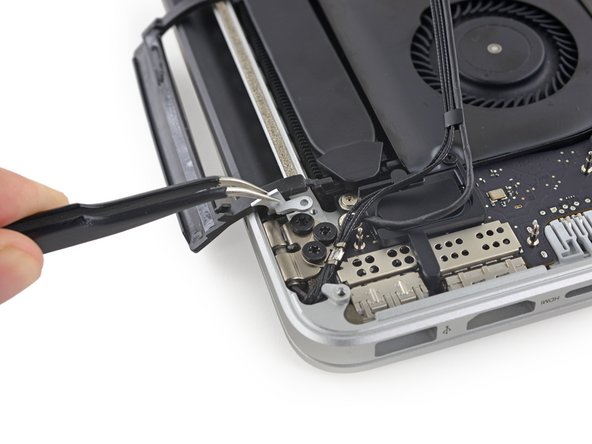
Use the tip of a spudger to flip up the display data cable lock and rotate it toward the MagSafe 2 power port side of the computer.
-
Pull the display data cable straight out of its socket on the logic board.
-
-
-
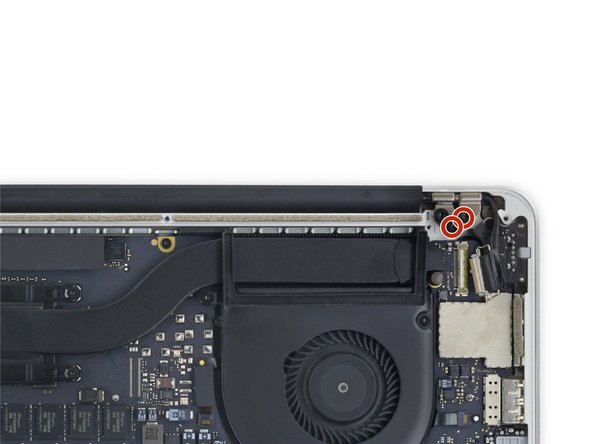
Remove the two 3.2 mm T5 Torx screws securing the aluminum hinge covers to the upper case.
-
-
-
Remove the two aluminum hinge covers from the MacBook Pro.
-
-
-
Remove four out of the six 5.3 mm T8 Torx screws securing the display to the upper case.
-
Leave the innermost screws (one from each hinge) in place.
-
-
-
Open the MacBook Pro approximately 110 degrees, and place it sideways on the table, as shown.
-
-
-
While holding the display and upper case together with your left hand, remove the remaining T8 Torx screw from the lower (closer to the table) display bracket.
-
-
-
While holding the display and upper case together with your left hand, remove the remaining T8 Torx screw from the upper display bracket.
-
-
-
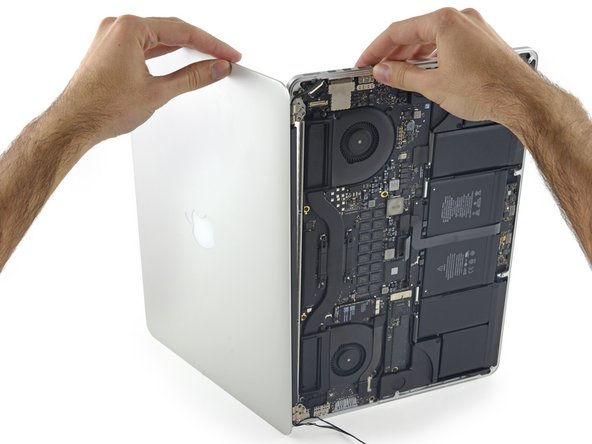
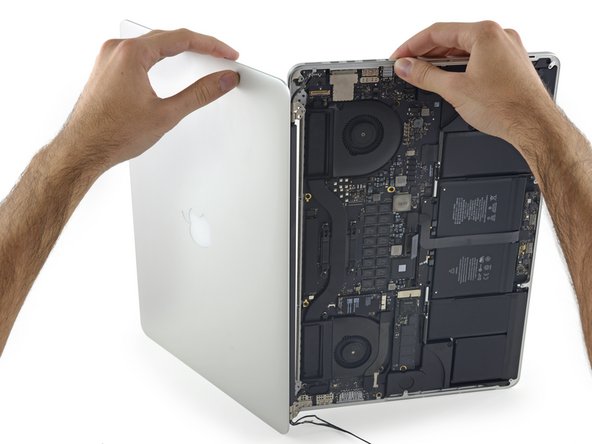
Grip both halves of the device, one in each hand.
-
Gently push forward on the bottom half of the device to detach it from the display assembly.
-
Carefully set each component aside, making sure to set down the bottom half keyboard-side down to avoid damaging internal components.
-


To reassemble your device, follow these instructions in reverse order.
crwdns2935221:0crwdne2935221:0
crwdns2935229:0158crwdne2935229:0

crwdns2947412:057crwdne2947412:0
Can the clutch be replaced in the 2015 15" Retina MacBook Pro?
Successfully replaced screen and everything is working great. One mechanical exception - the black clutch cover is loose on one side (the left side looking at the keyboard). i can "lift it" towards myself. it wasn't obvious while i was in there that there was a step to "hook it" into anything. what has it let go from and how do i go about ensuring that it's secure when it's flipped? Anyone know?
Thnaks!
It was a perfect job! Thanks!
Thank you! These instructions couldn't be better.
Do you have any intention of releasing a guide for the new A1707 2016 pro retina model with touch bar? Thanks for your help.