crwdns2933423:0crwdne2933423:0
crwdns2947577:0crwdnd2947577:0crwdne2947577:0

MacBook Pro 15" Retina Display Mid 2012 Heat Sink Replacement

crwdns2942213:0crwdne2942213:0

    1. MacBook Pro 15" Retina Display Mid 2012 Heat Sink Replacement, Lower Case: crwdns2935265:01crwdnd2935265:01crwdnd2935265:01crwdne2935265:0
      • Remove the following P5 pentalobe screws securing the lower case to the MacBook Pro:

      • Eight 3.0 mm

      • Two 2.3 mm

      crwdns2952109:0crwdne2952109:0

      crwdns2917038:0crwdne2917038:0

    2. MacBook Pro 15" Retina Display Mid 2012 Heat Sink Replacement: crwdns2935265:02crwdnd2935265:01crwdnd2935265:01crwdne2935265:0
      • Lifting from the edge nearest the clutch cover, lift the lower case off the MacBook Pro.

      • Set the lower case aside.

      crwdns2952109:0crwdne2952109:0

      crwdns2917038:0crwdne2917038:0

    1. MacBook Pro 15" Retina Display Mid 2012 Heat Sink Replacement, Battery Connector: crwdns2935265:03crwdnd2935265:01crwdnd2935265:01crwdne2935265:0
      • Peel back the warning label covering the battery connector.

      crwdns2952109:0crwdne2952109:0

      crwdns2917038:0crwdne2917038:0

    2. MacBook Pro 15" Retina Display Mid 2012 Heat Sink Replacement: crwdns2935265:04crwdnd2935265:01crwdnd2935265:02crwdne2935265:0 MacBook Pro 15" Retina Display Mid 2012 Heat Sink Replacement: crwdns2935265:04crwdnd2935265:02crwdnd2935265:02crwdne2935265:0
      • Using the flat end of a spudger, gently pry the battery connector straight up out of its socket on the logic board.

      • Bend the battery cables back and out of the way, ensuring that the battery connector doesn't accidentally make contact with the logic board.

      crwdns2952109:0crwdne2952109:0

      crwdns2917038:0crwdne2917038:0

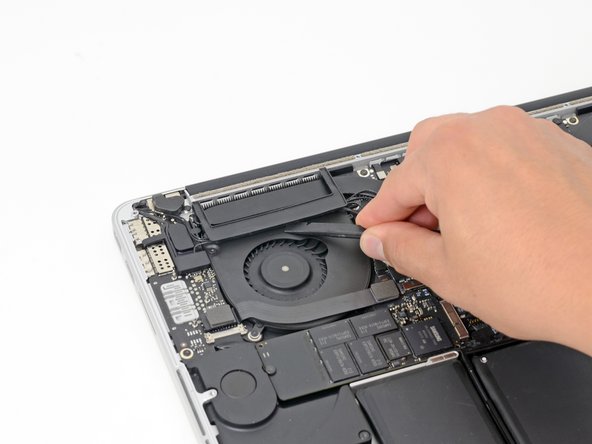
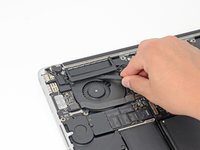
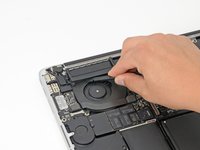
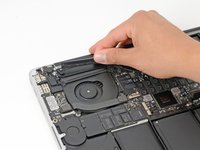
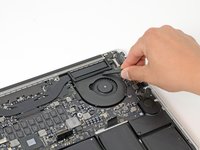
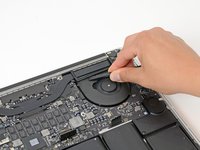
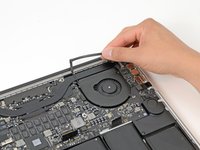
    1. MacBook Pro 15" Retina Display Mid 2012 Heat Sink Replacement, Heat Sink: crwdns2935265:05crwdnd2935265:01crwdnd2935265:03crwdne2935265:0 MacBook Pro 15" Retina Display Mid 2012 Heat Sink Replacement, Heat Sink: crwdns2935265:05crwdnd2935265:02crwdnd2935265:03crwdne2935265:0 MacBook Pro 15" Retina Display Mid 2012 Heat Sink Replacement, Heat Sink: crwdns2935265:05crwdnd2935265:03crwdnd2935265:03crwdne2935265:0
      • Insert the flat end of a spudger underneath the rubber heat sink cover on the right fan.

      • Slide the spudger underneath the length of the cover, releasing the adhesive.

      • Lift the cover and rotate it off of the heat sink.

      crwdns2952109:0crwdne2952109:0

      crwdns2917038:0crwdne2917038:0

    2. MacBook Pro 15" Retina Display Mid 2012 Heat Sink Replacement: crwdns2935265:06crwdnd2935265:01crwdnd2935265:03crwdne2935265:0 MacBook Pro 15" Retina Display Mid 2012 Heat Sink Replacement: crwdns2935265:06crwdnd2935265:02crwdnd2935265:03crwdne2935265:0 MacBook Pro 15" Retina Display Mid 2012 Heat Sink Replacement: crwdns2935265:06crwdnd2935265:03crwdnd2935265:03crwdne2935265:0
      • In the same manner described above, release the adhesive and flip back the heat sink cover on the left fan.

      crwdns2952109:0crwdne2952109:0

      crwdns2917038:0crwdne2917038:0

    3. MacBook Pro 15" Retina Display Mid 2012 Heat Sink Replacement: crwdns2935265:07crwdnd2935265:01crwdnd2935265:01crwdne2935265:0
      • Remove the following ten screws securing the heat sink to the logic board:

      • Two 2.4 mm T5 Torx screws

      • Six 3.4 mm T5 Torx screws

      • One 5.2 mm Raised Head T5 Torx screw

      • One 3.5 mm T5 Torx screw

      crwdns2952109:0crwdne2952109:0

      crwdns2917038:0crwdne2917038:0

    4. MacBook Pro 15" Retina Display Mid 2012 Heat Sink Replacement: crwdns2935265:08crwdnd2935265:01crwdnd2935265:01crwdne2935265:0
      • Grasping the heat sink from one side, lift the heat sink off of the MacBook Pro, pulling it free from the computer.

      • The thermal paste may make it difficult to remove the heat sink. Pull the heat sink off gently but forcefully to avoid damaging any components on the logic board.

      • When installing the new heat sink, do not forget to replace the thermal paste underneath the heat sink. See our Applying Thermal Paste guide for further instructions.

      crwdns2952109:0crwdne2952109:0

      crwdns2917038:0crwdne2917038:0

crwdns2915888:0crwdne2915888:0

To reassemble your device, follow these instructions in reverse order.

crwdns2935221:0crwdne2935221:0

crwdns2935229:041crwdne2935229:0

Brett Hartt

crwdns2935283:004/12/10crwdne2935283:0

132.464 crwdns2915208:0crwdne2915208:0

crwdns2935297:0144crwdne2935297:0

crwdns2935287:0crwdne2935287:0

iFixit crwdns2935289:0iFixitcrwdne2935289:0

Staff

crwdns2931471:0122crwdne2931471:0

crwdns2935297:072.400crwdne2935297:0

crwdns2947412:08crwdne2947412:0

would doing this void the warranty?

sakada - crwdns2934203:0crwdne2934203:0 crwdns2950251:0crwdne2950251:0

Hello everybody!!! I tried to follow this guide... I removed the bottom case, no problem... but when it was the time to remove the upper 2.4mm T5 torn screw... it stripped and now i cannot remove it! How can i remove that screw?

And if this is not enough one of the 3mm pentalobe screw of the bottom stripped too! so what can i do?!? please help me!

Sorry for my bad english

Shaggot96 - crwdns2934203:0crwdne2934203:0 crwdns2950251:0crwdne2950251:0

I'm sorry to hear that! Try checking out this stripped screw guide and reading through this Answers post. Hope this helps with your repair!

Sam Goldheart - crwdns2934203:0crwdne2934203:0 crwdns2950251:0crwdne2950251:0

I won't call this moderate but rather easy instead, seems like ifixit expect that easy is something you just unplug without even open the computer

Benjamin H - crwdns2934203:0crwdne2934203:0 crwdns2950251:0crwdne2950251:0

Where can I get new screws if I want to replace them?

Boro J. - crwdns2934203:0crwdne2934203:0 crwdns2950251:0crwdne2950251:0

crwdns2917038:0crwdne2917038:0

crwdns2936625:0crwdne2936625:0:

crwdns2936751:024crwdne2936751:0 3

crwdns2936753:07crwdne2936753:0 40

crwdns2936753:030crwdne2936753:0 174

crwdns2942667:0crwdne2942667:0 46,263