crwdns2915892:0crwdne2915892:0
Fans can be such blowhards, except when they blow out. Use this guide to help you replace a damaged, broken, or faulty right fan.
crwdns2942213:0crwdne2942213:0
-
-
Remove the following P5 pentalobe screws securing the lower case to the MacBook Pro:
-
Eight 3.0 mm
-
Two 2.3 mm
-
-
-
Lifting from the edge nearest the clutch cover, lift the lower case off the MacBook Pro.
-
Set the lower case aside.
-
-
-
Peel back the warning label covering the battery connector.
-
-
-
Using the flat end of a spudger, gently pry the battery connector straight up out of its socket on the logic board.
-
Bend the battery cables back and out of the way, ensuring that the battery connector doesn't accidentally make contact with the logic board.
-
-
crwdns2935267:0crwdne2935267:0Tweezers$4.99
-
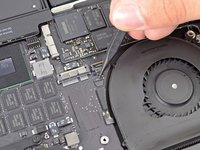
Use a spudger or tweezers to pry the three AirPort antenna cables straight up off of their sockets on the AirPort board.
-
-
-
-
Use the tip of a spudger to push the camera cable's plug toward the fan and out of its socket on the logic board.
-
-
-
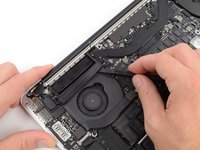
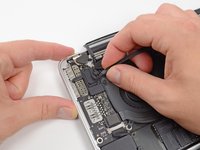
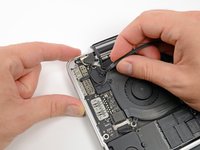
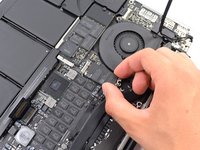
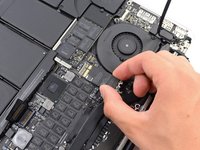
Insert the flat end of a spudger underneath the rubber heat sink cover on the right fan.
-
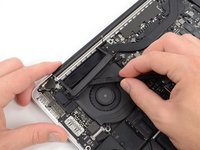
Slide the spudger underneath the length of the cover, releasing the adhesive.
-
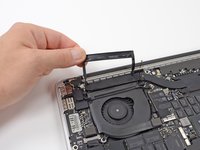
Lift the cover and flip it back so that you can access the cables underneath.
-
-
-
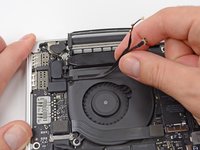
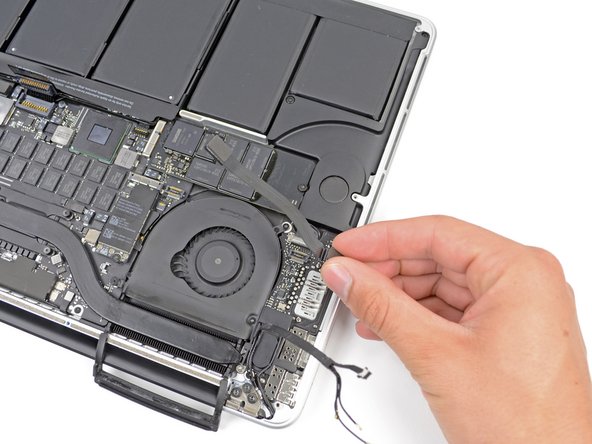
Use your fingers to pull the AirPort/Camera cables up off the fan.
-
Carefully de-route the cables from the plastic cable guide.
-
-
-
Using the flat end of a spudger, pry the I/O Board connector straight up out of its socket on the logic board.
-
In a similar fashion, remove the I/O Board cable connector from its socket on the I/O Board.
-
Remove the I/O Board cable from the MacBook Pro.
-
-
-
Remove the single 2.9 mm T5 Torx screw securing the AirPort card to the logic board.
-
-
-
Grasp the sides of the AirPort card and lift it up to a shallow angle (5-10˚) to separate the light adhesive adhering it to the logic board.
-
Pull the AirPort card parallel out of its connector on the logic board to remove it.
-
-
-
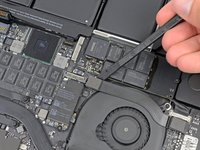
Use the tip of a spudger to flip up the retaining flap on the right fan ribbon cable ZIF socket.
-
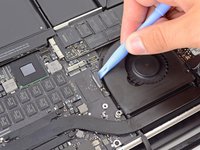
Starting at the top of the cable, slide a plastic opening tool under the right fan cable to free it from the logic board.
-
-
-
Remove the following three screws securing the right fan to the logic board:
-
One 4.4 mm T5 Torx screw
-
One 3.9 mm T5 Wide Head Torx screw
-
One 5.0 mm T5 Torx screw with 2 mm collar
-
-
-
Lift and remove the right fan out from the MacBook Pro.
-
To reassemble your device, follow these instructions in reverse order.
To reassemble your device, follow these instructions in reverse order.
crwdns2935221:0crwdne2935221:0
crwdns2935229:020crwdne2935229:0
crwdns2947412:04crwdne2947412:0
doesn't look too bad, my right fan is making a terrible sound, I'm debating if I should bring it to apple or if I should just replace it myself
pretty easy guide. i replaced the left fan recently, so i decided to do the right as well since it had been making the same grinding noise, albeit not quite as loud. the fans themselves were pretty clean, i’ve typically use a blast of compressed air to dust them out about once a month over the almost 5 years i’ve owned this MBP.
i skipped steps 3-4-5. and using some of the comments as guidance i was able to take a few short cuts and have the fan replaced in about 20 minutes. powered up the MB without the back cover just to make sure the fan would spin, it did, checked to make sure everything worked, internet, BT connection, camera etc, powered down, screwed on the back cover and done.
easy and fast. it took me 10 min to replace.
Replaced batteries and RIGHT FAN. Made all connections. LEFT FAN runs and won't stop, whether connected with charge cord or running on batteries. Laptop will NOT start up. Disconnected LEFT FAN to save batteries. I'M STUMPED! :-(


