crwdns2915892:0crwdne2915892:0
Things heating up inside your MacBook Pro with Retina Display? Could be trouble with the heat sink. Use this guide to show you how to remove the heat sink in the Early 2013 MacBook Pro with Retina display.
crwdns2942213:0crwdne2942213:0
-
-
Remove the following P5 pentalobe screws securing the lower case to the MacBook Pro:
-
Eight 3.0 mm
-
Two 2.3 mm
-
-
-
Lifting from the edge nearest the clutch cover, lift the lower case off the MacBook Pro.
-
Set the lower case aside.
-
-
-
Peel back the warning label covering the battery connector.
-
-
-
-
Using the flat end of a spudger, gently pry the battery connector straight up out of its socket on the logic board.
-
Bend the battery cables back and out of the way, ensuring that the battery connector doesn't accidentally make contact with the logic board.
-
-
-
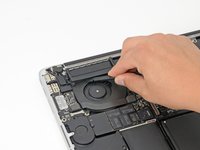
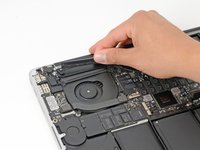
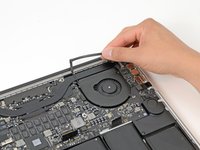
Insert the flat end of a spudger underneath the rubber heat sink cover on the right fan.
-
Slide the spudger underneath the length of the cover, releasing the adhesive.
-
Lift the cover and rotate it off of the heat sink.
-
-
-
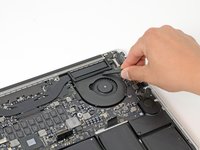
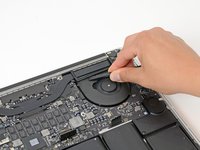
In the same manner described above, release the adhesive and flip back the heat sink cover on the left fan.
-
-
-
Remove the following ten screws securing the heat sink to the logic board:
-
Two 2.4 mm T5 Torx screws
-
Six 3.4 mm T5 Torx screws
-
One 5.2 mm Raised Head T5 Torx screw
-
One 3.5 mm T5 Torx screw
-
-
-
Grasping the heat sink from one side, lift the heat sink off of the MacBook Pro, pulling it free from the computer.
-


To reassemble your device, follow these instructions in reverse order.
To reassemble your device, follow these instructions in reverse order.
crwdns2935221:0crwdne2935221:0
crwdns2935229:020crwdne2935229:0

