crwdns2942213:0crwdne2942213:0
-
-
Before we begin it is advised to carefully read through the whole guide to get the full idea on the processes involved.
-
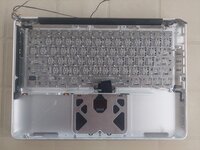
We begin at the stage where the top case with all its components safely removed, except for the backlight and keyboard. We can now begin the process to remove them, install a new keyboard & if necessary a new backlight.
-
We do not need to remove the display but it is recommended to do so to avoid any pressure that will be applied when screwing in the new keyboard, avoiding cracking the display glass.
-
-
-
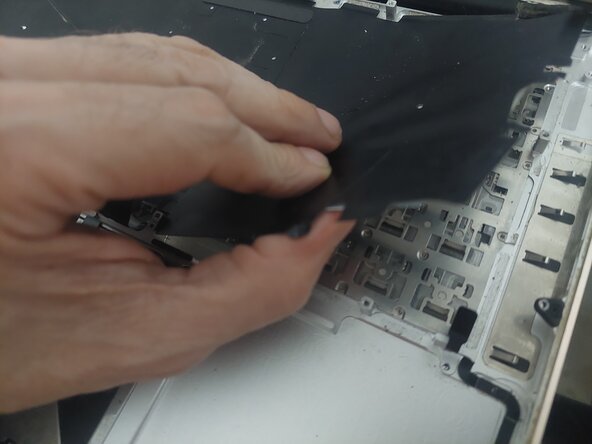
We have to remove the backlight carefully as not to damage it, if you are replacing this component then you can simply pull it off.
-
The backlight consists of 3 layers, the very fragile backlight covering, a clear plastic layer and a very fragile keyboard layout template. We DO NOT want to damage these in any way if we are to use them again, so ultimate care is needed. They are stuck together but with plenty of care they can be separated.
-
Using a sharp small craft knife or similar, very carefully lift up the surrounding edge of the backlight by running the blade underneath where the adhesive is located, as we do not want to tear this extremely fragile component.
-
Some may suggest to use a heat gun to soften any adhesive but this will more than likely deform the backlight from the heat, rendering it useless.
-
Once we have a fair sized area lifted we can very gently pull away the backlight using extra care not to tear it. We can use the strength of the middle plastic sheet to assist in lifting it away. Once removed put it to the side as it will be used again in a later stage.
-
We can gently brush or wipe off any stains or debris that may have built up over time using a soft brush or cloth with some alcohol making the part nice and clean ready for re-installation.
-
-
-
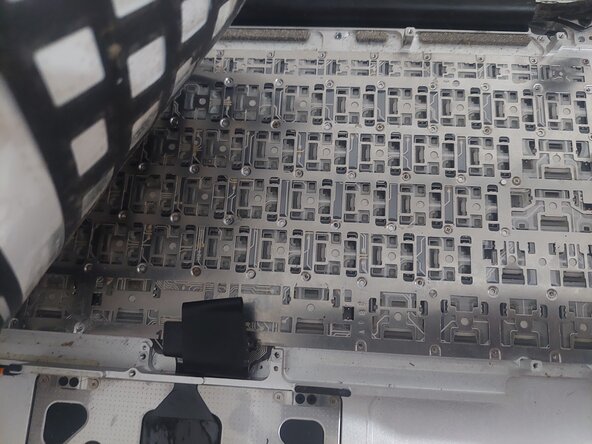
Now for the fun part, removing all of the tiny screws.
-
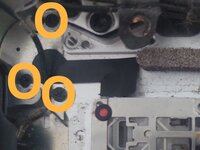
1st we will remove the 3 screws that secure the power button.
-
Then we will remove all of the 80 or so tiny screws that secure the keyboard to the case.
-
-
-
-
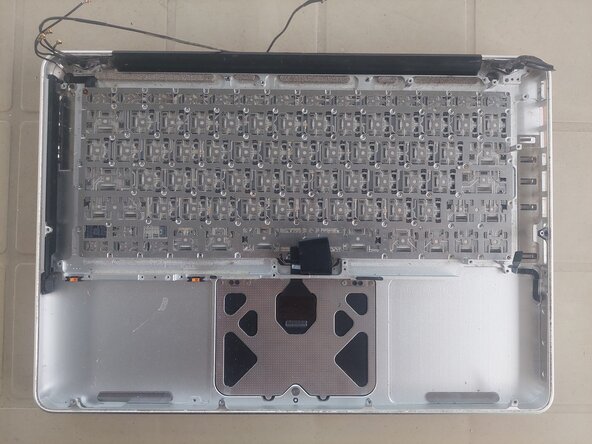
Once we have removed ll the screws we can lift out the keyboard.
-
Pay attention the the power button and carefully wiggle it out of its slot on the case, there is a grounding wire nearby that we do not want to tear away from it's soldering point.
-
-
-
Now is a good time to get a cloth and give a good clean out of the key holes on the casing as they are prone to collect dirt or debris from sticky fingers in the past.
-
-
-
Place the keyboard into the casing starting at the power button side, we need to get the power button back in its location 1st before we place the keyboard into its resting position.
-
Take care not to damage that grounding wire and its soldering point.
-
Once the keyboard is in position it is time to screw down all the 80 or so screws needed to get a nice tight fit ready for use. Do as many as possible as the more the better!
-
-
-
Once we are satisfied with the keyboards fit and there are no sticky keys, especially the top rows smaller function keys, as they are the ones that are most common to do so if ever, we can now prepare to install the old or a new backlight to the casing.
-
Using the 3M tape carefully go around the edges where the old tape was leaving as less space as possible, this will help in case of any dirt, dust or worst case scenario of a water spill getting inside and onto the logic board, or at least it will help to minimize that risk.
-
A new backlight usually comes with adhesive tape preinstalled, if so there will be no need to use the 3M tape,
-
Gently put the backlight in its correct alignment and position, making sure that it is laying nicely flat and even, and then gently run your finger around the edges of the backlight pushing it down to firmly secure it to the case.
-
Once you are satisfied that everything is nice and secure, we are now ready to re-assemble the laptop. Job done.
-


To reassemble your device, follow these instructions in reverse order.
crwdns2935221:0crwdne2935221:0
crwdns2935227:0crwdne2935227:0
