crwdns2942213:0crwdne2942213:0
-
-
Remove the soft padding that may be on top and gently pull the connector up out of its socket on the logic board.
-
-
-
Pull the camera cable connector toward the optical drive to disconnect it from the logic board.
-
-
-
Use the flat end of a spudger to pry the optical drive connector straight up off the logic board.
-
-
-
-
Use the flat end of a spudger to pry the hard drive connector straight up off the logic board.
-
-
-
Remove the following screws securing the subwoofer to the upper case:
-
One 3.8 mm Phillips screw
-
One 5 mm Phillips screw
-
-
-
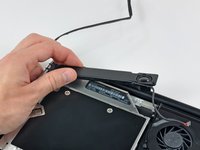
Lift the subwoofer off the optical drive, and set it above the computer.
-
-
-
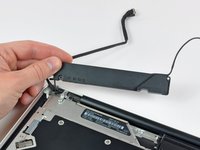
Remove the two 10 mm Phillips screws securing the camera cable bracket to the upper case.
-
Lift the camera cable bracket out of the upper case.
-
-
-
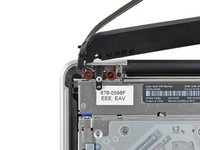
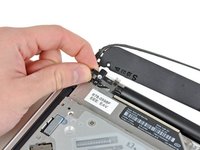
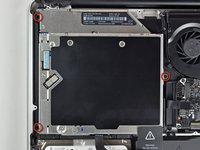
Remove the three 2.5 mm Phillips screws securing the optical drive to the upper case.
-
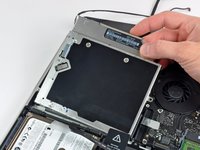
Lift the optical drive from its right edge and pull it out of the computer.
-


To reassemble your device, follow these instructions in reverse order.
To reassemble your device, follow these instructions in reverse order.
crwdns2935221:0crwdne2935221:0
crwdns2935227:0crwdne2935227:0

crwdns2947410:01crwdne2947410:0
Bonsoir. Le tuto est très clair, mais je voudrais savoir s’il est applicable sur la version 15” du MBP 10. Amicalement, Marc.