crwdns2915892:0crwdne2915892:0
Is the right side of your MacBook Pro mute? Use this guide to replace the subwoofer and right speaker.
crwdns2942213:0crwdne2942213:0
-
-
Remove the following 10 screws securing the lower case to the MacBook Pro 13" Unibody:
-
Seven 3 mm Phillips screws.
-
Three 13.5 mm Phillips screws.
-
-
-
Slightly lift the lower case and push it toward the rear of the computer to free the mounting tabs.
-
-
-
Use the flat end of a spudger to lift the battery connector up out of its socket on the logic board.
-
-
-
Using the flat end of a spudger, gently pry the right speaker/subwoofer cable connector straight up off the logic board. Be careful not to lift the socket. Pull the connector toward the optical drive.
-
-
-
Pull the camera cable connector toward the optical drive to disconnect it from the logic board.
-
-
-
-
Use the flat end of a spudger to pry the optical drive connector straight up off the logic board.
-
-
-
Use the flat end of a spudger to pry the hard drive connector straight up off the logic board.
-
-
-
Remove the two Phillips screws securing the subwoofer to the upper case. The right one is 5 mm and the left 3.9 mm.
-
-
-
Lift the subwoofer off the optical drive, and set it above the computer.
-
-
-
Remove the two 8.4 mm Phillips screws securing the camera cable bracket to the upper case.
-
Lift the camera cable bracket out of the upper case.
-
-
-
Remove the three 2.5 mm Phillips screws securing the optical drive to the upper case.
-
Lift the optical drive from its right edge and pull it out of the computer.
-
-
-
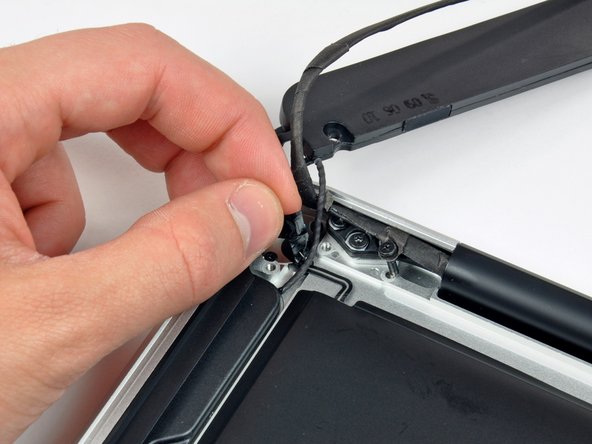
Peel back the small piece of black tape covering the right speaker cable.
-
-
-
Use the tip of a spudger to pry the right speaker up off the adhesive securing it to the upper case.
-
-
-
Lift the subwoofer and right speaker assembly out of the upper case.
-
To reassemble your device, follow these instructions in reverse order.
To reassemble your device, follow these instructions in reverse order.
crwdns2935221:0crwdne2935221:0
crwdns2935229:043crwdne2935229:0
crwdns2947412:04crwdne2947412:0
Thank you iFixit
Thanks ifixit for the super guide. I followed the steps and now my mac works properly again!
Thank you iFixit!
I too snapped the right speaker/subwoofer cable connector right off the mother board, but with patience and a little research, I learned how to solder the thing back on. How about a Warning!!!!! inserted at that step.? I only saw that there were comments AFTER I gingerly tried to pry the connector as instructed. It would help to show how the parts fit together as is done with the fan cable connector. Those instructions (the fan cable connector instructions), helped me better understand what I was prying apart and gave me an idea of how best to do it, and how the speaker/subwoofer cable connector connected to the board, as well as how to position the “pads.”
So, I learned from my mistake, which is a good thing. Nonetheless, I would have preferred to learn BEFORE I snapped off the cable connector, LOL!
Thanks Again for this incredible site.
My connection did not hold. I asked above what the best way is to solder or reattach the right speaker/subwoofer cable connector back onto the board. I saw the soldering guide, but have only soldered once. Any specific guidance on how to reattach this cable would be SO APPRECIATED, especially referencing the soldering guide. Visuals are extremely important to me.


