crwdns2915892:0crwdne2915892:0
Use this guide to replace the AirPort board.
crwdns2942213:0crwdne2942213:0
-
crwdns2935267:0crwdne2935267:0Magnetic Project Mat$19.95
-
Remove the following ten screws securing the lower case to the upper case:
-
Two 2.3 mm P5 Pentalobe screws
-
Eight 3.0 mm P5 Pentalobe screws
-
-
-
Wedge your fingers between the upper case and the lower case.
-
Gently pull the lower case away from the upper case.
-
Remove the lower case and set it aside.
-
-
-
The lower case is connected to the upper case at the center, with two plastic clips.
-
-
-
Remove the plastic cover adhered to the battery contact board.
-
-
-
Remove the following screws securing the battery connector board to the logic board:
-
Two 2.8 mm T6 Torx screws
-
One 7.0 mm T6 Torx shouldered screw
-
-
-
crwdns2935267:0crwdne2935267:0Tweezers$4.99
-
Use tweezers to remove the small plastic cover located near the bottom right of the battery connector board.
-
-
-
Remove the wide head 6.4 mm T6 Torx screw securing the battery connector to the logic board assembly.
-
-
-
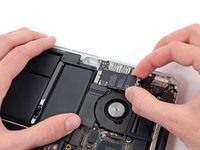
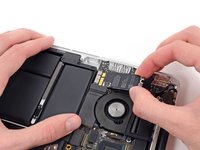
Carefully lift the battery connector board up off the logic board.
-
It is recommended to bend the battery cables just slightly, to keep the board suspended up above the logic board and out of the way.
-
-
-
Remove the single 2.7 mm T5 Torx screw securing the AirPort board to the I/O board.
-
-
-
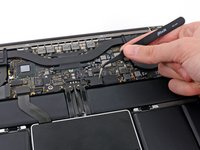
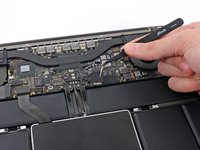
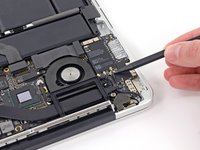
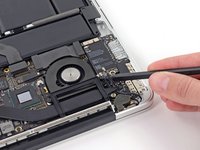
Use the flat end of a spudger to pry and disconnect the three antenna cable connectors from the AirPort board.
-
Connect the long-sleeved cable to the center socket.
-
The short-sleeved cable connects next to the screw.
-
The remaining cable has no sleeve, and connects in the last empty socket, next to the fan.
-
-
-
Move the antenna cables aside, clear of the AirPort board.
-
-
-
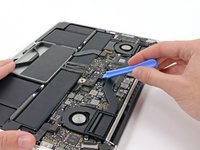
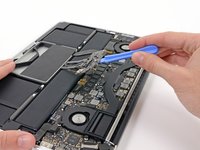
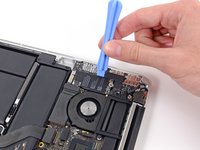
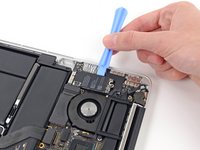
Wedge a plastic opening tool between the AirPort board (side nearest the I/O ports) and the I/O board.
-
Gently pry the AirPort board upwards, but do not remove it.
-
-
-
Pull the AirPort board straight out of its socket on the I/O board.
-
-
-
AirPort board remains.
-


To reassemble your device, follow these instructions in reverse order.
To reassemble your device, follow these instructions in reverse order.
crwdns2935221:0crwdne2935221:0
crwdns2935229:017crwdne2935229:0
