crwdns2933423:0crwdne2933423:0
crwdns2947577:0crwdnd2947577:0crwdne2947577:0

MacBook Pro 13" Retina Display Early 2013 Left Fan Replacement

crwdns2942213:0crwdne2942213:0

    1. MacBook Pro 13" Retina Display Early 2013 Left Fan Replacement, Lower Case: crwdns2935265:01crwdnd2935265:01crwdnd2935265:01crwdne2935265:0
      crwdns2935267:0crwdne2935267:0
      Magnetic Project Mat
      $19.95
      • Remove the following ten screws securing the lower case to the upper case:

      • Two 2.3 mm P5 Pentalobe screws

      • Eight 3.0 mm P5 Pentalobe screws

      • Throughout this repair, keep track of each screw and make sure it goes back exactly where it came from to avoid damaging your device.

      crwdns2952109:0crwdne2952109:0

      crwdns2917038:0crwdne2917038:0

    2. MacBook Pro 13" Retina Display Early 2013 Left Fan Replacement: crwdns2935265:02crwdnd2935265:01crwdnd2935265:01crwdne2935265:0
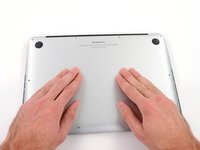
      • Wedge your fingers between the upper case and the lower case.

      • Gently pull the lower case away from the upper case.

      • Remove the lower case and set it aside.

      crwdns2952109:0crwdne2952109:0

      crwdns2917038:0crwdne2917038:0

    3. MacBook Pro 13" Retina Display Early 2013 Left Fan Replacement: crwdns2935265:03crwdnd2935265:01crwdnd2935265:03crwdne2935265:0 MacBook Pro 13" Retina Display Early 2013 Left Fan Replacement: crwdns2935265:03crwdnd2935265:02crwdnd2935265:03crwdne2935265:0 MacBook Pro 13" Retina Display Early 2013 Left Fan Replacement: crwdns2935265:03crwdnd2935265:03crwdnd2935265:03crwdne2935265:0
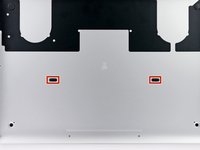
      • During reassembly, gently push down the center of the lower case to reattach the two plastic clips.

      • The lower case is connected to the upper case at the center, with two plastic clips.

      crwdns2952109:0crwdne2952109:0

      crwdns2917038:0crwdne2917038:0

    1. MacBook Pro 13" Retina Display Early 2013 Left Fan Replacement, Battery Connector: crwdns2935265:04crwdnd2935265:01crwdnd2935265:01crwdne2935265:0
      • Remove the plastic cover adhered to the battery contact board.

      crwdns2952109:0crwdne2952109:0

      crwdns2917038:0crwdne2917038:0

    2. MacBook Pro 13" Retina Display Early 2013 Left Fan Replacement: crwdns2935265:05crwdnd2935265:01crwdnd2935265:01crwdne2935265:0
      • Remove the following screws securing the battery connector board to the logic board:

      • Two 2.8 mm T6 Torx screws

      • One 7.0 mm T6 Torx shouldered screw

      crwdns2952109:0crwdne2952109:0

      crwdns2917038:0crwdne2917038:0

    3. MacBook Pro 13" Retina Display Early 2013 Left Fan Replacement: crwdns2935265:06crwdnd2935265:01crwdnd2935265:02crwdne2935265:0 MacBook Pro 13" Retina Display Early 2013 Left Fan Replacement: crwdns2935265:06crwdnd2935265:02crwdnd2935265:02crwdne2935265:0
      crwdns2935267:0crwdne2935267:0
      Tweezers
      $4.99
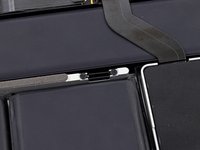
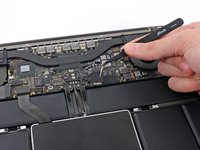
      • Use tweezers to remove the small plastic cover located near the bottom right of the battery connector board.

      crwdns2952109:0crwdne2952109:0

      crwdns2917038:0crwdne2917038:0

    4. MacBook Pro 13" Retina Display Early 2013 Left Fan Replacement: crwdns2935265:07crwdnd2935265:01crwdnd2935265:01crwdne2935265:0
      • Remove the wide head 6.4 mm T6 Torx screw securing the battery connector to the logic board assembly.

      crwdns2952109:0crwdne2952109:0

      crwdns2917038:0crwdne2917038:0

    5. MacBook Pro 13" Retina Display Early 2013 Left Fan Replacement: crwdns2935265:08crwdnd2935265:01crwdnd2935265:02crwdne2935265:0 MacBook Pro 13" Retina Display Early 2013 Left Fan Replacement: crwdns2935265:08crwdnd2935265:02crwdnd2935265:02crwdne2935265:0
      • Carefully lift the battery connector board up off the logic board.

      • It is recommended to bend the battery cables just slightly, to keep the board suspended up above the logic board and out of the way.

      • Do not fold the board completely over, or crease the cables, as this may damage the battery.

      crwdns2952109:0crwdne2952109:0

      crwdns2917038:0crwdne2917038:0

    1. MacBook Pro 13" Retina Display Early 2013 Left Fan Replacement, Battery Contact Board: crwdns2935265:09crwdnd2935265:01crwdnd2935265:02crwdne2935265:0 MacBook Pro 13" Retina Display Early 2013 Left Fan Replacement, Battery Contact Board: crwdns2935265:09crwdnd2935265:02crwdnd2935265:02crwdne2935265:0
      crwdns2935267:0crwdne2935267:0
      Tweezers
      $4.99
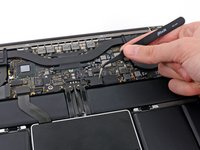
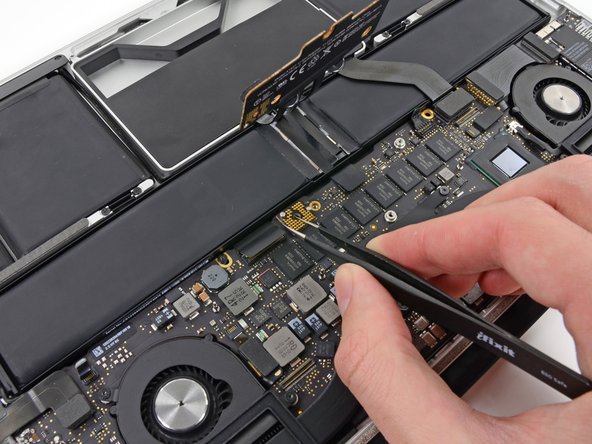
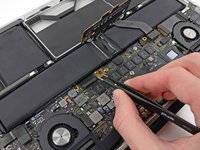
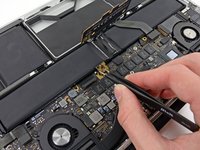
      • Grasp the Interposer with tweezers.

      • An interposer is the name for an interface that links one electrical connection to another. In this repair, it is the board connecting the battery to logic board.

      • Lift the Interposer off the logic board and remove it.

      • Removing this board will ensure that the battery remains disconnected throughout your repair, preventing your computer from accidentally powering on. It's also a good idea to take it out so it doesn't fall out unexpectedly.

      crwdns2952109:0crwdne2952109:0

      crwdns2917038:0crwdne2917038:0

    1. MacBook Pro 13" Retina Display Early 2013 Left Fan Replacement, Heat Sink Assembly: crwdns2935265:010crwdnd2935265:01crwdnd2935265:01crwdne2935265:0
      • Remove the following screws securing the heat sink to the logic board assembly:

      • One 2.4 mm Phillips #00 screw

      • One 3.4 mm T5 Torx screw

      • Four 2.7 mm T5 Torx screws

      crwdns2952109:0crwdne2952109:0

      crwdns2917038:0crwdne2917038:0

    2. MacBook Pro 13" Retina Display Early 2013 Left Fan Replacement: crwdns2935265:011crwdnd2935265:01crwdnd2935265:02crwdne2935265:0 MacBook Pro 13" Retina Display Early 2013 Left Fan Replacement: crwdns2935265:011crwdnd2935265:02crwdnd2935265:02crwdne2935265:0
      • Lift and remove the heat sink up off the logic board assembly.

      • When reinstalling the heat sink, be sure to apply a new layer of thermal paste. If you have never applied thermal paste before, we have a guide that makes it easy.

      crwdns2952109:0crwdne2952109:0

      crwdns2917038:0crwdne2917038:0

    1. MacBook Pro 13" Retina Display Early 2013 Left Fan Replacement, Left Fan: crwdns2935265:012crwdnd2935265:01crwdnd2935265:02crwdne2935265:0 MacBook Pro 13" Retina Display Early 2013 Left Fan Replacement, Left Fan: crwdns2935265:012crwdnd2935265:02crwdnd2935265:02crwdne2935265:0
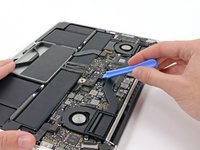
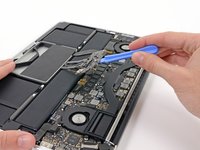
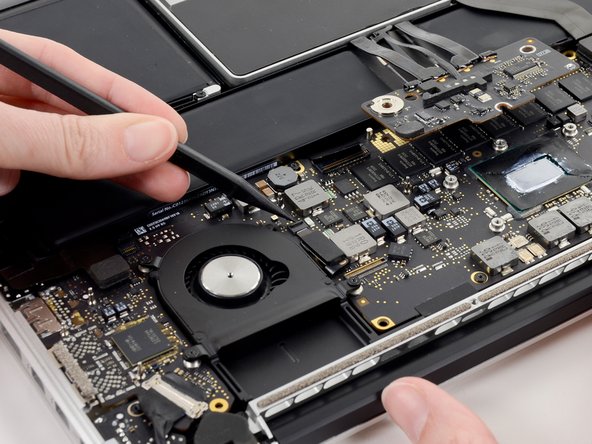
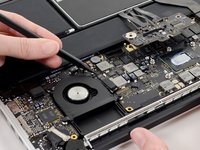
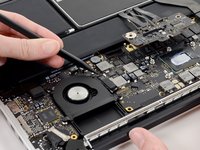
      • Use the tip of a spudger to flip up the retaining flap on the left fan ribbon cable ZIF socket.

      • Be sure you are prying up on the hinged retaining flap, not the socket itself.

      crwdns2952109:0crwdne2952109:0

      crwdns2917038:0crwdne2917038:0

    2. MacBook Pro 13" Retina Display Early 2013 Left Fan Replacement: crwdns2935265:013crwdnd2935265:01crwdnd2935265:01crwdne2935265:0
      • Remove the three 3.1 mm T5 Torx screws securing the left fan to the logic board assembly.

      crwdns2952109:0crwdne2952109:0

      crwdns2917038:0crwdne2917038:0

    3. MacBook Pro 13" Retina Display Early 2013 Left Fan Replacement: crwdns2935265:014crwdnd2935265:01crwdnd2935265:02crwdne2935265:0 MacBook Pro 13" Retina Display Early 2013 Left Fan Replacement: crwdns2935265:014crwdnd2935265:02crwdnd2935265:02crwdne2935265:0
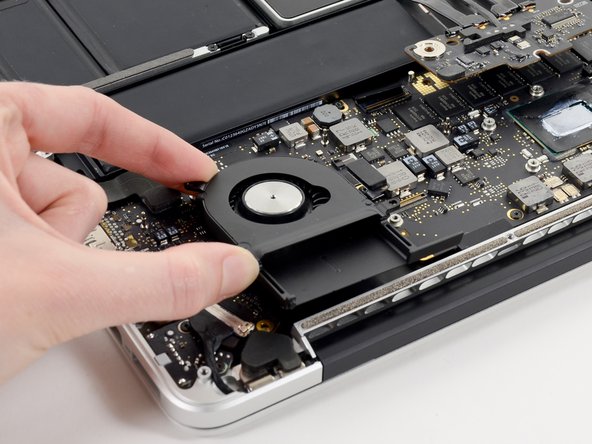
      • Lift and remove the left fan out of the upper case.

      • Make sure to pull the left fan straight away to simultaneously pull the left fan ribbon cable out of its socket on the logic board.

      crwdns2952109:0crwdne2952109:0

      crwdns2917038:0crwdne2917038:0

crwdns2915888:0crwdne2915888:0

To reassemble your device, follow these instructions in reverse order.

crwdns2935221:0crwdne2935221:0

crwdns2935227:0crwdne2935227:0

Sam Goldheart

crwdns2935283:010/18/12crwdne2935283:0

478,275 crwdns2915208:0crwdne2915208:0

crwdns2935297:0538crwdne2935297:0

crwdns2935287:0crwdne2935287:0

iFixit crwdns2935289:0iFixitcrwdne2935289:0

Staff

crwdns2931471:0122crwdne2931471:0

crwdns2935297:086,625crwdne2935297:0

crwdns2947412:00crwdne2947412:0

crwdns2917038:0crwdne2917038:0

crwdns2936625:0crwdne2936625:0:

crwdns2936751:024crwdne2936751:0 5

crwdns2936753:07crwdne2936753:0 23

crwdns2936753:030crwdne2936753:0 93

crwdns2942667:0crwdne2942667:0 6,616