crwdns2915892:0crwdne2915892:0
Use this guide to replace the trackpad.
crwdns2942213:0crwdne2942213:0
-
crwdns2935267:0crwdne2935267:0P5 Pentalobe Screwdriver Retina MacBook Pro and Air$5.99
-
Remove the following ten screws:
-
Two 8 mm 5-point Pentalobe screws
-
Eight 2.5 mm 5-point Pentalobe screws
-
-
-
Wedge your fingers between the display and the lower case and pull upward to pop the lower case off the Air.
-
-
-
Use the flat end of a spudger to pry both short sides of the battery connector upward to disconnect it from its socket on the logic board.
-
Bend the battery cable slightly away from the logic board so the connector will not accidentally bend back and make contact with its socket.
-
-
-
-
Remove the following five screws securing the battery to the upper case:
-
Two 5.2 mm T5 Torx screws
-
One 6 mm T5 Torx screw
-
Two 2.6 mm T5 Torx screws
-
-
-
Lift the battery from its edge nearest the logic board and remove it from the upper case.
-
Charge it to 100%, and then keep charging it for at least 2 more hours. Next, unplug and use it normally to drain the battery. When you see the low battery warning, save your work, and keep your laptop on until it goes to sleep due to low battery. Wait at least 5 hours, then charge your laptop uninterrupted to 100%.
-
If you notice any unusual behavior or problems after installing your new battery, you may need to reset your MacBook's SMC.
-
-
-
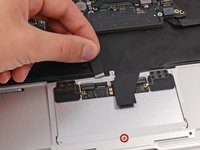
Use the point of a spudger to lift the ZIF connector retaining flap on the trackpad data cable.
-
Gently slide the ribbon cable out of the ZIF connector.
-
Adjust, but do not remove the T5 Trackpad Sensitivity Screw to change the trackpad's depth sensitivity.
-
-
-
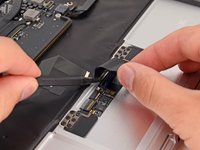
With one hand, push the keyboard ribbon cable in slightly to access the ZIF connector beneath it.
-
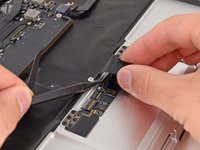
Use a spudger to flip up the retaining flap.
-
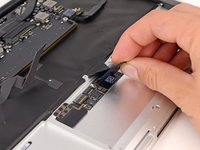
Gently slide the cable out of the connector.
-
-
-
Remove the six 1.5 mm Phillips #00 screws holding the trackpad in place.
-
-
-
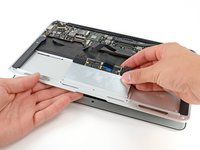
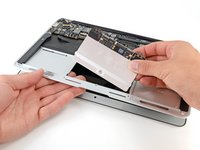
Open the device about 10 degrees.
-
While holding the bottom of the trackpad, press up on the side of the trackpad closest to the logic board to free it from the upper case.
-
Remove the trackpad from the device.
-


To reassemble your device, follow these instructions in reverse order.
To reassemble your device, follow these instructions in reverse order.
crwdns2935221:0crwdne2935221:0
crwdns2935229:015crwdne2935229:0


crwdns2947412:03crwdne2947412:0
Followed the instructions in order to adjust the sensitivity of the trackpad, nonetheless the screw I found was a T6, not a T5. But in any case, excellent guide, thank you!
any chance this part is the same for a mid 2012 11” ?
If you click the part at the top of the guide, you can see the compatibility listed, unfortunately they’re not the same, but we do have the 11” trackpad here. And the accompanying guide lives here!