crwdns2915892:0crwdne2915892:0
This guide will show you the steps necessary to replace the battery in the MSI MS-1782 laptop. The battery may need to be replaced if your laptop does not retain any charge, or if it does not charge at all. Check the troubleshooting page for more information.
crwdns2942213:0crwdne2942213:0
-
-
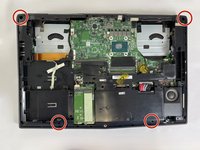
Remove five 6.6 mm screws from the edges of the bottom cover using a JIS #1 screwdriver.
-
Remove one 5.6 mm screw from the center of the bottom cover using a JIS #1 screwdriver.
-
-
-
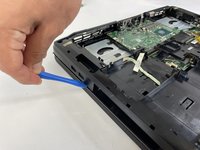
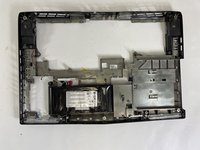
Use an iFixit opening pick to unclip the bottom cover.
-
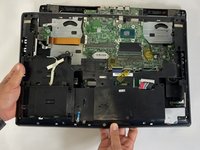
After unclipping the bottom case, pull from the back of the laptop upwards using the lip of the bottom case as a handle.
-
-
-
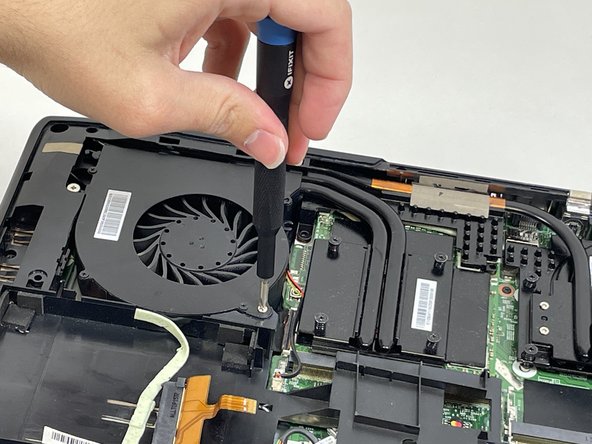
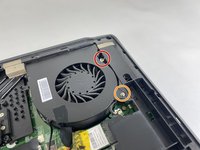
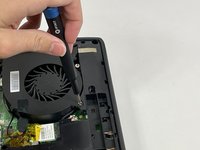
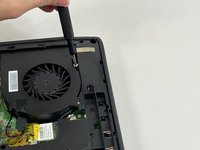
Loosen the captive screw on the left side of the left fan using a JIS #2 screwdriver.
-
Remove the 5.1 mm screw on the right side of the left fan using a JIS #2 screwdriver.
-
-
-
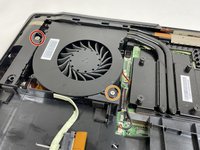
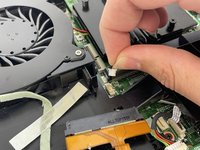
Gently detach the fan connector.
-
Remove the fan by lifting it out of its housing.
-
-
-
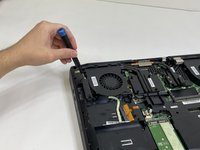
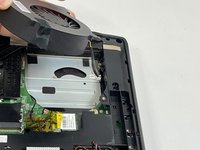
Loosen the captive screw on the top of the right fan using a JIS #2 screwdriver.
-
Remove the 3.6 mm screw on the bottom of the right fan using a JIS #2 screwdriver.
-
-
-
-
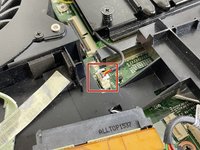
Gently detach the fan connector.
-
Remove the fan by lifting it out of its housing.
-
-
-
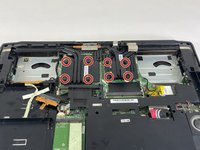
Loosen the eight captive screws holding the heat sink in place using a JIS #2 screwdriver.
-
-
-
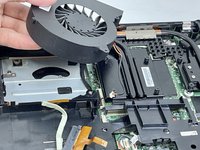
Gently lift the heat sink and then pull forwards towards you.
-
-
-
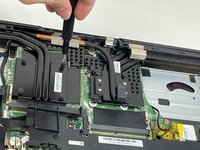
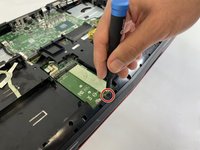
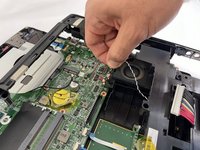
Remove the four 5.5 mm screws holding the battery frame in place using a JIS #1 screwdriver.
-
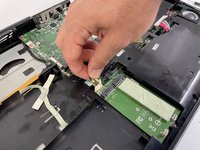
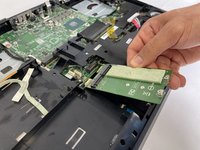
Gently disconnect the cable connecting the M.2 caddy to the motherboard.
-
-
-
Remove the 3.6 mm screw holding the M.2 caddy in place using a JIS #1 screwdriver.
-
-
-
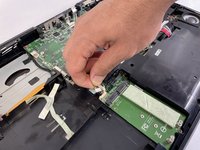
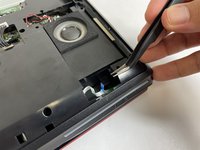
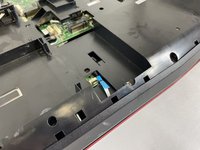
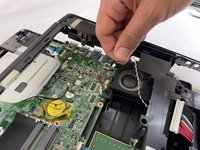
Gently disconnect the two blue ribbons.
-
-
-
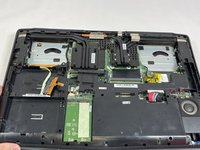
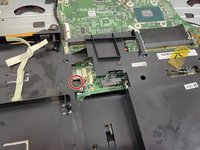
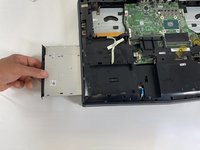
Remove the 5.1 mm screw holding in the disk reader using a JIS #1 screwdriver.
-
Use an iFixit opening tool to push the back of the disk reader to push it out of the laptop's chassis.
-
-
-
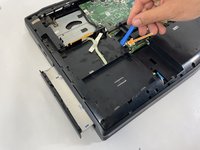
Gently pull the disc reader out of the laptop.
-
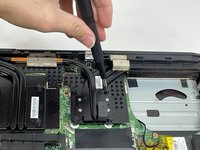
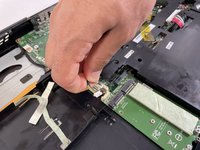
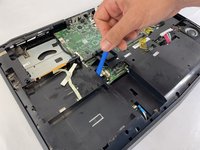
Lift the plastic cover and disconnect the cable connected next to the speaker.
-
-
-
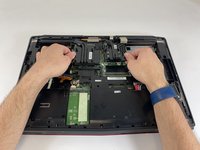
Remove the five 5 mm screws holding the frame in place using a JIS #1 screwdriver.
-
-
-
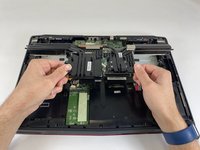
Pry up on the battery frame with an opening tool and unclip from the main chassis, working your way around the laptop.
-
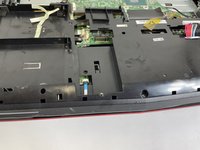
To remove the battery, pry up on it to unstick the adhesive.
-


To reassemble your device, follow these instructions in reverse order.
crwdns2935287:0crwdne2935287:0

University of New Orleans, Team 4-4, McDonald Spring 2023 crwdns2935289:0University of New Orleans, Team 4-4, McDonald Spring 2023crwdne2935289:0
UNO-MCDONALD-S23S4G4
crwdns2931471:03crwdne2931471:0
crwdns2935297:07crwdne2935297:0